Cómo instalar FileRun en Debian 11
FileRun es una aplicación gratuita, de código abierto y para compartir archivos para Linux. Es una muy buena alternativa a Google Drive y Dropbox. Te permite compartir y sincronizar archivos, acceder vía WebDAV e incluso conectarte a ella con la aplicación móvil Nextcloud. Está escrito en PHP y utiliza MariaDB como base de datos. Te permite acceder a tus archivos en cualquier lugar a través de un almacenamiento seguro en la nube, y también ofrece la posibilidad de hacer copias de seguridad y compartir tus fotos, vídeos, archivos y mucho más.
En este artículo, explicaré cómo instalar FileRun con Apache y Let’s Encrypt SSL en Debian 11.
Requisitos previos
- Un servidor con Debian 11.
- Un nombre de dominio válido apuntado con la IP de tu servidor.
- Una contraseña de root configurada en el servidor.
Instalar el servidor LAMP
En primer lugar, tendrás que instalar en tu servidor los paquetes Apache, MariaDB, PHP y otros. Puedes instalarlos todos ejecutando el siguiente comando:
apt-get install apache2 mariadb-server mariadb-client php libapache2-mod-php imagemagick ffmpeg php-imagick php-mysql php-fpm php-common php-gd php-json php-curl php-zip php-xml php-mbstring php-bz2 php-intl unzip -y
Una vez instalados todos los paquetes, también tendrás que instalar el cargador IonCube en tu sistema.
Primero, descarga el cargador de IonCube con el siguiente comando:
wget https://downloads.ioncube.com/loader_downloads/ioncube_loaders_lin_x86-64.tar.gz
Una vez completada la descarga, extrae el archivo descargado con el siguiente comando:
tar -xzf ioncube_loaders_lin_x86-64.tar.gz -C /usr/lib/php
A continuación, crea un archivo de configuración de IonCube y define la ruta de la fuente de IonCube:
nano /etc/php/7.4/apache2/conf.d/00-ioncube.ini
Añade la siguiente línea:
zend_extension = /usr/lib/php/ioncube/ioncube_loader_lin_7.4.so
Guarda y cierra el archivo y luego crea un archivo de configuración PHP para FileRun:
nano /etc/php/7.4/apache2/conf.d/filerun.ini
Añade la siguiente configuración:
expose_php = Off
error_reporting = E_ALL & ~E_NOTICE
display_errors = Off
display_startup_errors = Off
log_errors = On
ignore_repeated_errors = Off
allow_url_fopen = On
allow_url_include = Off
variables_order = "GPCS"
allow_webdav_methods = On
memory_limit = 128M
max_execution_time = 300
output_buffering = Off
output_handler = ""
zlib.output_compression = Off
zlib.output_handler = ""
safe_mode = Off
register_globals = Off
magic_quotes_gpc = Off
upload_max_filesize = 20M
post_max_size = 20M
enable_dl = Off
disable_functions = ""
disable_classes = ""
session.save_handler = files
session.use_cookies = 1
session.use_only_cookies = 1
session.auto_start = 0
session.cookie_lifetime = 0
session.cookie_httponly = 1
date.timezone = "UTC"
Guarda y cierra el archivo y luego reinicia el servicio Apache para aplicar los cambios:
systemctl reload apache2
Configurar la base de datos MariaDB
En primer lugar, tendrás que asegurar la instalación de MariaDB mediante el siguiente comando:
mysql_secure_installation
Responde a todas las preguntas como se indica a continuación:
Enter current password for root (enter for none):  PRESS ENTER
Set root password? [Y/n] Y
New password:
Re-enter new password:
Remove anonymous users? [Y/n] Y
Disallow root login remotely? [Y/n] Y
Remove test database and access to it? [Y/n]  Y
Reload privilege tables now? [Y/n] Y
A continuación, inicia sesión en el shell de MariaDB con el siguiente comando:
mysql -u root -p
Una vez iniciada la sesión, crea una base de datos y un usuario con el siguiente comando:
MariaDB [(none)]> CREATE DATABASE filerun;
MariaDB [(none)]> CREATE USER 'filerun'@'localhost' IDENTIFIED BY 'password';
A continuación, concede todos los privilegios a la base de datos FileRun con el siguiente comando:
MariaDB [(none)]> GRANT ALL PRIVILEGES ON filerun.* TO 'filerun'@'localhost';
A continuación, vacía los privilegios y sal de MariaDB con el siguiente comando:
MariaDB [(none)]> FLUSH PRIVILEGES;
MariaDB [(none)]> EXIT;
Una vez que hayas terminado, puedes pasar al siguiente paso.
Descargar FileRun
Primero, descarga la última versión de FileRun con el siguiente comando:
wget -O FileRun.zip https://filerun.com/download-latest
Una vez descargado el FileRun, descomprime el archivo descargado con el siguiente comando:
unzip FileRun.zip -d /var/www/html/filerun/
A continuación, establece el permiso y la propiedad adecuados con el siguiente comando:
chown -R www-data:www-data /var/www/html/filerun
chmod -R 755 /var/www/html/filerun
Una vez que hayas terminado, puedes pasar al siguiente paso.
Configurar Apache para FileRun
A continuación, tendrás que crear un archivo de configuración del host virtual de Apache para FileRun. Puedes crearlo con el siguiente comando:
nano /etc/apache2/sites-available/filerun.conf
Añade las siguientes líneas:
<VirtualHost *:80>
        ServerName filerun.example.com

        DocumentRoot /var/www/html/filerun

        <Directory "/var/www/html/filerun">
                Options Indexes FollowSymLinks
                AllowOverride All
                Require all granted
        </Directory>

        ErrorLog ${APACHE_LOG_DIR}/filerun.error.log
        CustomLog ${APACHE_LOG_DIR}/filerun.access.log combined
</VirtualHost>
Guarda y cierra el archivo y, a continuación, activa el host virtual de Apache y el módulo de reescritura con el siguiente comando:
a2ensite filerun.conf
a2enmod rewrite
A continuación, reinicia el servicio Apache para aplicar los cambios:
systemctl restart apache2
También puedes comprobar el estado de Apache con el siguiente comando:
systemctl status apache2
Deberías ver la siguiente salida:
? apache2.service - The Apache HTTP Server
     Loaded: loaded (/lib/systemd/system/apache2.service; enabled; vendor preset: enabled)
     Active: active (running) since Sat 2022-01-29 15:14:56 UTC; 5s ago
       Docs: https://httpd.apache.org/docs/2.4/
    Process: 22533 ExecStart=/usr/sbin/apachectl start (code=exited, status=0/SUCCESS)
   Main PID: 22538 (apache2)
      Tasks: 6 (limit: 2341)
     Memory: 16.4M
        CPU: 94ms
     CGroup: /system.slice/apache2.service
             ??22538 /usr/sbin/apache2 -k start
             ??22539 /usr/sbin/apache2 -k start
             ??22540 /usr/sbin/apache2 -k start
             ??22541 /usr/sbin/apache2 -k start
             ??22542 /usr/sbin/apache2 -k start
             ??22543 /usr/sbin/apache2 -k start

Jan 29 15:14:56 debian11 systemd[1]: Starting The Apache HTTP Server...
Una vez que hayas terminado, puedes pasar al siguiente paso.
Accede a la interfaz web de FileRun
Ahora, abre tu navegador web y accede a la interfaz web de FileRun utilizando la URL http://filerun.example.com. Serás redirigido a la siguiente página:
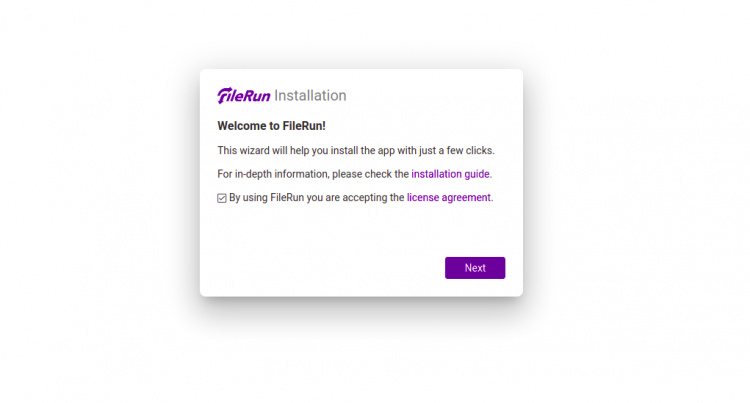
Haz clic en el botón Siguiente. Deberías ver la página de comprobación de los requisitos del servidor:
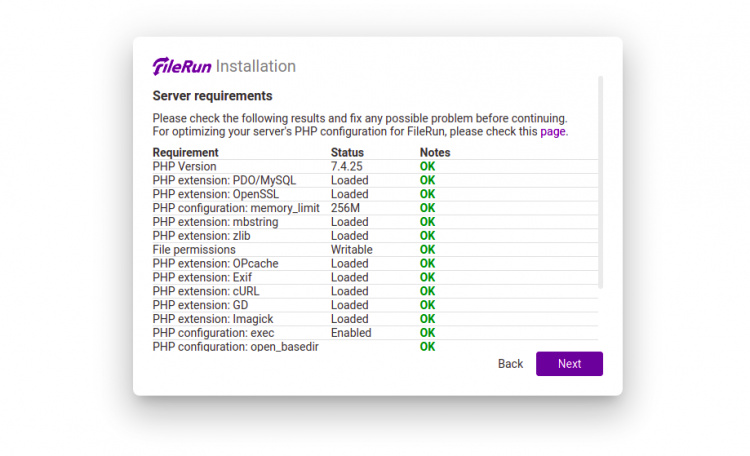
Haz clic en el botón Siguiente. Deberías ver la página de configuración de la base de datos:
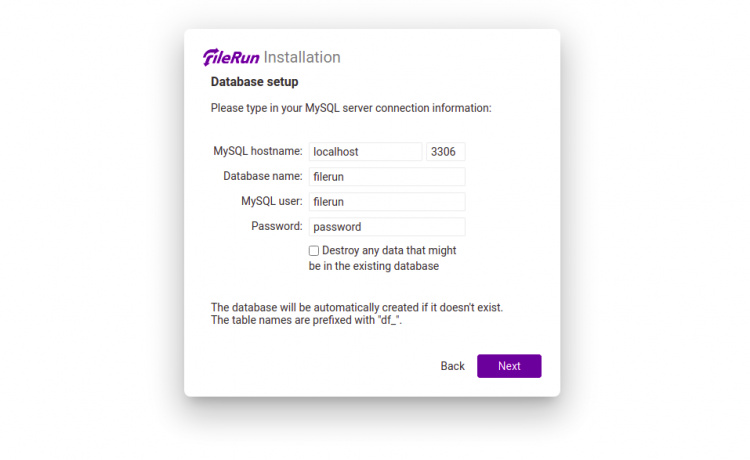
Haz clic en el botón Siguiente. Una vez finalizada la instalación, deberías ver la siguiente página:
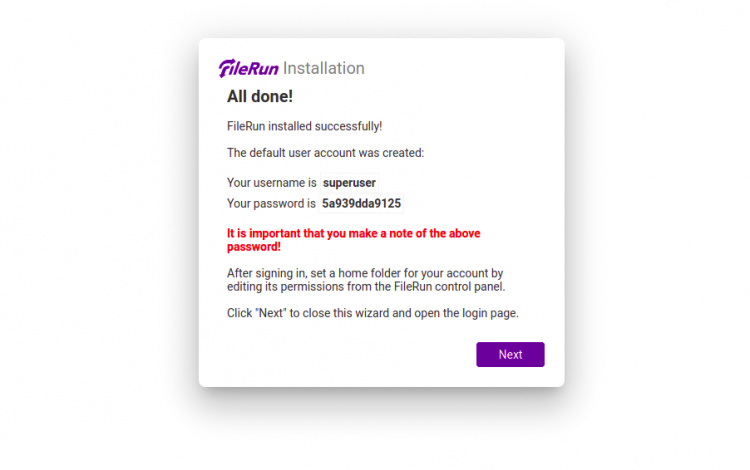
Haz clic en el botón Siguiente. Deberías ver la página de inicio de sesión de FileRun:
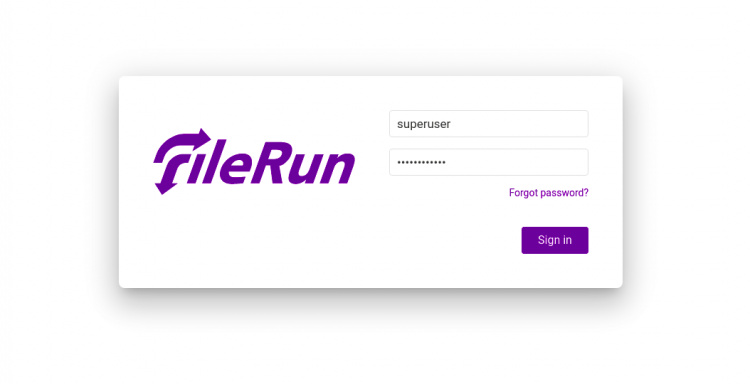
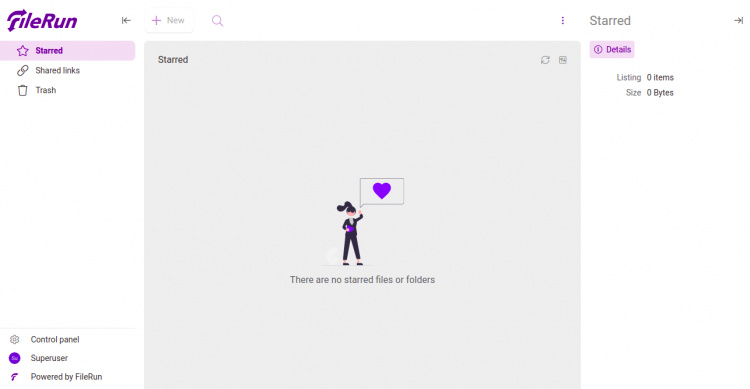
Proporciona tu nombre de usuario y contraseña de administrador, y haz clic en el botón Iniciar sesión. Deberías ver el panel de control de FileRun en la siguiente página:
Asegura FileRun con Let’s Encrypt SSL
También se recomienda asegurar tu sitio web con Let’s Encrypt SSL. En primer lugar, tendrás que instalar el cliente Certbot para instalar y gestionar el SSL. Por defecto, el paquete Certbot está incluido en el repositorio por defecto de Debian, así que puedes instalarlo con el siguiente comando:
apt-get install python3-certbot-apache -y
Una vez instalado Certbot, ejecuta el siguiente comando para asegurar tu sitio web con Let’s Encrypt SSL:
certbot --apache -d filerun.example.com
Se te pedirá que proporciones tu correo electrónico y que aceptes las condiciones del servicio, como se muestra a continuación:
Saving debug log to /var/log/letsencrypt/letsencrypt.log
Plugins selected: Authenticator standalone, Installer None
Enter email address (used for urgent renewal and security notices) (Enter 'c' to
cancel): [email protected]

- - - - - - - - - - - - - - - - - - - - - - - - - - - - - - - - - - - - - - - -
Please read the Terms of Service at
https://letsencrypt.org/documents/LE-SA-v1.2-November-15-2017.pdf. You must
agree in order to register with the ACME server at
https://acme-v02.api.letsencrypt.org/directory
- - - - - - - - - - - - - - - - - - - - - - - - - - - - - - - - - - - - - - - -
(A)gree/(C)ancel: A

- - - - - - - - - - - - - - - - - - - - - - - - - - - - - - - - - - - - - - - -
Would you be willing to share your email address with the Electronic Frontier
Foundation, a founding partner of the Let's Encrypt project and the non-profit
organization that develops Certbot? We'd like to send you email about our work
encrypting the web, EFF news, campaigns, and ways to support digital freedom.
- - - - - - - - - - - - - - - - - - - - - - - - - - - - - - - - - - - - - - - -
(Y)es/(N)o: Y
Plugins selected: Authenticator apache, Installer apache
Obtaining a new certificate
Performing the following challenges:
http-01 challenge for filerun.example.com
Enabled Apache rewrite module
Waiting for verification...
Cleaning up challenges
Created an SSL vhost at /etc/apache2/sites-available/filerun-le-ssl.conf
Enabled Apache socache_shmcb module
Enabled Apache ssl module
Deploying Certificate to VirtualHost /etc/apache2/sites-available/filerun-le-ssl.conf
Enabling available site: /etc/apache2/sites-available/filerun-le-ssl.conf
Next, select whether or not to redirect HTTP traffic to HTTPS as shown below:
Elige si quieres redirigir el tráfico HTTP a HTTPS, eliminando el acceso HTTP.
- - - - - - - - - - - - - - - - - - - - - - - - - - - - - - - - - - - - - - - -
1: No redirect - Make no further changes to the webserver configuration.
2: Redirect - Make all requests redirect to secure HTTPS access. Choose this for
new sites, or if you're confident your site works on HTTPS. You can undo this
change by editing your web server's configuration.
- - - - - - - - - - - - - - - - - - - - - - - - - - - - - - - - - - - - - - - -
Select the appropriate number [1-2] then [enter] (press 'c' to cancel): 2
Escribe 2 y pulsa Intro para instalar el SSL de Let’s Encrypt para tu sitio web:
Enabled Apache rewrite module
Redirecting vhost in /etc/apache2/sites-enabled/filerun.conf to ssl vhost in /etc/apache2/sites-available/filerun-le-ssl.conf

- - - - - - - - - - - - - - - - - - - - - - - - - - - - - - - - - - - - - - - -
Congratulations! You have successfully enabled https://filerun.example.com

You should test your configuration at:
https://www.ssllabs.com/ssltest/analyze.html?d=filerun.example.com
- - - - - - - - - - - - - - - - - - - - - - - - - - - - - - - - - - - - - - - -

IMPORTANT NOTES:
 - Congratulations! Your certificate and chain have been saved at:
   /etc/letsencrypt/live/filerun.example.com/fullchain.pem
   Your key file has been saved at:
   /etc/letsencrypt/live/filerun.example.com/privkey.pem
   Your cert will expire on 2022-4-29. To obtain a new or tweaked
   version of this certificate in the future, simply run certbot again
   with the "certonly" option. To non-interactively renew *all* of
   your certificates, run "certbot renew"
 - If you like Certbot, please consider supporting our work by:

   Donating to ISRG / Let's Encrypt:   https://letsencrypt.org/donate
   Donating to EFF:                    https://eff.org/donate-le
Conclusión
Enhorabuena! has instalado con éxito FileRun con Apache y Let’s Encrypt SSL en Debian 11. Ahora puedes utilizar FileRun para almacenar tus archivos, música y fotos y compartirlos con tus amigos y familiares.