Cómo instalar oVirt Open Virtualization Manager en CentOS 8
oVirt es una solución de virtualización distribuida gratuita y de código abierto que puede utilizarse para gestionar toda tu infraestructura. Se basa en Red Hat Enterprise Virtualization y te permite gestionar máquinas virtuales, recursos informáticos, de almacenamiento y de red desde la interfaz basada en la web. Utiliza el hipervisor KVM y se basa en otros proyectos de la comunidad, como libvirt, Gluster, PatternFly y Ansible.
En este tutorial, explicaremos cómo instalar oVirt en un servidor CentOS 8.
Requisitos previos
- Un servidor que ejecute CentOS 8 con un mínimo de 16 GB de RAM.
- Una contraseña de root configurada el servidor.
Cómo empezar
Antes de empezar, tendrás que configurar el nombre de host FQDN en tu sistema. Puedes hacerlo con el siguiente comando:
hostnamectl set-hostname centos.example.com
A continuación, tendrás que editar el archivo /etc/hosts y enlazar la IP de tu sistema con el nombre de host.
nano /etc/hosts
Añade las siguientes líneas:
your-server-ip centos.example.com
Guarda y cierra el archivo cuando hayas terminado.
Instalar el repositorio necesario
A continuación, tendrás que añadir oVirt y otros repositorios necesarios en tu sistema.
Primero, instala el repositorio de oVirt con el siguiente comando:
dnf install https://resources.ovirt.org/pub/yum-repo/ovirt-release44.rpm
Una vez instalado, habilita la herramienta de paquetes Java, pki-deps y el módulo PostgreSQL con el siguiente comando:
dnf module enable javapackages-tools -y
dnf module enable pki-deps -y
dnf module enable postgresql:12 -y
Una vez que hayas terminado, puedes pasar al siguiente paso.
Instalar y configurar el motor oVirt
En primer lugar, actualiza el repositorio con el siguiente comando:
dnf update -y
Una vez actualizado el repositorio, instala el motor oVirt utilizando el siguiente comando:
dnf install ovirt-engine -y
Una vez finalizada la instalación, puedes configurar el Motor oVirt con el siguiente comando:
engine-setup
Se te harán varias preguntas durante la configuración, como se muestra a continuación:
          --== PRODUCT OPTIONS ==--

          Configure Cinderlib integration (Currently in tech preview) (Yes, No) [No]: Yes
          Configure Engine on this host (Yes, No) [Yes]: Yes

          Configuring ovirt-provider-ovn also sets the Default cluster.'s default network provider to ovirt-provider-ovn.
          Non-Default clusters may be configured with an OVN after installation.
          Configure ovirt-provider-ovn (Yes, No) [Yes]: Yes
          Configure WebSocket Proxy on this host (Yes, No) [Yes]: Yes

          * Please note * : Data Warehouse is required for the engine.
          If you choose to not configure it on this host, you have to configure
          it on a remote host, and then configure the engine on this host so
          that it can access the database of the remote Data Warehouse host.
          Configure Data Warehouse on this host (Yes, No) [Yes]: Yes
          Configure Grafana on this host (Yes, No) [Yes]: Yes
          Configure VM Console Proxy on this host (Yes, No) [Yes]: Yes

          --== PACKAGES ==--

[ INFO  ] Checking for product updates...
[ INFO  ] No product updates found

          --== NETWORK CONFIGURATION ==--

          Host fully qualified DNS name of this server [centos.example.com]: Yes
[WARNING] Host name Yes has no domain suffix
[ ERROR ] Host name is not valid: Yes did not resolve into an IP address
          Host fully qualified DNS name of this server [centos.example.com]:
[WARNING] Failed to resolve centos.example.com using DNS, it can be resolved only locally

          Setup can automatically configure the firewall on this system.
          Note: automatic configuration of the firewall may overwrite current settings.
          Do you want Setup to configure the firewall? (Yes, No) [Yes]: Yes
          --== DATABASE CONFIGURATION ==--

          Where is the DWH database located? (Local, Remote) [Local]: Local

          Setup can configure the local postgresql server automatically for the DWH to run. This may conflict with existing applications.
          Would you like Setup to automatically configure postgresql and create DWH database, or prefer to perform that manually? (Automatic, Manual) [Automatic]:
          Where is the ovirt cinderlib database located? (Local, Remote) [Local]:
          Setup can configure the local postgresql server automatically for the CinderLib to run. This may conflict with existing applications.
          Would you like Setup to automatically configure postgresql and create CinderLib database, or prefer to perform that manually? (Automatic, Manual) [Automatic]:
          Where is the Engine database located? (Local, Remote) [Local]:

          Setup can configure the local postgresql server automatically for the engine to run. This may conflict with existing applications.
          Would you like Setup to automatically configure postgresql and create Engine database, or prefer to perform that manually? (Automatic, Manual) [Automatic]:

          --== OVIRT ENGINE CONFIGURATION ==--

          Engine admin password:

          --== SUMMARY ==--

[ INFO  ] Restarting httpd
          Please use the user 'admin@internal' and password specified in order to login
          Web access is enabled at:
              http://centos.example.com:80/ovirt-engine
              https://centos.example.com:443/ovirt-engine
          Internal CA 65:FA:CD:BF:DD:2D:F4:99:D6:63:85:80:97:B9:66:B9:C7:29:5A:F3
          SSH fingerprint: SHA256:Y46liXyme5Fz/oJA9QaYY1dhK8BKeJiw1kcSjOYL204
[WARNING] Less than 16384MB of memory is available
          Web access for grafana is enabled at:
              https://centos.example.com/ovirt-engine-grafana/
          Please run the following command on the engine machine centos.example.com, for SSO to work:
          systemctl restart ovirt-engine

          --== END OF SUMMARY ==--

[ INFO  ] Stage: Clean up
          Log file is located at /var/log/ovirt-engine/setup/ovirt-engine-setup-20200830105920-2u1ydn.log
[ INFO  ] Generating answer file '/var/lib/ovirt-engine/setup/answers/20200830110513-setup.conf'
[ INFO  ] Stage: Pre-termination
[ INFO  ] Stage: Termination
[ INFO  ] Execution of setup completed successfully
Después de la instalación con éxito, deberías obtener la URL de la consola de administración de oVirt y el panel de control de Grafana en la salida anterior.
Configurar SELinux y el cortafuegos
Por defecto, SELinux está activado en CentOS 8. Así que tendrás que configurar SELinux para oVirt. Puedes configurarlo con el siguiente comando:
setsebool -P httpd_can_network_connect 1
A continuación, tendrás que permitir los puertos 80 y 443 a través de firewalld. Puedes hacerlo con el siguiente comando:
firewall-cmd --permanent --zone public --add-port 80/tcp
firewall-cmd --permanent --zone public --add-port 443/tcp
firewall-cmd --reload
Una vez que hayas terminado, puedes pasar al siguiente paso.
Accede a la consola de administración de oVirt
Ahora, abre tu navegador web y escribe la URL https://centos.example.com/ovirt-engine/sso/login.html. Deberías ver la página de inicio de sesión de oVirt:
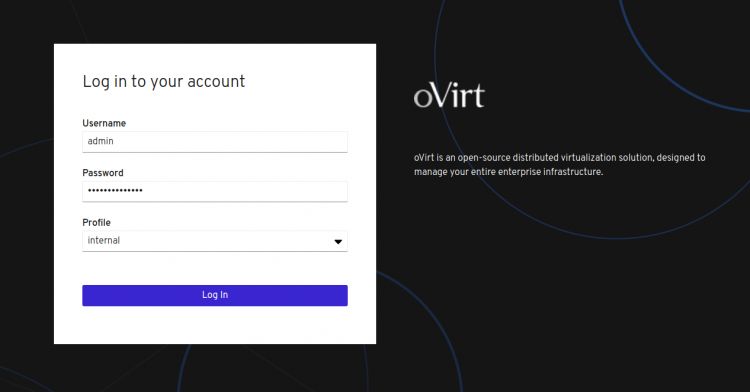
Proporciona el nombre de usuario como admin y la contraseña que has establecido durante la instalación, y haz clic en el botón Iniciar sesión. Deberías ver la siguiente pantalla:
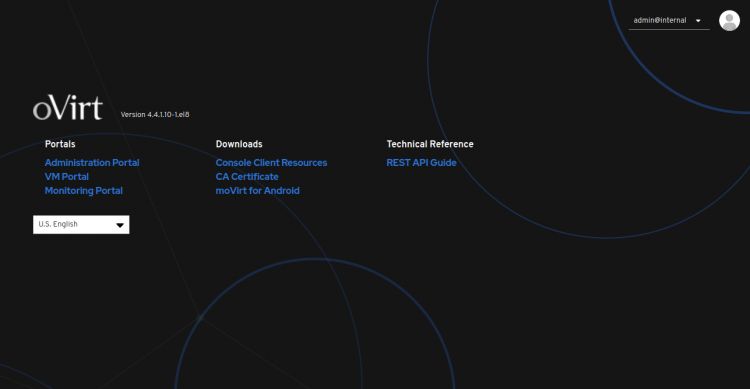
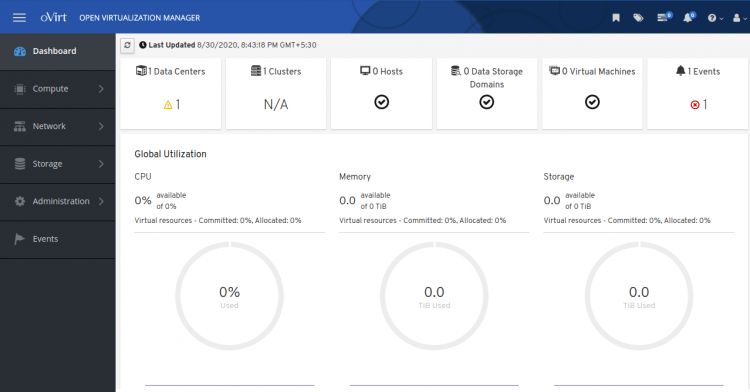
Ahora, haz clic en el Portal de Administración. Deberías ver el Panel de Control de oVirt en la siguiente pantalla:
Conclusión
Enhorabuena! has instalado con éxito el motor oVirt en el servidor CentOS 8. Ahora puedes añadir un host de virtualización remoto desde la consola de oVirt y empezar a crear tu primera máquina virtual desde el panel de control de oVirt. No dudes en preguntarme si tienes alguna duda.