Cómo instalar Dollibar ERP en Debian 11
Dolibarr es un sistema ERP y CRM gratuito y de código abierto para gestionar clientes, facturas, pedidos, productos, existencias, agendas e inventarios. Está diseñado para que PYMES, autónomos o grandes empresas gestionen una actividad profesional o fundacional. Ofrece una interfaz web fácil de usar con la que puedes gestionar tu aplicación ERP a través de un navegador web. Dolibarr es la elección adecuada para ti si buscas soluciones ERP y CRM de código abierto.
Este post te mostrará cómo instalar Dolibarr en un servidor Debian 11.
Requisitos
- Un servidor con Debian 11.
- Una contraseña de root configurada en tu servidor.
- Un nombre de dominio válido apuntando a tu servidor.
Instalar Apache, MariaDB y PHP
Dolibarr está escrito en PHP y utiliza MariaDB como base de datos. Por tanto, necesitarás instalar Apache, MariaDB, PHP y otros módulos PHP en tu sistema. Puedes instalarlos todos con el siguiente comando:
apt-get install apache2 mariadb-server php libapache2-mod-php php-common php-curl php-intl php-mbstring php-json php-xmlrpc php-soap php-mysql php-gd php-xml php-cli php-zip wget unzip git curl -y
A continuación, edita el archivo php.ini y cambia algunos ajustes por defecto:
nano /etc/php/7.4/apache2/php.ini
Cambia los siguientes ajustes:
memory_limit = 256M
upload_max_filesize = 64M
max_execution_time = 300
date.timezone = UTC
Guarda y cierra el archivo. A continuación, inicia los servicios Apache y MariaDB y habilítalos para que se inicien al arrancar el sistema con el siguiente comando:
systemctl start apache2
systemctl enable apache2
systemctl start mariadb
systemctl enable mariadb
Crear una base de datos para Dolibarr
Por defecto, MariaDB no está protegida. Por tanto, primero tendrás que asegurarla. Puedes asegurarla ejecutando el siguiente script:
mysql_secure_installation
Responde a todas las preguntas como se muestra a continuación:
    Enter current password for root (enter for none):
    Set root password? [Y/n]: N
    Remove anonymous users? [Y/n]: Y
    Disallow root login remotely? [Y/n]: Y
    Remove test database and access to it? [Y/n]:  Y
    Reload privilege tables now? [Y/n]:  Y
Una vez que MariaDB esté protegida, accede a la shell de MariaDB:
mysql -u root -p
Introduce tu contraseña de root, luego crea una base de datos y un usuario para Dolibarr:
MariaDB [(none)]> CREATE DATABASE dolibarr;
MariaDB [(none)]> CREATE USER dolibarr;
A continuación, concede privilegios a la base de datos Dolibarr con el siguiente comando:
MariaDB [(none)]> GRANT ALL PRIVILEGES ON dolibarr.* TO 'dolibarr'@'localhost' IDENTIFIED BY 'password';
A continuación, vacía los privilegios con el siguiente comando.
MariaDB [(none)]> FLUSH PRIVILEGES;
A continuación, sal de la consola MariaDB con el siguiente comando:
MariaDB [(none)]> EXIT
Instalar Dolibarr Debian 11
Primero, ejecuta el siguiente comando para descargar la última versión de Dolibarr:
release_tag=$(curl -s https://api.github.com/repos/Dolibarr/dolibarr/releases/latest | grep tag_name | cut -d '"' -f 4) wget https://github.com/Dolibarr/dolibarr/archive/${release_tag}.tar.gz
Una vez finalizada la descarga, extrae el archivo descargado con el siguiente comando:
tar -xvzf 16.0.3.tar.gz
A continuación, copia el directorio extraído en la raíz web de Apache y establece los permisos adecuados:
cp -r dolibarr-16.0.3 /var/www/html/dolibarr
chown -R www-data:www-data /var/www/html/dolibarr/
chmod -R 775 /var/www/html/dolibarr/
Configurar Apache para Dolibarr
A continuación, crea un archivo de host virtual de Apache para Dolibarr con el siguiente comando:
nano /etc/apache2/sites-available/dolibarr.conf
Añade las siguientes líneas:
<VirtualHost *:80>
     ServerAdmin [email protected]
     DocumentRoot /var/www/html/dolibarr/htdocs
     ServerName dolibarr.example.com

     <Directory /var/www/html/dolibarr/htdocs/>
          Options +FollowSymlinks
          AllowOverride All
          Require all granted
     </Directory>

     ErrorLog ${APACHE_LOG_DIR}/dolibarr_error.log
     CustomLog ${APACHE_LOG_DIR}/dolibarr_access.log combined

</VirtualHost>
Guarda el archivo y, a continuación, habilita el archivo de host virtual de apache con el siguiente comando:
a2ensite dolibarr
A continuación, habilita el módulo de reescritura de Apache y recarga el servicio apache con el siguiente comando:
a2enmod rewrite
systemctl restart apache2
Ahora puedes comprobar el estado de Dolibarr con el siguiente comando:
systemctl status apache2
Obtendrás la siguiente salida:
? apache2.service - The Apache HTTP Server
     Loaded: loaded (/lib/systemd/system/apache2.service; enabled; vendor preset: enabled)
     Active: active (running) since Fri 2022-12-30 04:44:52 UTC; 14min ago
       Docs: https://httpd.apache.org/docs/2.4/
    Process: 17472 ExecStart=/usr/sbin/apachectl start (code=exited, status=0/SUCCESS)
    Process: 19177 ExecReload=/usr/sbin/apachectl graceful (code=exited, status=0/SUCCESS)
   Main PID: 17476 (apache2)
      Tasks: 6 (limit: 4675)
     Memory: 20.6M
        CPU: 5.708s
     CGroup: /system.slice/apache2.service
             ??17476 /usr/sbin/apache2 -k start
             ??19182 /usr/sbin/apache2 -k start
             ??19183 /usr/sbin/apache2 -k start
             ??19184 /usr/sbin/apache2 -k start
             ??19185 /usr/sbin/apache2 -k start
             ??19186 /usr/sbin/apache2 -k start

Dec 30 04:44:52 debian11 systemd[1]: Starting The Apache HTTP Server...
Acceder a la interfaz web de Dolibarr
En este punto, Dolibarr está instalado y configurado. Ahora, abre tu navegador web y escribe la URL http://dolibarr.example.com. Serás redirigido a la siguiente página:
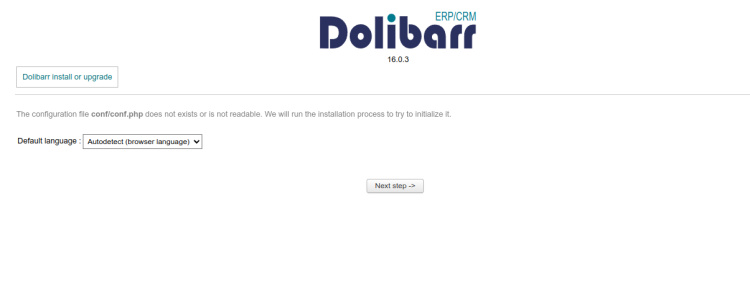
Selecciona tu idioma y pulsa el botón Siguiente paso. Deberías ver la siguiente página:
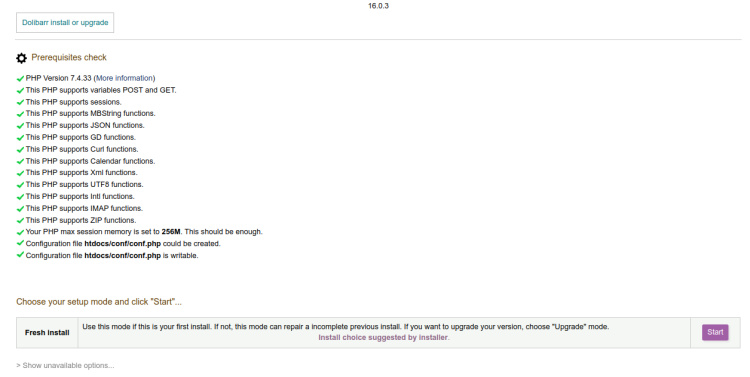
Valida las comprobaciones PHP y pulsa el botón Iniciar. Deberías ver la siguiente página:
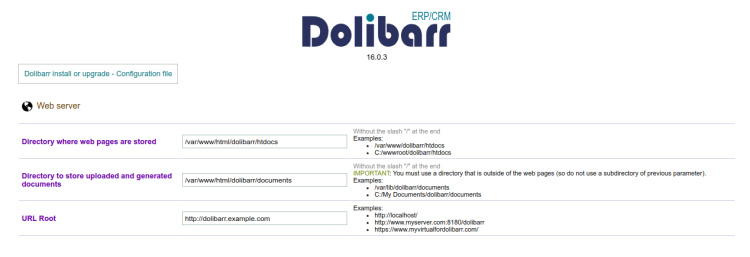
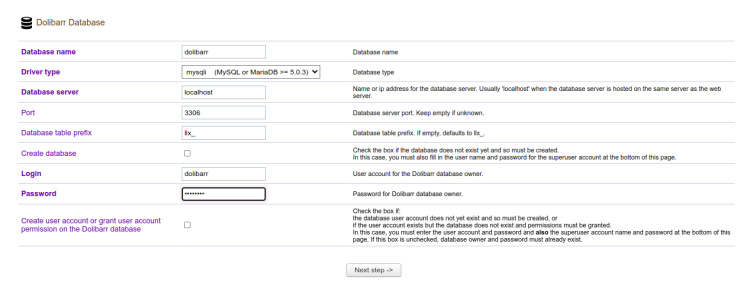
Define la configuración de tu base de datos y pulsa el botón Paso siguiente. Deberías ver la siguiente página:

A continuación, haz clic en el botón Paso siguiente. Debes ver la página siguiente:
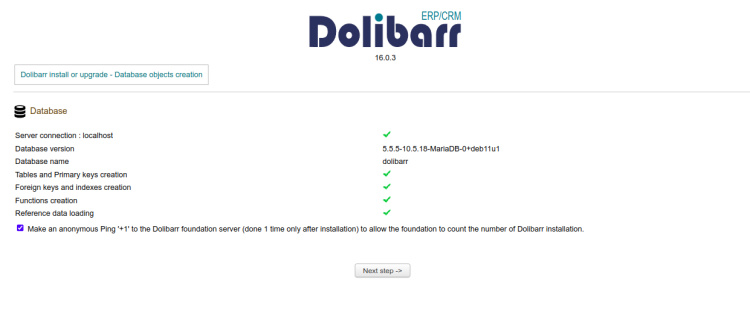
A continuación, haz clic en el botón Paso siguiente. Debes ver la siguiente página:
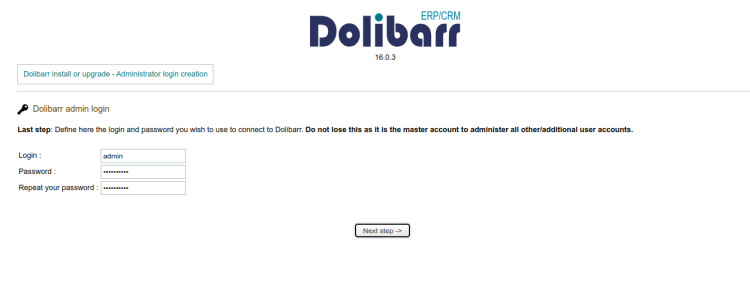
Establece tu nombre de usuario y contraseña de administrador. A continuación, haz clic en el botón Paso siguiente. Una vez creado el usuario correctamente, deberías ver la siguiente página:
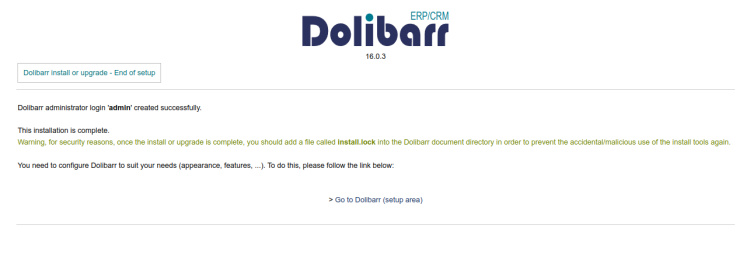
Ahora, haz clic en el botón Ir a Dolibarr. Serás redirigido a la página de inicio de sesión de Dolibarr:
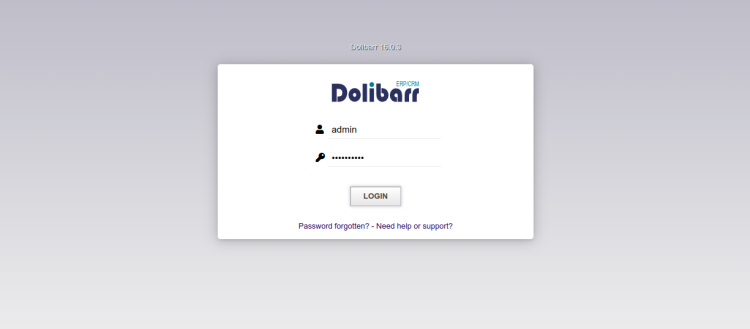
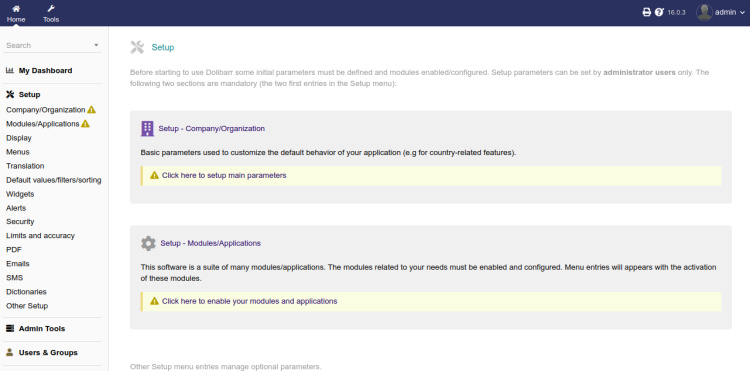
Ahora, proporciona tu nombre de usuario y contraseña de administrador. A continuación, haz clic en el botón Conectar. Deberías ver el panel de control de Dolibarr en la página siguiente:
Asegurar Dolibarr con Let’s Encrypt SSL
Para asegurar Dolibarr con SSL, necesitarás instalar el cliente Certbot en tu servidor.
Primero, instala el gestor de paquetes Snap con el siguiente comando:
apt install snapd
A continuación, actualiza el paquete Snap a la última versión:
snap install core
snap refresh core
A continuación, instala el paquete certbot con el siguiente comando:
snap install --classic certbot
A continuación, crea un enlace simbólico para el binario de Certbot en la ubicación del sistema:
ln -s /snap/bin/certbot /usr/bin/certbot
A continuación, ejecuta el siguiente comando para descargar e instalar los certificados SSL de Let’s Encrypt:
certbot --apache -d dolibarr.example.com
Se te pedirá que proporciones tu correo electrónico y que aceptes las condiciones del servicio, como se muestra a continuación:
Saving debug log to /var/log/letsencrypt/letsencrypt.log
Enter email address (used for urgent renewal and security notices)
 (Enter 'c' to cancel): [email protected]

- - - - - - - - - - - - - - - - - - - - - - - - - - - - - - - - - - - - - - - -
Please read the Terms of Service at
https://letsencrypt.org/documents/LE-SA-v1.3-September-21-2022.pdf. You must
agree in order to register with the ACME server. Do you agree?
- - - - - - - - - - - - - - - - - - - - - - - - - - - - - - - - - - - - - - - -
(Y)es/(N)o: Y

- - - - - - - - - - - - - - - - - - - - - - - - - - - - - - - - - - - - - - - -
Would you be willing, once your first certificate is successfully issued, to
share your email address with the Electronic Frontier Foundation, a founding
partner of the Let's Encrypt project and the non-profit organization that
develops Certbot? We'd like to send you email about our work encrypting the web,
EFF news, campaigns, and ways to support digital freedom.
- - - - - - - - - - - - - - - - - - - - - - - - - - - - - - - - - - - - - - - -
(Y)es/(N)o: Y
Escribe Y y pulsa la tecla Intro para descargar e instalar los certificados SSL para tu dominio:
Account registered.
Requesting a certificate for dolibarr.example.com

Successfully received certificate.
Certificate is saved at: /etc/letsencrypt/live/dolibarr.example.com/fullchain.pem
Key is saved at:         /etc/letsencrypt/live/dolibarr.example.com/privkey.pem
This certificate expires on 2023-03-29.
These files will be updated when the certificate renews.
Certbot has set up a scheduled task to automatically renew this certificate in the background.

Deploying certificate
Successfully deployed certificate for dolibarr.example.com to /etc/apache2/sites-available/dolibarr.conf
Congratulations! You have successfully enabled HTTPS on https://dolibarr.example.com

- - - - - - - - - - - - - - - - - - - - - - - - - - - - - - - - - - - - - - - -
If you like Certbot, please consider supporting our work by:
 * Donating to ISRG / Let's Encrypt:   https://letsencrypt.org/donate
 * Donating to EFF:                    https://eff.org/donate-le
- - - - - - - - - - - - - - - - - - - - - - - - - - - - - - - - - - - - - - - -
Conclusión
Enhorabuena! has instalado y configurado correctamente Dolibarr ERP y CRM con Apache en un servidor Debian 11. Ahora, explora las funcionalidades de Dolibarr e impleméntalo en tu organización para gestionar tu ERP y CRM. No dudes en preguntarme si tienes alguna duda.