El servidor perfecto – Ubuntu 18.04 (Nginx, MySQL, PHP, Postfix, BIND, Dovecot, Pure-FTPD e ISPConfig 3.1)
15. Instalar Roundcube Webmail
Para instalar RoundCube webmail, ejecuta:
apt-get -y install roundcube roundcube-core roundcube-mysql roundcube-plugins javascript-common libjs-jquery-mousewheel php-net-sieve tinymce
El instalador te hará las siguientes preguntas:
Configure database for roundcube with dbconfig-common? <-- Yes
MySQL application password for roundcube: <-- Press enter
A continuación, edita el archivo de configuración RoundCube config.inc.php
nano /etc/roundcube/config.inc.php
y cambia el host por defecto a localhost:
$config['default_host'] = 'localhost';
Esto evita que Roundcube muestre el campo de entrada del nombre del servidor en el formulario de acceso.
No crear un symlibk para que podamos utilizar la configuración de SquirrelMail en ISPConfig para Roundcube:
ln -s /usr/share/roundcube /usr/share/squirrelmail
Después de haber instalado ISPConfig 3, puedes acceder a Roundcube de la siguiente manera:
El vhost de aplicaciones de ISPConfig en el puerto 8081 para nginx viene con una configuración de Roundcube, así que puedes usar http://server1.example.com:8081/webmail para acceder a Roundcube.
Si quieres utilizar un alias /webmail que puedas usar desde tus sitios web, esto es un poco más complicado que para Apache porque nginx no tiene alias globales (es decir, alias que se pueden definir para todos los vhosts). Por tanto, tienes que definir estos alias para cada vhost desde el que quieras acceder a Roundcube.
Para ello, pega lo siguiente en el campo Directivas nginx de la pestaña Opciones del sitio web en ISPConfig:
        location /roundcube {
               root /usr/share/;
               index index.php index.html index.htm;
               location ~ ^/roundcube/(.+\.php)$ {
                       try_files $uri =404;
                       root /usr/share/;
                       fastcgi_pass unix:/var/run/php/php7.2-fpm.sock;
                       fastcgi_index index.php;
                       fastcgi_param SCRIPT_FILENAME $request_filename;
                       include /etc/nginx/fastcgi_params;
                       fastcgi_param PATH_INFO $fastcgi_script_name;
                       fastcgi_buffer_size 128k;
                       fastcgi_buffers 256 4k;
                       fastcgi_busy_buffers_size 256k;
                       fastcgi_temp_file_write_size 256k;
                       fastcgi_intercept_errors on;
               }
               location ~* ^/roundcube/(.+\.(jpg|jpeg|gif|css|png|js|ico|html|xml|txt))$ {
                       root /usr/share/;
               }
        }
        location /webmail {
               rewrite ^/* /roundcube last;
        }
Si utilizas https en lugar de http para tu vhost, debes añadir la línea fastcgi_param HTTPS on; a tu configuración de SquirrelMail así:
        location /roundcube {
               root /usr/share/;
               index index.php index.html index.htm;
               location ~ ^/roundcube/(.+\.php)$ {
                       try_files $uri =404;
                       root /usr/share/;
                       fastcgi_pass unix:/var/run/php/php7.2-fpm.sock;
                       fastcgi_param HTTPS on; # <-- add this line
                       fastcgi_index index.php;
                       fastcgi_param SCRIPT_FILENAME $request_filename;
                       include /etc/nginx/fastcgi_params;
                       fastcgi_param PATH_INFO $fastcgi_script_name;
                       fastcgi_buffer_size 128k;
                       fastcgi_buffers 256 4k;
                       fastcgi_busy_buffers_size 256k;
                       fastcgi_temp_file_write_size 256k;
                       fastcgi_intercept_errors on;
               }
               location ~* ^/roundcube/(.+\.(jpg|jpeg|gif|css|png|js|ico|html|xml|txt))$ {
                       root /usr/share/;
               }
        }
        location /webmail {
               rewrite ^/* /roundcube last;
        }
Si utilizas tanto http como https para tu vhost, debes añadir la siguiente sección a la sección http {} en /etc/nginx/nginx.conf (antes de cualquier línea de inclusión) que determina si el visitante utiliza http o https y establece la variable $fastcgi_https (que utilizaremos en nuestra configuración de Roundcube) en consecuencia:
nano /etc/nginx/nginx.conf
[...]
http {
[...]
        ## Detect when HTTPS is used
        map $scheme $fastcgi_https {
          default off;
          https on;

        }
[...]
}
[...]
No olvides recargar nginx después:
service nginx reload
A continuación, ve al campo Directivas de nginx de nuevo, y en lugar de fastcgi_param HTTPS on; añade la línea fastcgi_param HTTPS $fastcgi_https; para que puedas utilizar Roundcube tanto para peticiones http como https:
        location /roundcube {
               root /usr/share/;
               index index.php index.html index.htm;
               location ~ ^/roundcube/(.+\.php)$ {
                       try_files $uri =404;
                       root /usr/share/;
                       fastcgi_pass unix:/var/run/php/php7.2-fpm.sock;
                       fastcgi_param HTTPS $fastcgi_https; # <-- add this line
                       fastcgi_index index.php;
                       fastcgi_param SCRIPT_FILENAME $request_filename;
                       include /etc/nginx/fastcgi_params;
                       fastcgi_param PATH_INFO $fastcgi_script_name;
                       fastcgi_buffer_size 128k;
                       fastcgi_buffers 256 4k;
                       fastcgi_busy_buffers_size 256k;
                       fastcgi_temp_file_write_size 256k;
                       fastcgi_intercept_errors on;
               }
               location ~* ^/roundcube/(.+\.(jpg|jpeg|gif|css|png|js|ico|html|xml|txt))$ {
                       root /usr/share/;
               }
        }
        location /webmail {
               rewrite ^/* /roundcube last;
        }
16. Instalar ISPConfig 3.1
Antes de empezar la instalación de ISPConfig, asegúrate de que Apache está parado (si está instalado – es posible que alguno de tus paquetes instalados haya instalado Apache como dependencia sin que lo sepas). Si Apache2 ya está instalado en el sistema, detenlo ahora…
service apache2 stop
… y elimina los enlaces de inicio del sistema de Apache:
update-rc.d -f apache2 remove
Asegúrate de que nginx se está ejecutando:
service nginx restart
(Si tienes instalados tanto Apache como nginx, el instalador te pregunta cuál quieres utilizar: Apache y nginx detectados. Selecciona el servidor a utilizar para ISPConfig: (apache,nginx) [apache]:
Escribe nginx. Si sólo se instala Apache o Nginx, el instalador lo detecta automáticamente y no hace ninguna pregunta).
Para instalar ISPConfig 3.1 desde la rama estable del GIT, haz esto:
cd /tmp
wget -O ispconfig.tar.gz https://www.ispconfig.org/downloads/ISPConfig-3-stable.tar.gz
tar xfz ispconfig.tar.gz
cd ispconfig3*/install/
El siguiente paso es ejecutar
php -q install.php
Esto iniciará el instalador de ISPConfig 3.1. El instalador configurará todos los servicios como Postfix, Dovecot, etc. por ti.
root@server1:/tmp/ispconfig3-stable-3.1-da1e393d7bed829d180dd9006019201e3370e77a/install# php install.php
--------------------------------------------------------------------------------
_____ ___________ _____ __ _ ____
|_ _/ ___| ___ \ / __ \ / _(_) /__ \
| | \ `--.| |_/ / | / \/ ___ _ __ | |_ _ __ _ _/ /
| | `--. \ __/ | | / _ \| '_ \| _| |/ _` | |_ |
_| |_/\__/ / | | \__/\ (_) | | | | | | | (_| | ___\ \
\___/\____/\_| \____/\___/|_| |_|_| |_|\__, | \____/
__/ |
|___/
--------------------------------------------------------------------------------
>> Initial configuration
Operating System: Ubuntu 18.04 LTS (Bionic Beaver)
Following will be a few questions for primary configuration so be careful.
Default values are in [brackets] and can be accepted with <ENTER>.
Tap in "quit" (without the quotes) to stop the installer.
Select language (en,de) [en]: <-- ENTER
Installation mode (standard,expert) [standard]: <-- ENTER
Full qualified hostname (FQDN) of the server, eg server1.domain.tld [server1.example.com]: <-- ENTER
MySQL server hostname [localhost]: <-- ENTER
MySQL server port [3306]: <-- ENTER
MySQL root username [root]: <-- ENTER
MySQL root password []: <--enter the MySQL root password here
MySQL database to create [dbispconfig]: <-- ENTER
MySQL charset [utf8]: <-- ENTER
Configuring Postgrey
Configuring Postfix
Generating a 4096 bit RSA private key
.................................................................................................................................................................................................................................................................................................................................................................................................................++
...++
writing new private key to 'smtpd.key'
-----
You are about to be asked to enter information that will be incorporated
into your certificate request.
What you are about to enter is what is called a Distinguished Name or a DN.
There are quite a few fields but you can leave some blank
For some fields there will be a default value,
If you enter '.', the field will be left blank.
-----
Country Name (2 letter code) [AU]: <-- enter your 2 letter country code, e.g. DE in my case
State or Province Name (full name) [Some-State]: <-- Enter your home state
Locality Name (eg, city) []:  <-- Enter your city, in my case Lueneburg
Organization Name (eg, company) [Internet Widgits Pty Ltd]: <-- Enter your company name, in my case ISPConfig UG
Organizational Unit Name (eg, section) []: <-- Enter your Organisational unit name, I use IT here
Common Name (e.g. server FQDN or YOUR name) []: <-- Enter the server hostname, in my case server1.example.com
Email Address []: <-- Enter an email address, e.g. [email protected]
Configuring Mailman
Configuring Dovecot
Configuring Spamassassin
Configuring Amavisd
Configuring Getmail
Configuring Jailkit
Configuring Pureftpd
Configuring BIND
Configuring nginx
[INFO] service OpenVZ not detected
Configuring Ubuntu Firewall
Configuring Metronome XMPP Server
writing new private key to 'localhost.key'
-----
Country Name (2 letter code) [AU]: <-- Enter your 2 letter country code, e.g. DE in my case
Locality Name (eg, city) [City Name]: <-- Enter your city, in my case Lueneburg
Organization Name (eg, company) [Internet Widgits Pty Ltd]: <-- Enter your company name, in my case ISPConfig UG
Organizational Unit Name (eg, section) [Infrastructure]: <-- Enter your Organisational unit name, I use IT here
Common Name (e.g. server FQDN or YOUR name) [server1.example.com]: <-- Enter the server hostname, in my case server1.example.com
Email Address [[email protected]]: <-- Enter an email address, e.g. [email protected]
IMPORTANT:
Localhost Key, Csr and a self-signed Cert have been saved to /etc/metronome/certs
In order to work with all clients, the server must have a trusted certificate, so use the Csr
to get a trusted certificate from your CA or replace Key and Cert with already signed files for
your domain. Clients like Pidgin dont allow to use untrusted self-signed certificates.
Configuring Fail2ban
Configuring Apps vhost
Installing ISPConfig
ISPConfig Port [8080]: <-- ENTER
Admin password [admin]: <-- Enter your desired admin password
Do you want a secure (SSL) connection to the ISPConfig web interface (y,n) [y]: <-- ENTER
Generating RSA private key, 4096 bit long modulus
....................................................++
........................++
e is 65537 (0x10001)
You are about to be asked to enter information that will be incorporated
into your certificate request.
What you are about to enter is what is called a Distinguished Name or a DN.
There are quite a few fields but you can leave some blank
For some fields there will be a default value,
If you enter '.', the field will be left blank.
-----
Country Name (2 letter code) [AU]: <-- enter your 2 letter country code, e.g. DE in my case
State or Province Name (full name) [Some-State]: <-- Enter your home state
Locality Name (eg, city) []:  <-- Enter your city, in my case Lueneburg
Organization Name (eg, company) [Internet Widgits Pty Ltd]: <-- Enter your company name, in my case ISPConfig UG
Organizational Unit Name (eg, section) []: <-- Enter your Organisational unit name, I use IT here
Common Name (e.g. server FQDN or YOUR name) []: <-- Enter the server hostname, in my case server1.example.com
Email Address []: <-- Enter an email address, e.g. [email protected]
Please enter the following 'extra' attributes
to be sent with your certificate request
A challenge password []: <-- ENTER
An optional company name []: <-- ENTER
writing RSA key
Configuring DBServer
Installing ISPConfig crontab
Installing ISPConfig crontab
no crontab for root
no crontab for getmail
Detect IP addresses
Restarting services ...
Installation completed.
El instalador configura automáticamente todos los servicios subyacentes, por lo que no es necesaria ninguna configuración manual.
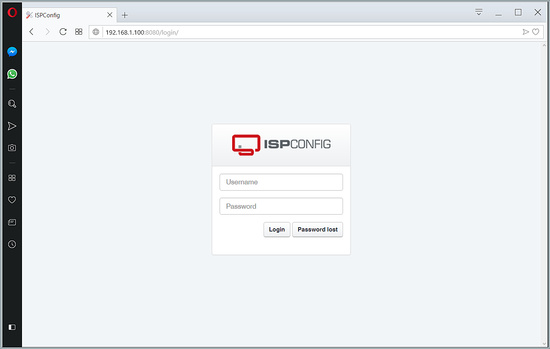
Después puedes acceder a ISPConfig 3 bajo http(s)://servidor1.ejemplo.com:8080/ o http(s)://192.168.1.100:8080/ ( http o https depende de lo que hayas elegido durante la instalación). Accede con el nombre de usuario admin y la contraseña admin (deberías cambiar la contraseña por defecto después de tu primer acceso):
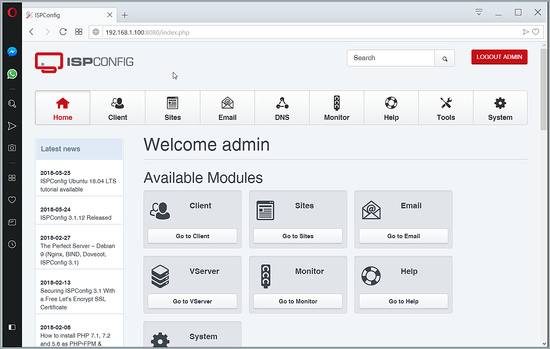
El sistema está ahora listo para ser utilizado.
16.1 Manual de ISPConfig 3.1
Para aprender a usar ISPConfig 3, recomiendo encarecidamente descargar el Manual de ISPConfig 3.1.
En más de 300 páginas, cubre el concepto detrás de ISPConfig (administrador, revendedores, clientes), explica cómo instalar y actualizar ISPConfig 3, incluye una referencia para todos los formularios y campos de formulario en ISPConfig junto con ejemplos de entradas válidas, y proporciona tutoriales para las tareas más comunes en ISPConfig 3. También se explica cómo hacer que tu servidor sea más seguro y viene con una sección de resolución de problemas al final.
17 Descarga de la imagen de la máquina virtual de este tutorial
Este tutorial está disponible como imagen de máquina virtual lista para usar en formato ovf/ova que es compatible con VMWare y Virtualbox. La imagen de la máquina virtual utiliza los siguientes datos de acceso:
Inicio de sesión SSH / Shell
Nombre de usuario: administrador
Contraseña: howtoforge
Este usuario tiene derechos sudo.
Inicio de sesión en ISPConfig
Nombre de usuario: admin
Contraseña: howtoforge
Inicio de sesión en MySQL
Nombre de usuario: root
Contraseña: howtoforge
La IP de la VM es 192.168.1.100, se puede cambiar en el archivo /etc/netplan/01-netcfg.yaml. Por favor, cambia todas las contraseñas anteriores para asegurar la máquina virtual.
18. Enlaces
- Ubuntu: http://www.ubuntu.com/
- ISPConfig: http: //www.ispconfig.org/