El servidor perfecto CentOS 7.6 con Apache, PHP 7.2, Postfix, Dovecot, Pure-FTPD, BIND e ISPConfig 3.1
21 Instalar el webmail de Roundcube
Para instalar el cliente de correo web RoundCube, descarga la última versión con wget en la carpeta /tmp:
cd /tmp
wget https://github.com/roundcube/roundcubemail/releases/download/1.3.9/roundcubemail-1.3.9-complete.tar.gz
Descomprime el archivo tar.gz y mueve el código fuente de roundcube a /usr/share/roundcubemail
tar xfz roundcubemail-1.3.9-complete.tar.gz
mkdir /usr/share/roundcubemail
mv /tmp/roundcubemail-1.3.9/* /usr/share/roundcubemail/
chown -R root:root /usr/share/roundcubemail
chown apache /usr/share/roundcubemail/temp
chown apache /usr/share/roundcubemail/logs
Crea un archivo de configuración roundcubemail.conf con el editor nano:
nano /etc/httpd/conf.d/roundcubemail.conf
Y añade el siguiente contenido a ese archivo
#
# Round Cube Webmail is a browser-based multilingual IMAP client
#

Alias /roundcubemail /usr/share/roundcubemail
Alias /webmail /usr/share/roundcubemail

# Define who can access the Webmail
# You can enlarge permissions once configured

<Directory /usr/share/roundcubemail/>
        Options none
        AllowOverride Limit
        Require all granted
</Directory>

# Define who can access the installer
# keep this secured once configured

<Directory /usr/share/roundcubemail/installer>
        Options none
        AllowOverride Limit
        Require all granted
</Directory>


# Those directories should not be viewed by Web clients.
<Directory /usr/share/roundcubemail/bin/>
    Order Allow,Deny
    Deny from all
</Directory>
<Directory /usr/share/roundcubemail/plugins/enigma/home/>
    Order Allow,Deny
    Deny from all
</Directory>
Reinicia Apache:
systemctl restart httpd.service
Ahora necesitamos una base de datos para RoundCube mail, la inicializaremos de la siguiente manera:
mysql -u root -p
En el prompt de MariaDB utiliza:
CREATE DATABASE roundcubedb;
CREATE USER roundcubeuser@localhost IDENTIFIED BY 'roundcubepassword';
GRANT ALL PRIVILEGES on roundcubedb.* to roundcubeuser@localhost ;
FLUSH PRIVILEGES;
exit
Estoy utilizando los detalles de la base de datos de RoundCube como ejemplo, por favor, sustituye los valores según tu elección por razones de seguridad.
Ahora instalaremos RoundCube en el navegador en http://192.168.0.100/roundcubemail/installer
Ahora crea el archivo config.inc.php:
nano /usr/share/roundcubemail/config/config.inc.php
<?php
/* Local configuration for Roundcube Webmail */
// ----------------------------------
// SQL DATABASE
// ----------------------------------
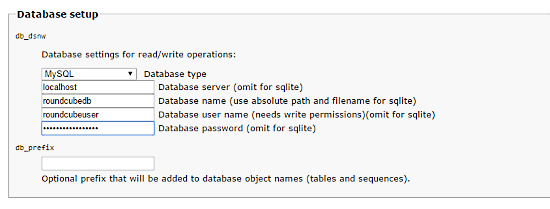
// Database connection string (DSN) for read+write operations
// Format (compatible with PEAR MDB2): db_provider://user:password@host/database
// Currently supported db_providers: mysql, pgsql, sqlite, mssql, sqlsrv, oracle
// For examples see http://pear.php.net/manual/en/package.database.mdb2.intro-dsn.php
// NOTE: for SQLite use absolute path (Linux): 'sqlite:////full/path/to/sqlite.db?mode=0646'
// or (Windows): 'sqlite:///C:/full/path/to/sqlite.db'
$config['db_dsnw'] = 'mysql://roundcubeuser:roundcubepassword@localhost/roundcubedb';
// ----------------------------------
// IMAP
// ----------------------------------
// The IMAP host chosen to perform the log-in.
// Leave blank to show a textbox at login, give a list of hosts
// to display a pulldown menu or set one host as string.
// To use SSL/TLS connection, enter hostname with prefix ssl:// or tls://
// Supported replacement variables:
// %n - hostname ($_SERVER['SERVER_NAME'])
// %t - hostname without the first part
// %d - domain (http hostname $_SERVER['HTTP_HOST'] without the first part)
// %s - domain name after the '@' from e-mail address provided at login screen
// For example %n = mail.domain.tld, %t = domain.tld
// WARNING: After hostname change update of mail_host column in users table is
// required to match old user data records with the new host.
$config['default_host'] = 'localhost';
// provide an URL where a user can get support for this Roundcube installation
// PLEASE DO NOT LINK TO THE ROUNDCUBE.NET WEBSITE HERE!
$config['support_url'] = '';
// This key is used for encrypting purposes, like storing of imap password
// in the session. For historical reasons it's called DES_key, but it's used
// with any configured cipher_method (see below).
$config['des_key'] = 'pb0UucO0eqjgvhrqYlFTBVjE';
// ----------------------------------
// PLUGINS
// ----------------------------------
// List of active plugins (in plugins/ directory)
$config['plugins'] = array();
// Set the spell checking engine. Possible values:
// - 'googie' - the default (also used for connecting to Nox Spell Server, see 'spellcheck_uri' setting)
// - 'pspell' - requires the PHP Pspell module and aspell installed
// - 'enchant' - requires the PHP Enchant module
// - 'atd' - install your own After the Deadline server or check with the people at http://www.afterthedeadline.com before using their API
// Since Google shut down their public spell checking service, the default settings
// connect to http://spell.roundcube.net which is a hosted service provided by Roundcube.
// You can connect to any other googie-compliant service by setting 'spellcheck_uri' accordingly.
$config['spellcheck_engine'] = 'pspell';
$config['enable_installer'] = true;
Luego pulsa «continuar» en el instalador web. En la siguiente página, pulsa el botón «Inicializar la base de datos».
Por último, desactiva el instalador de Roundecubemail. Cambia el archivo de configuración RoundCube config.inc.php
nano /usr/share/roundcubemail/config/config.inc.php
y cambia la línea
$config['enable_installer'] = true;
a:
$config['enable_installer'] = false;
Roundcube está ahora disponible bajo los alias /webmail y /roundcubemail en tu servidor:
http://192.168.0.100/webmail
El nombre de usuario de RoundCube es la dirección de correo electrónico y la contraseña de una cuenta de correo electrónico que crearás más tarde en ISPConfig.
22 Instalar ISPConfig 3.1
El instalador de ISPConfig configurará todos los servicios como Postfix, Dovecot, etc. por ti.
Ahora también tienes la posibilidad de dejar que el instalador cree un vhost SSL para el panel de control de ISPConfig para que se pueda acceder a ISPConfig usando https:// en lugar de http://. Para conseguirlo, simplemente pulsa ENTER cuando veas esta pregunta: ¿Quieres una conexión segura (SSL) a la interfaz web de ISPConfig (y,n) [y]:.
Para instalar ISPConfig 3.1 desde la rama estable del GIT, haz esto:
cd /tmp
wget -O ispconfig.tar.gz https://www.ispconfig.org/downloads/ISPConfig-3-stable.tar.gz
tar xfz ispconfig.tar.gz
cd ispconfig3*/install/
El siguiente paso es ejecutar:
php -q install.php
Esto iniciará el instalador de ISPConfig 3. El instalador configurará todos los servicios como Postfix, Dovecot, etc. por ti. No es necesaria una configuración manual como la requerida para ISPConfig 2 (guías de instalación perfectas).
[root@server1 install]# php install.php
--------------------------------------------------------------------------------
_____ ___________ _____ __ _ ____
|_ _/ ___| ___ \ / __ \ / _(_) /__ \
| | \ `--.| |_/ / | / \/ ___ _ __ | |_ _ __ _ _/ /
| | `--. \ __/ | | / _ \| '_ \| _| |/ _` | |_ |
_| |_/\__/ / | | \__/\ (_) | | | | | | | (_| | ___\ \
\___/\____/\_| \____/\___/|_| |_|_| |_|\__, | \____/
__/ |
|___/
--------------------------------------------------------------------------------
>> Initial configuration
Operating System: CentOS 7.6
Following will be a few questions for primary configuration so be careful.
Default values are in [brackets] and can be accepted with <ENTER>.
Tap in "quit" (without the quotes) to stop the installer.
Select language (en,de) [en]: <-- Hit Enter
Installation mode (standard,expert) [standard]: <-- Hit Enter
Full qualified hostname (FQDN) of the server, eg server1.domain.tld [server1.example.com]: <-- Hit Enter
MySQL server hostname [localhost]: <-- Hit Enter
MySQL server port [3306]: <-- Hit Enter
MySQL root username [root]: <-- Hit Enter
MySQL root password []: <-- Ente the MySQL root password here
MySQL database to create [dbispconfig]: <-- Hit Enter
MySQL charset [utf8]: <-- Hit Enter
Configuring Postgrey
Configuring Postfix
Generating a 4096 bit RSA private key
................................++
.....................................................................................................................................................................................................................................................................................................................................................++
writing new private key to 'smtpd.key'
-----
You are about to be asked to enter information that will be incorporated
into your certificate request.
What you are about to enter is what is called a Distinguished Name or a DN.
There are quite a few fields but you can leave some blank
For some fields there will be a default value,
If you enter '.', the field will be left blank.
-----
Country Name (2 letter code) [XX]: <-- Enter 2 Letter country code, e.g. US
State or Province Name (full name) []: <-- Enter anme of State or Province
Locality Name (eg, city) [Default City]: <-- Name of city
Organization Name (eg, company) [Default Company Ltd]: <-- Company name
Organizational Unit Name (eg, section) []: <-- Hit Enter
Common Name (eg, your name or your server's hostname) []: <-- Enter server hostname here, in my case: server1.example.com
Email Address []: <-- Enter Email address
Configuring mailman
Configuring Dovecot
Configuring Spamassassin
Configuring Amavisd
Configuring Getmail
Configuring Jailkit
Configuring Pureftpd
Configuring BIND
Configuring Apache
Configuring vlogger
[INFO] service OpenVZ not detected
Configuring Bastille Firewall
[INFO] service Metronome XMPP Server not detected
Configuring Fail2ban
Configuring Apps vhost
Installing ISPConfig
ISPConfig Port [8080]: <-- Hit Enter
Admin password [fad579a6]: <-- Enter new password for ISPConfig admin user
Re-enter admin password []: <-- Repeat the password
Do you want a secure (SSL) connection to the ISPConfig web interface (y,n) [y]: <-- Hit Enter
Generating RSA private key, 4096 bit long modulus
.................................................................................++
.....++
e is 65537 (0x10001)
You are about to be asked to enter information that will be incorporated
into your certificate request.
What you are about to enter is what is called a Distinguished Name or a DN.
There are quite a few fields but you can leave some blank
For some fields there will be a default value,
If you enter '.', the field will be left blank.
-----
Country Name (2 letter code) [XX]: <-- Enter 2 Letter country code, e.g. US
State or Province Name (full name) []: <-- Enter anme of State or Province
Locality Name (eg, city) [Default City]: <-- Name of city
Organization Name (eg, company) [Default Company Ltd]: <-- Company name
Organizational Unit Name (eg, section) []: <-- Hit Enter
Common Name (eg, your name or your server's hostname) []: <-- Enter server hostname here, in my case: server1.example.com
Email Address []: <-- Enter Email address
Please enter the following 'extra' attributes
to be sent with your certificate request
A challenge password []: <-- Hit Enter
An optional company name []: <-- Hit Enter
writing RSA key
Configuring DBServer
Installing ISPConfig crontab
Installing ISPConfig crontab
no crontab for root
no crontab for getmail
Detect IP addresses
Restarting services ...
Installation completed.
El instalador configura automáticamente todos los servicios subyacentes, por lo que no es necesaria una configuración manual.
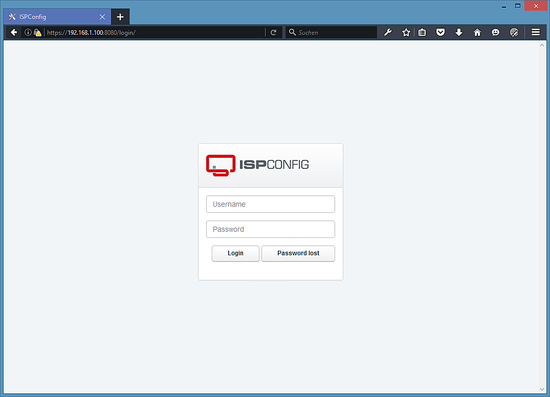
23 Primer acceso a ISPConfig
Después puedes acceder a ISPConfig 3 bajo http(s)://servidor1.ejemplo.com:8080/ o http(s)://192.168.0.100:8080/(http o httpsdepende de lo que hayas elegido durante la instalación).
Accede con el nombre de usuario admin y la contraseña admin (deberías cambiar la contraseña por defecto después de tu primer acceso):
23.1 El Manual de ISPConfig 3
Para aprender a usar ISPConfig 3, recomiendo encarecidamente descargar el Manual de ISPConfig 3.
En más de 300 páginas, cubre el concepto detrás de ISPConfig (administrador, revendedores, clientes), explica cómo instalar y actualizar ISPConfig 3, incluye una referencia para todos los formularios y campos de formulario en ISPConfig junto con ejemplos de entradas válidas, y proporciona tutoriales para las tareas más comunes en ISPConfig 3. También se explica cómo hacer que tu servidor sea más seguro y viene con una sección de resolución de problemas al final.
24 Descarga como máquina virtual
Esta configuración está disponible como descarga de máquina virtual en formato ova/ovf (compatible con VMWare y Virtualbox) para los suscriptores de howtoforge.
Datos de acceso a la VM
- La contraseña de root es: howtoforge
- La contraseña del usuario «admin» de ISPConfig es: howtoforge
- Hay otro usuario shell con el nombre «howtoforge» y la contraseña: howtoforge
Por favor, cambia ambas contraseñas en el primer acceso.
- La dirección IP de la máquina virtual es 192.168.0.100
25 Enlaces
- CentOS: http://www.centos.org/
- ISPConfig: http: //www.ispconfig.org/