Cómo instalar y crear un servidor de chat utilizando Matrix Synapse y Element en Rocky Linux 9
Matrix es un estándar abierto para la comunicación descentralizada y encriptada de extremo a extremo. Es una colección de servidores y servicios que se comunican entre sí mediante una API estandarizada que se sincroniza en tiempo real. Utiliza servidores domésticos para almacenar la información de las cuentas y el historial de chat. Si un servidor doméstico se cae, otros servidores pueden continuar la comunicación sin problemas debido a la naturaleza de la descentralización. Puedes utilizar un servidor doméstico de Matrix alojado por otra persona o alojar el tuyo propio para mantener el control sobre tus datos.
En este tutorial, aprenderás a instalar y crear un servidor de chat utilizando Synapse, una implementación de servidor doméstico de Matrix. Element es un cliente web de Matrix construido utilizando el SDK React de Matrix. Esto te permitirá ofrecer el chat de Matrix en la web. También puedes utilizar el servidor con cualquier otro cliente de Matrix. También instalaremos el servidor Coturn para permitir llamadas de voz y vídeo. El servicio Coturn es opcional si no te interesa utilizarlo.
Requisitos previos
- Un servidor con Debian 12.
- Un usuario no usuario con privilegios de root.
- El Cortafuegos sin complicaciones(UFW) está activado y en ejecución.
- Nombres de dominio completos (FQDN) para Matrix, Element y Coturn que apunten a tu servidor. Utilizaremos
matrix.example.com,element.example.com, ycoturn.example.comrespectivamente para los tres servicios. - Asegúrate de que todo está actualizado.
$ sudo dnf update
- Pocos paquetes necesita tu sistema.
$ sudo dnf install wget curl nano unzip yum-utils policycoreutils-python-utils -y
Puede que algunos de estos paquetes ya estén instalados en tu sistema.
Paso 1 – Configurar el Cortafuegos
Antes de instalar ningún paquete, el primer paso es configurar el cortafuegos para abrir puertos para HTTP, HTTPS y Synapse. Rocky Linux utiliza el cortafuegos Firewalld. Comprueba el estado del cortafuegos.
$ sudo firewall-cmd --state
running
El cortafuegos funciona con diferentes zonas, y la zona pública es la que utilizaremos por defecto. Enumera todos los servicios y puertos activos en el cortafuegos.
$ sudo firewall-cmd --zone=public --list-all
Debería mostrar la siguiente salida.
public
  target: default
  icmp-block-inversion: no
  interfaces: enp1s0
  sources:
  services: cockpit dhcpv6-client ssh
  ports:
  protocols:
  forward: yes
  masquerade: no
  forward-ports:
  source-ports:
  icmp-blocks:
  rich rules:
Abre los puertos HTTP, HTTPS y Synapse en el cortafuegos.
$ sudo firewall-cmd --zone=public --add-port=8448/tcp
$ sudo firewall-cmd --zone=public --add-service=http
$ sudo firewall-cmd --zone=public --add-service=https
Vuelve a comprobar el estado del cortafuegos.
$ sudo firewall-cmd --zone=public --list-all
Deberías ver una salida similar.
public
  target: default
  icmp-block-inversion: no
  interfaces: enp1s0
  sources:
  services: cockpit dhcpv6-client http https ssh
  ports: 8448/tcp
  protocols:
  forward: yes
  masquerade: no
  forward-ports:
  source-ports:
  icmp-blocks:
  rich rules:
Haz que todos los cambios sean permanentes y vuelve a cargar el cortafuegos para activar los cambios.
$ sudo firewall-cmd --runtime-to-permanent
$ sudo firewall-cmd --reload
Paso 2 – Instalar y configurar PostgreSQL
Rocky Linux 9 viene con PostgreSQL 13 por defecto. Nosotros utilizaremos PostgreSQL 16 desde su repositorio oficial.
Instala el repositorio RPM de PostgreSQL.
$ sudo dnf install -y https://download.postgresql.org/pub/repos/yum/reporpms/EL-9-x86_64/pgdg-redhat-repo-latest.noarch.rpm
Desactiva el módulo incorporado de PostgreSQL.
$ sudo dnf -qy module disable postgresql
Ahora, puedes instalar PostgreSQL utilizando el siguiente comando.
$ sudo dnf install -y postgresql16-server postgresql16-contrib postgresql16-devel
sudo dnf install postgresql16-devel
export PATH=$PATH:/usr/pgsql-16/bin
El paquete postgresql-contrib contiene algunas utilidades adicionales.
Verifica la versión.
$ psql --version
psql (PostgreSQL) 16.1
Inicializa la base de datos PostgreSQL.
$ sudo /usr/pgsql-16/bin/postgresql-16-setup initdb
Initializing database ... OK
Habilita el servicio PostgreSQL.
$ sudo systemctl enable postgresql-16
Inicia el servicio PostgreSQL.
$ sudo systemctl start postgresql-16
Comprueba el estado del servicio PostgreSQL.
$ sudo systemctl status postgresql-16
? postgresql-16.service - PostgreSQL 16 database server
     Loaded: loaded (/usr/lib/systemd/system/postgresql-16.service; enabled; preset: disabled)
     Active: active (running) since Tue 2024-01-30 11:55:26 UTC; 10s ago
       Docs: https://www.postgresql.org/docs/16/static/
    Process: 9610 ExecStartPre=/usr/pgsql-16/bin/postgresql-16-check-db-dir ${PGDATA} (code=exited, status=0/SUCCESS)
   Main PID: 9615 (postgres)
      Tasks: 7 (limit: 12225)
     Memory: 17.4M
        CPU: 98ms
     CGroup: /system.slice/postgresql-16.service
             ??9615 /usr/pgsql-16/bin/postgres -D /var/lib/pgsql/16/data/
             ??9616 "postgres: logger "
             ??9617 "postgres: checkpointer "
             ??9618 "postgres: background writer "
             ??9620 "postgres: walwriter "
             ??9621 "postgres: autovacuum launcher "
             ??9622 "postgres: logical replication launcher "

Jan 30 11:55:26 matrix.example.com systemd[1]: Starting PostgreSQL 16 database server...
Jan 30 11:55:26 matrix.example.com postgres[9615]: 2024-01-30 11:55:26.482 UTC [9615] LOG:  redirecting log output to logging collector process
Jan 30 11:55:26 matrix.example.com postgres[9615]: 2024-01-30 11:55:26.482 UTC [9615] HINT:  Future log output will appear in directory "log".
Jan 30 11:55:26 matrix.example.com systemd[1]: Started PostgreSQL 16 database server.
Puedes ver que el servicio está habilitado y en ejecución por defecto.
Accede a la cuenta del sistema postgres.
$ sudo -su postgres
Crea un nuevo usuario de base de datos y una base de datos para PostgreSQL. Se te pedirá una contraseña al crear el usuario.
$ createuser --pwprompt synapse
$ createdb --encoding=UTF8 --locale=C --template=template0 --owner=synapse synapsedb
Sal de la cuenta postgres.
$ exit
Paso 3 – Instalar Matrix Synapse
Matrix Synapse no tiene un paquete preconstruido para distribuciones basadas en CentOS como Rocky Linux. Por lo tanto, lo instalaremos como un módulo de Python desde PyPI.
El primer paso es instalar los requisitos previos necesarios para que Synapse funcione. También necesitamos el repositorio EPEL, que incluye el paquete python3-virtualenv.
$ sudo dnf install epel-release
$ sudo dnf install --enablerepo=crb libtiff-devel libjpeg-devel libzip-devel \
                 freetype-devel libwebp-devel libxml2-devel libxslt-devel \
                 libpq-devel  python3-virtualenv libffi-devel openssl-devel \
                 python3-devel libicu-devel
$ sudo dnf groupinstall "Development Tools"
$ sudo dnf install postgresql16-devel
Crea un directorio para Synapse.
$ mkdir -p ~/synapse
Crea un entorno virtual Python en dicho directorio.
$ virtualenv -p python3 ~/synapse/env
Activa el entorno virtual.
$ source ~/synapse/env/bin/activate
Asegúrate de que tienes la última versión de pip y setuptools.
(env) $ pip install --upgrade pip
(env) $ pip install --upgrade setuptools
Instala Matrix Synapse.
(env) $ pip install "matrix-synapse[postgres]"
Esto descargará Synapse de PyPI y lo instalará, junto con las librerías Python que utiliza, en un entorno virtual bajo la carpeta ~/synapse/env. También instalará la biblioteca PostgreSQL Python necesaria para que Synapse se conecte con el servidor PostgreSQL. El comando anterior es una combinación de los comandos pip install matrix-synapse y pip install psycopg2.
El siguiente paso es generar un archivo de configuración con algunos ajustes básicos. Cambia al directorio de Synapse.
(env) $ cd ~/synapse
Ejecuta el siguiente comando para generar el archivo de configuración.
(env) $ python -m synapse.app.homeserver \
    --server-name matrix.example.com \
    --config-path homeserver.yaml \
    --generate-config \
    --report-stats=[yes|no]
El valor de la variable --server-name forma parte de tu ID de Matrix. Introduce como valor tu nombre de dominio Matrix. Esto actuará como tu dirección de servidor doméstico.
Puedes elegir si deseas o no enviar estadísticas anonimizadas sobre tu servidor doméstico a Matrix a través de la variable --report-stats. Elige yes o no según prefieras.
Obtendrás la siguiente salida.
Generating config file homeserver.yaml
Generating log config file /home/navjot/synapse/matrix.example.com.log.config which will log to /home/navjot/synapse/homeserver.log
Generating signing key file /home/navjot/synapse/matrix.example.com.signing.key
A config file has been generated in 'homeserver.yaml' for server name 'matrix.example.com'. Please review this file and customise it to your needs.
Puedes cambiar estos ajustes más adelante en el archivo ~/synapse/homeserver.yaml o en el archivo /home/<username>/synapse/homeserver.yaml. Las claves generadas por el comando anterior permitirán a tu servidor doméstico identificarse ante otros servidores domésticos.
Es hora de ejecutar el servidor Matrix. Asegúrate de que estás dentro del directorio Synapse y de que el entorno virtual está activo.
Inicia el servidor doméstico.
(env) $ synctl start
Deberías ver una salida similar.
This server is configured to use 'matrix.org' as its trusted key server via the
'trusted_key_servers' config option. 'matrix.org' is a good choice for a key
server since it is long-lived, stable and trusted. However, some admins may
wish to use another server for this purpose.

To suppress this warning and continue using 'matrix.org', admins should set
'suppress_key_server_warning' to 'true' in homeserver.yaml.
--------------------------------------------------------------------------------
started synapse.app.homeserver(homeserver.yaml)
Para detener el servidor, ejecuta el siguiente comando.
(env) $ synctl stop
Desactiva el entorno virtual.
(env) $ deactivate
Paso 4 – Instalar Nginx
Para el entorno de producción, se recomienda ejecutar el servidor Synapse utilizando un proxy Nginx.
Rocky Linux 9 viene con una versión antigua de Nginx. Necesitas utilizar el repositorio oficial de Nginx para instalar la última versión.
Crea y abre el archivo /etc/yum.repos.d/nginx.repo para editarlo.
$ sudo nano /etc/yum.repos.d/nginx.repo
Pega en él el siguiente código.
[nginx-stable]
name=nginx stable repo
baseurl=http://nginx.org/packages/centos/$releasever/$basearch/
gpgcheck=1
enabled=1
gpgkey=https://nginx.org/keys/nginx_signing.key
module_hotfixes=true

[nginx-mainline]
name=nginx mainline repo
baseurl=http://nginx.org/packages/mainline/centos/$releasever/$basearch/
gpgcheck=1
enabled=0
gpgkey=https://nginx.org/keys/nginx_signing.key
module_hotfixes=true
Cuando hayas terminado, guarda el archivo pulsando Ctrl + X e introduciendo Y cuando se te pida.
Vamos a instalar la versión principal de Nginx, así que habilita el paquete correspondiente.
$ sudo dnf config-manager --enable nginx-mainline
Instala Nginx.
$ sudo dnf install nginx -y
Verifica la instalación.
$ nginx -v
nginx version: nginx/1.25.3
Habilita e inicia el servicio del servidor Nginx.
$ sudo systemctl enable nginx --now
Comprueba el estado del servicio.
$ sudo systemctl status nginx
? nginx.service - nginx - high performance web server
     Loaded: loaded (/usr/lib/systemd/system/nginx.service; enabled; preset: disabled)
     Active: active (running) since Tue 2024-01-30 12:50:34 UTC; 4s ago
       Docs: http://nginx.org/en/docs/
    Process: 10810 ExecStart=/usr/sbin/nginx -c /etc/nginx/nginx.conf (code=exited, status=0/SUCCESS)
   Main PID: 10811 (nginx)
      Tasks: 3 (limit: 12225)
     Memory: 3.1M
        CPU: 24ms
     CGroup: /system.slice/nginx.service
             ??10811 "nginx: master process /usr/sbin/nginx -c /etc/nginx/nginx.conf"
             ??10812 "nginx: worker process"
             ??10813 "nginx: worker process"
Paso 5 – Instalar SSL
Necesitamos instalar Certbot para generar el certificado SSL. Para ello utilizaremos el instalador de paquetes Snapd. Como Rocky Linux no lo incluye, instala el instalador Snapd. Necesita el repositorio EPEL (Extra Packages for Enterprise Linux) para funcionar. Pero como ya lo hemos instalado en el paso 3, podemos avanzar directamente.
Instala el paquete Snapd.
$ sudo dnf install snapd -y
Habilita e Inicia el servicio Snap.
$ sudo systemctl enable snapd --now
Instala el paquete Snap core, y asegúrate de que tu versión de Snapd está actualizada.
$ sudo snap install core
$ sudo snap refresh core
Crea los enlaces necesarios para que Snapd funcione.
$ sudo ln -s /var/lib/snapd/snap /snap
$ echo 'export PATH=$PATH:/var/lib/snapd/snap/bin' | sudo tee -a /etc/profile.d/snapd.sh
Instala Certbot.
$ sudo snap install --classic certbot
Asegúrate de que se puede ejecutar el comando Certbot creando un enlace simbólico al directorio /usr/bin.
$ sudo ln -s /snap/bin/certbot /usr/bin/certbot
Comprueba la versión de Certbot.
$ certbot --version
certbot 2.8.0
Ejecuta el siguiente comando para generar un certificado SSL.
$ sudo certbot certonly --nginx --agree-tos --no-eff-email --staple-ocsp --preferred-challenges http -m [email protected] -d matrix.example.com
El comando anterior descargará un certificado en el directorio /etc/letsencrypt/live/matrix.example.com de tu servidor.
Genera un certificado de grupo Diffie-Hellman.
$ sudo openssl dhparam -dsaparam -out /etc/ssl/certs/dhparam.pem 4096
Comprueba el servicio programador de renovación de Certbot.
$ systemctl list-timers
Encontrarás snap.certbot.renew.service como uno de los servicios programados para ejecutarse.
NEXT                        LEFT         LAST                        PASSED      UNIT                         ACTIVATES                   ----------------------------------------------------------------------------------------------------------------------------------
Tue 2024-01-30 14:37:50 UTC 29min left   Tue 2024-01-30 13:05:13 UTC 1h 3min ago dnf-makecache.timer          dnf-makecache.service
Tue 2024-01-30 15:13:00 UTC 1h 4min left -                           -           snap.certbot.renew.timer     snap.certbot.renew.service
Wed 2024-01-31 00:00:00 UTC 9h left      Tue 2024-01-30 06:35:44 UTC 7h ago      logrotate.timer              logrotate.service
Realiza una ejecución en seco del proceso para comprobar si la renovación SSL funciona correctamente.
$ sudo certbot renew --dry-run
Si no ves ningún error, ya está todo listo. Tu certificado se renovará automáticamente.
Paso 6 – Configurar SELinux
SELinux impide ejecutar un servicio del sistema cuyo binario se encuentre en el directorio personal de un usuario. Por este motivo, si creamos un archivo de servicio para Synapse, será bloqueado por SELinux. Para evitar este problema, tenemos que ejecutar el siguiente comando para permitir que el binario de Python se ejecute como un servicio del sistema.
$ sudo chcon -R -t bin_t /home/username/synapse/env/bin/python
Aplica la política para permitir que se establezcan conexiones con hosts externos.
$ sudo setsebool -P httpd_can_network_connect 1
Aplica la política para permitir que Nginx dé acceso a PostgreSQL.
$ sudo setsebool -P httpd_can_network_connect_db 1
Paso 7 – Crear el servicio Matrix Systemd
El estado del servicio Synapse no se guarda al reiniciar, lo que significa que si reinicias el servidor, tendrás que iniciarlo manualmente. Para evitar este problema, tenemos que crear el archivo Systemd correspondiente.
Antes de proceder, asegúrate de que el servicio Synapse está detenido.
$ cd ~/synapse
$ source env/bin/activate
(env) $ synctl stop
(env) $ deactivate
Crea y abre el archivo matrix-synapse.service en el directorio /etc/systemd/system/ para editarlo.
$ sudo nano /etc/systemd/system/matrix-synapse.service
Pega en él el siguiente código. Sustituye la variable username por el usuario de tu sistema Linux bajo el que instalaste Synapse.
# This assumes that Synapse has been installed by a user named username.
# This assumes that Synapse has been installed in a virtualenv in
# the user's home directory: `/home/username/synapse/env`.

[Unit]
Description=Synapse Matrix homeserver
After=postgresql-16.service

[Service]
Type=notify
NotifyAccess=main
ExecReload=/bin/kill -HUP $MAINPID
Restart=on-abort

WorkingDirectory=/home/username/synapse
ExecStart=/home/username/synapse/env/bin/python -m synapse.app.homeserver --config-path=/home/username/synapse/homeserver.yaml
SyslogIdentifier=matrix-synapse

# adjust the cache factor if necessary
# Environment=SYNAPSE_CACHE_FACTOR=2.0

[Install]
WantedBy=multi-user.target
Cuando hayas terminado, guarda el archivo pulsando Ctrl + X e introduciendo Y cuando se te pida.
Recarga el demonio de servicio.
$ sudo systemctl daemon-reload
Activa el servicio Matrix Synapse.
$ sudo systemctl enable matrix-synapse
Inicia el servicio Matrix Synapse.
$ sudo systemctl start matrix-synapse
Comprueba el estado del servicio.
$ sudo systemctl status matrix-synapse
Deberías ver la siguiente salida.
? matrix-synapse.service - Synapse Matrix homeserver
     Loaded: loaded (/etc/systemd/system/matrix-synapse.service; enabled; preset: disabled)
     Active: active (running) since Tue 2024-01-30 14:20:20 UTC; 5s ago
   Main PID: 14687 (python)
      Tasks: 8 (limit: 12225)
     Memory: 77.6M
        CPU: 3.527s
     CGroup: /system.slice/matrix-synapse.service
             ??14687 /home/navjot/synapse/env/bin/python -m synapse.app.homeserver --config-path=/home/navjot/synapse/homeserver.yaml

Jan 30 14:20:16 matrix.example.com systemd[1]: Starting Synapse Matrix homeserver...
Jan 30 14:20:19 matrix.example.com matrix-synapse[14687]: This server is configured to use 'matrix.org' as its trusted key server via the
Jan 30 14:20:19 matrix.example.com matrix-synapse[14687]: 'trusted_key_servers' config option. 'matrix.org' is a good choice for a key
Jan 30 14:20:19 matrix.example.com matrix-synapse[14687]: server since it is long-lived, stable and trusted. However, some admins may
Jan 30 14:20:19 matrix.example.com matrix-synapse[14687]: wish to use another server for this purpose.
Jan 30 14:20:19 matrix.example.com matrix-synapse[14687]: To suppress this warning and continue using 'matrix.org', admins should set
Jan 30 14:20:19 matrix.example.com matrix-synapse[14687]: 'suppress_key_server_warning' to 'true' in homeserver.yaml.
Jan 30 14:20:19 matrix.example.com matrix-synapse[14687]: --------------------------------------------------------------------------------
Jan 30 14:20:20 matrix.example.com systemd[1]: Started Synapse Matrix homeserver.
Paso 8 – Configurar Matrix Synapse
Antes de seguir adelante, crea primero una clave de registro secreta. La clave debe ser segura porque permitirá a cualquiera registrar un nuevo usuario, aunque el registro esté desactivado.
$ echo "registration_shared_secret: '$(cat /dev/urandom | tr -cd '[:alnum:]' | fold -w 256 | head -n 1)'"
registration_shared_secret: '1y75ja0RUxvbWcS6SdZhakenukUwHHEjOXWC9Mu3FpO0QenOnpKRsc6NBZSxuzPcHYsOEuIQziwVjSZcP87dlWK4ZkIGYniurMqNsCYL4xg5xXs4bJDuTJH2CUXab4U9liv399lmkIZFaMpJCLxV9lVWB9mKHILYsjeLgGY5wAARv1SiK07bFsQOwKJGFqIvsUXmxymx5QCNDzTHw8R4ShqZ7elnnZrbdYk4r2f7qogERNHvQaRV7IEYUIOtMhVP'
Copia el resultado de la línea anterior y guárdalo.
Puedes configurar el servidor Matrix a través del archivo /home/username/synapse/homeserver.yaml. Ábrelo para editarlo.
$ nano ~/synapse/homeserver.yaml
Pega la salida del comando clave de registro en la parte inferior del archivo.
Por defecto, Synapse está configurado para utilizar la base de datos SQLite. Tenemos que editarlo para añadir las credenciales de PostgreSQL.
Busca la siguiente sección en el archivo y coméntala como se muestra.
#database:
#  name: sqlite3
#  args:
#    database: /home/navjot/synapse/homeserver.db
Añade la siguiente sección debajo. Sustituye el campo your-password por la contraseña de usuario PostgreSQL que creaste en el paso 3. Sustituye localhost por la dirección IP de tu servidor, si alojas la base de datos en otro lugar.
database:
  name: psycopg2
  args:
    user: synapse
    password: 'your-password'
    database: synapsedb
    host: localhost
    cp_min: 5
    cp_max: 10
Por defecto, Synapse activa indicadores de presencia que muestran si una persona está conectada. Puede provocar un uso elevado de la CPU, por lo que puedes desactivarlo. Pega la siguiente línea en la parte inferior.
presence:
  enabled: false
Una vez terminado, guarda el archivo pulsando Ctrl + X e introduciendo Y cuando se te pida.
Crea un nuevo usuario matrix. Se te pedirá el nombre de usuario y la contraseña. Como éste es el primer usuario que estamos creando, escribe yes cuando se te pregunte si quieres que el usuario sea administrador. Tendrás que activar el entorno virtual para crear el usuario.
$ cd ~/synapse
$ source env/bin/activate
(env) $ register_new_matrix_user -c homeserver.yaml http://localhost:8008
New user localpart [navjot]: navjot
Password:
Confirm password:
Make admin [no]: yes
Sending registration request...
Success!
(env) $ deactivate
Puedes ver que hemos utilizado el puerto 8008 en el comando anterior. Esto se debe a que es el puerto por defecto en el que escucha Matrix Synapse.
Por defecto, el registro de nuevos usuarios está desactivado, lo que significa que tienes que registrar a cada usuario manualmente, como se indica arriba. Si quieres abrir registros públicos, puedes hacerlo editando el archivo homeserver.yaml.
Vuelve a abrirlo para editarlo.
$ nano ~/synapse/homeserver.yaml
Pega la siguiente línea en la parte inferior.
enable_registration: true
Por defecto, Synapse no permite registros sin verificación de correo electrónico. Para activar la verificación del correo electrónico, pega las siguientes líneas.
registrations_require_3pid:
  - email

email:
  smtp_host: mail.example.com
  smtp_port: 587

  # If mail server has no authentication, skip these 2 lines
  smtp_user: '[email protected]'
  smtp_pass: 'password'

  # Optional, require encryption with STARTTLS
  require_transport_security: true

  app_name: 'HowtoForge Example Chat'  # defines value for %(app)s in notif_from and email subject
  notif_from: "%(app)s <[email protected]>"
Para desactivar la verificación del correo electrónico, pega la línea siguiente.
enable_registration_without_verification: true
Cuando hayas terminado, guarda el archivo pulsando Ctrl + X e introduciendo Y cuando se te pida.
Reinicia Synapse para aplicar la configuración.
$ sudo systemctl restart matrix-synapse
Paso 9 – Configurar Nginx
Abre el archivo /etc/nginx/nginx.conf para editarlo.
$ sudo nano /etc/nginx/nginx.conf
Añade la siguiente línea antes de la línea include /etc/nginx/conf.d/*.conf;.
server_names_hash_bucket_size 64;
Guarda el archivo pulsando Ctrl + X e introduciendo Y cuando se te solicite.
Crea y abre el archivo /etc/nginx/conf.d/synapse.conf para editarlo.
$ sudo nano /etc/nginx/conf.d/synapse.conf
Pega en él el siguiente código.
# enforce HTTPS
server {
    # Client port
    listen 80;
    listen [::]:80;
    server_name matrix.example.com;
    return 301 https://$host$request_uri;
}

server {
    server_name matrix.example.com;

    # Client port
    listen 443 ssl;
    listen [::]:443 ssl;
    http2 on;

    # Federation port
    listen 8448 ssl default_server;
    listen [::]:8448 ssl default_server;

    access_log  /var/log/nginx/synapse.access.log;
    error_log   /var/log/nginx/synapse.error.log;

    # TLS configuration
    ssl_certificate /etc/letsencrypt/live/matrix.example.com/fullchain.pem;
    ssl_certificate_key /etc/letsencrypt/live/matrix.example.com/privkey.pem;
    ssl_trusted_certificate /etc/letsencrypt/live/matrix.example.com/chain.pem;
    ssl_session_timeout 1d;
    ssl_session_cache shared:MozSSL:10m;
    ssl_session_tickets off;
    ssl_prefer_server_ciphers on;
    ssl_stapling on;
    ssl_stapling_verify on;
    ssl_dhparam /etc/ssl/certs/dhparam.pem;
    resolver 1.1.1.1 1.0.0.1 [2606:4700:4700::1111] [2606:4700:4700::1001] 8.8.8.8 8.8.4.4 [2001:4860:4860::8888] [2001:4860:4860::8844] valid=60s;
    resolver_timeout 2s;

    ssl_protocols TLSv1.2 TLSv1.3;
    ssl_ciphers ECDHE-ECDSA-AES128-GCM-SHA256:ECDHE-RSA-AES128-GCM-SHA256:ECDHE-ECDSA-AES256-GCM-SHA384:ECDHE-RSA-AES256-GCM-SHA384:ECDHE-ECDSA-CHACHA20-POLY1305:ECDHE-RSA-CHACHA20-POLY1305:DHE-RSA-AES128-GCM-SHA256:DHE-RSA-AES256-GCM-SHA384;

    tcp_nopush on;
    gzip on;

    location ~ ^(/_matrix|/_synapse/client) {
            proxy_pass http://localhost:8008;
            proxy_http_version 1.1;

            proxy_set_header X-Forwarded-For $remote_addr;
            proxy_set_header X-Forwarded-Proto $scheme;
            proxy_set_header Host $host;

            # Nginx by default only allows file uploads up to 1M in size
            # Increase client_max_body_size to match max_upload_size defined in homeserver.yaml
            client_max_body_size 50M;
    }
}
Guarda el archivo pulsando Ctrl + X e introduciendo Y cuando se te solicite una vez hayas terminado. La configuración anterior funciona suponiendo que la dirección IP de los dominios example.com y matrix.example.com apuntan al mismo servidor. Si no es así, utiliza el siguiente archivo de configuración para el servidor example.com.
server {
    server_name example.com;

    listen 443 ssl http2;
    listen [::]:443 ssl http2;

    # TLS configuration
    ssl_certificate /etc/letsencrypt/live/matrix.example.com/fullchain.pem;
    ssl_certificate_key /etc/letsencrypt/live/matrix.example.com/privkey.pem;
    ssl_trusted_certificate /etc/letsencrypt/live/matrix.example.com/chain.pem;
    ssl_session_timeout 1d;
    ssl_session_cache shared:MozSSL:10m;
    ssl_session_tickets off;
    ssl_prefer_server_ciphers on;
    ssl_stapling on;
    ssl_stapling_verify on;
    ssl_dhparam /etc/ssl/certs/dhparam.pem;
    resolver 1.1.1.1 1.0.0.1 [2606:4700:4700::1111] [2606:4700:4700::1001] 8.8.8.8 8.8.4.4 [2001:4860:4860::8888] [2001:4860:4860::8844] valid=60s;
    resolver_timeout 2s;

    ssl_protocols TLSv1.2 TLSv1.3;
    ssl_ciphers ECDHE-ECDSA-AES128-GCM-SHA256:ECDHE-RSA-AES128-GCM-SHA256:ECDHE-ECDSA-AES256-GCM-SHA384:ECDHE-RSA-AES256-GCM-SHA384:ECDHE-ECDSA-CHACHA20-POLY1305:ECDHE-RSA-CHACHA20-POLY1305:DHE-RSA-AES128-GCM-SHA256:DHE-RSA-AES256-GCM-SHA384;

    # Redirect
    location ~ ^(/_matrix|/_synapse/client) {
            return 301 "https://matrix.example.com$request_uri";
    }

    # Client homeserver autodiscovery
    location /.well-known/matrix/client {
        default_type application/json;
        add_header Access-Control-Allow-Origin *;

        return 200 '{ "m.homeserver": { "base_url": "https://matrix.example.com" } }';
    }

    # Domain delegation
    location /.well-known/matrix/server {
        default_type application/json;
        add_header Access-Control-Allow-Origin *;

        return 200 '{ "m.server": "matrix.example.com" }';
    }
}
Comprueba la sintaxis del archivo de configuración de Nginx.
$ sudo nginx -t
nginx: the configuration file /etc/nginx/nginx.conf syntax is ok
nginx: configuration file /etc/nginx/nginx.conf test is successful
Reinicia el servicio Nginx.
$ sudo systemctl restart nginx
Paso 10 – Instalar Coturn
Necesitarás instalar un servidor Traversal Using Relays around the NAT (TURN) para habilitar las llamadas de voz y vídeo. Para ello, instalaremos el paquete Coturn. Si no necesitas esta funcionalidad, puedes saltarte este paso.
Instala Coturn.
$ sudo dnf install coturn
Abre los puertos TURN y UDP.
$ sudo firewall-cmd --zone=public --add-port=3478/{tcp,udp}
$ sudo firewall-cmd --zone=public --add-port=5349/{tcp,udp}
$ sudo firewall-cmd --zone=public --add-port=49152-65535/udp
$ sudo firewall-cmd --runtime-to-permanent
$ sudo firewall-cmd --reload
Genera un certificado SSL para Turn (coturn.example.com).
$ sudo certbot certonly --nginx --agree-tos --no-eff-email --staple-ocsp --preferred-challenges http -m [email protected] -d coturn.example.com
Genera un secreto de autenticación para Coturn.
$ echo "static-auth-secret=$(cat /dev/urandom | tr -cd '[:alnum:]' | fold -w 256 | head -n 1)"
static-auth-secret=u3ksgJ9X876sFMO00A8KabXwZvzVwCmV30wWvZ7DzGiepRwNRYSCTYzf2E8olNzdDHu7oO3XpT3l5bv5mVdhXEQ3pnoTWBquSVPFFBJtyD6y9gBxiMaD2TYTD2WohQLE9s7OKJVpkDeKTnZQnkmjrFadE3M9DRxPL1W5Lgdg6XLLKABgb5XGkutRgkJOV0JRH4sBYsot63fWq9mcGTm6nAMdIycvDVDOs7vhoeqRzcTbMF0wsfAHVJNhXpGGFDyZ
Abre el archivo de configuración para editarlo.
$ sudo nano /etc/coturn/turnserver.conf
Revisaremos el archivo y activaremos las opciones que necesitemos. En primer lugar, activa el método de autenticación descomentando la línea use-auth-secret.
# Be aware that use-auth-secret overrides some parts of lt-cred-mech.
# The use-auth-secret feature depends internally on lt-cred-mech, so if you set
# this option then it automatically enables lt-cred-mech internally
# as if you had enabled both.
#
# Note that you can use only one auth mechanism at the same time! This is because,
# both mechanisms conduct username and password validation in different ways.
#
# Use either lt-cred-mech or use-auth-secret in the conf
# to avoid any confusion.
#
use-auth-secret
A continuación, configuraremos la variable static-auth-secret con el valor que hemos creado anteriormente. También necesitaremos este secreto para configurar Synapse más adelante.
# 'Static' authentication secret value (a string) for TURN REST API only.
# If not set, then the turn server
# will try to use the 'dynamic' value in the turn_secret table
# in the user database (if present). The database-stored  value can be changed on-the-fly
# by a separate program, so this is why that mode is considered 'dynamic'.
#
static-auth-secret=u3ksgJ9X876sFMO00A8KabXwZvzVwCmV30wWvZ7DzGiepRwNRYSCTYzf2E8olNzdDHu7oO3XpT3l5bv5mVdhXEQ3pnoTWBquSVPFFBJtyD6y9gBxiMaD2TYTD2WohQLE9s7OKJVpkDeKTnZQnkmjrFadE3M9DRxPL1W5Lgdg6XLLKABgb5XGkutRgkJOV0JRH4sBYsot63fWq9mcGTm6nAMdIycvDVDOs7vhoeqRzcTbMF0wsfAHVJNhXpGGFDyZ
El siguiente valor que tenemos que cambiar es realm. Hace referencia al dominio que elegimos para Coturn.
# The default realm to be used for the users when no explicit
# origin/realm relationship is found in the database, or if the TURN
# server is not using any database (just the commands-line settings
# and the userdb file). Must be used with long-term credentials
# mechanism or with TURN REST API.
#
# Note: If the default realm is not specified, then realm falls back to the host domain name.
#       If the domain name string is empty, or set to '(None)', then it is initialized as an empty string.
#
realm=coturn.example.com
A continuación, define el número de sesiones y de sesiones por usuario. Elige un valor que funcione para tu servidor.
# Per-user allocation quota.
# default value is 0 (no quota, unlimited number of sessions per user).
# This option can also be set through the database, for a particular realm.
#
user-quota=12

# Total allocation quota.
# default value is 0 (no quota).
# This option can also be set through the database, for a particular realm.
#
total-quota=1200
A continuación, tenemos que desactivar TCP, ya que VOIP es UDP.
# Uncomment if no TCP relay endpoints are allowed.
# By default TCP relay endpoints are enabled (like in RFC 6062).
#
no-tcp-relay
También tenemos que configurar la ubicación de los certificados que creamos para Coturn.
# Certificate file.
# Use an absolute path or path relative to the
# configuration file.
# Use PEM file format.
#
cert=/etc/letsencrypt/live/coturn.example.com/fullchain.pem

# Private key file.
# Use an absolute path or path relative to the
# configuration file.
# Use PEM file format.
#
pkey=/etc/letsencrypt/live/coturn.example.com/privkey.pem
A continuación, tenemos que deshabilitar el tráfico a rangos de IP privadas y no permitir pares en direcciones multidifusión para mejorar la seguridad.
# Flag that can be used to disallow peers on well-known broadcast addresses (224.0.0.0 and above, and FFXX:*).
# This is an extra security measure.
#
no-multicast-peers

...............

# Option to allow or ban specific ip addresses or ranges of ip addresses.
# If an ip address is specified as both allowed and denied, then the ip address is
# considered to be allowed. This is useful when you wish to ban a range of ip
# addresses, except for a few specific ips within that range.
#
# This can be used when you do not want users of the turn server to be able to access
# machines reachable by the turn server, but would otherwise be unreachable from the
# internet (e.g. when the turn server is sitting behind a NAT)
#
# Examples:
# denied-peer-ip=83.166.64.0-83.166.95.255
# allowed-peer-ip=83.166.68.45
denied-peer-ip=0.0.0.0-0.255.255.255
denied-peer-ip=10.0.0.0-10.255.255.255
denied-peer-ip=100.64.0.0-100.127.255.255
denied-peer-ip=127.0.0.0-127.255.255.255
denied-peer-ip=169.254.0.0-169.254.255.255
denied-peer-ip=172.16.0.0-172.31.255.255
denied-peer-ip=192.0.0.0-192.0.0.255
denied-peer-ip=192.0.2.0-192.0.2.255
denied-peer-ip=192.88.99.0-192.88.99.255
denied-peer-ip=192.168.0.0-192.168.255.255
denied-peer-ip=198.18.0.0-198.19.255.255
denied-peer-ip=198.51.100.0-198.51.100.255
denied-peer-ip=203.0.113.0-203.0.113.255
denied-peer-ip=240.0.0.0-255.255.255.255
denied-peer-ip=::1
denied-peer-ip=64:ff9b::-64:ff9b::ffff:ffff
denied-peer-ip=::ffff:0.0.0.0-::ffff:255.255.255.255
denied-peer-ip=100::-100::ffff:ffff:ffff:ffff
denied-peer-ip=2001::-2001:1ff:ffff:ffff:ffff:ffff:ffff:ffff
denied-peer-ip=2002::-2002:ffff:ffff:ffff:ffff:ffff:ffff:ffff
denied-peer-ip=fc00::-fdff:ffff:ffff:ffff:ffff:ffff:ffff:ffff
denied-peer-ip=fe80::-febf:ffff:ffff:ffff:ffff:ffff:ffff:ffff
Cuando hayas terminado, guarda el archivo pulsando Ctrl + X e introduciendo Y cuando se te solicite.
Reinicia Coturn para aplicar la configuración.
$ sudo systemctl restart coturn
Abre el archivo de configuración de Synapse (homeserver.yaml) para añadir la configuración de Coturn.
$ nano ~/synapse/homeserver.yaml
Pega en él las siguientes líneas. Sustituye el valor de turn_shared_secret por el valor de static-auth-secret del archivo \etc\coturn\turnserver.conf.
turn_uris: [ "turn:coturn.example.com?transport=udp", "turn:coturn.example.com?transport=tcp" ]
turn_shared_secret: 'static-auth-secret'
turn_user_lifetime: 86400000
turn_allow_guests: True

# vim:ft=yaml
Guarda el archivo pulsando Ctrl + X e introduciendo Y cuando se te pida.
Reinicia Synapse para aplicar los cambios.
$ sudo systemctl restart matrix-synapse
Paso 11 – Acceder a Matrix
Puedes acceder al Chat de Matrix utilizando el cliente web de Element en https://app.element.io. Haz clic en el botón Iniciar sesión para continuar.
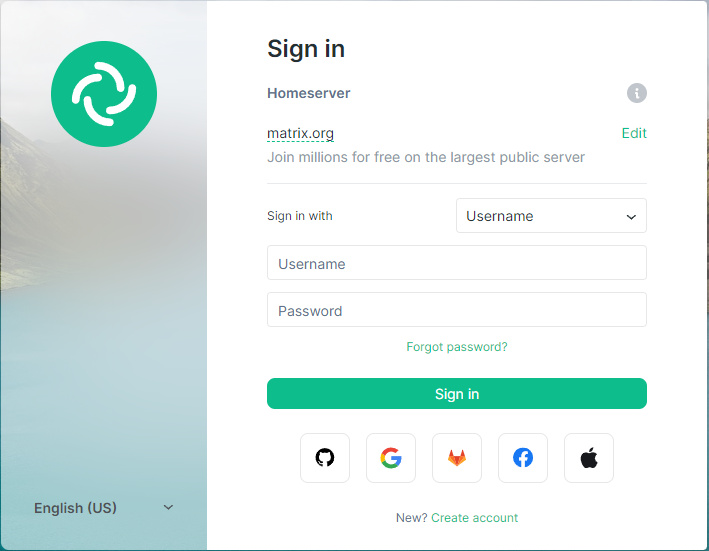
Haz clic en el enlace Editar bajo Servidor doméstico. Introduce matrix.example.com como tu servidor doméstico.
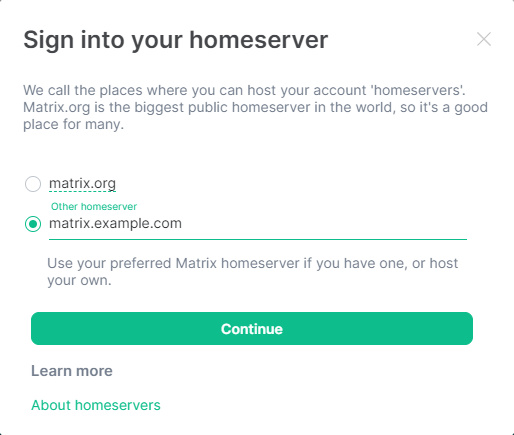
Si el cliente detecta correctamente tu servidor doméstico, el límite y el texto se volverán de color verde, de lo contrario se mostrarán en rojo. Haz clic en Continuar para proseguir.

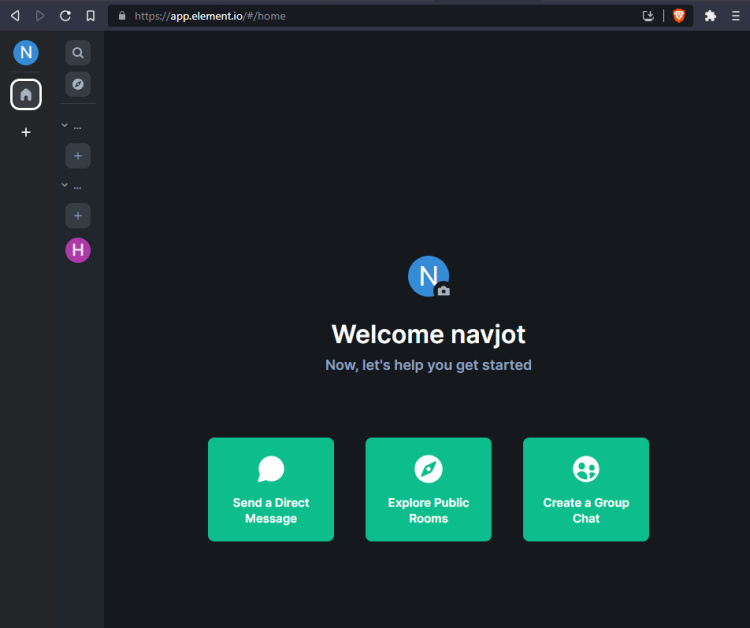
Introduce el nombre de usuario y la contraseña que creaste en el paso 8 al configurar Synapse. Haz clic en el botón Iniciar sesión para acceder. Se te pedirá que crees una copia de seguridad segura y encriptada.
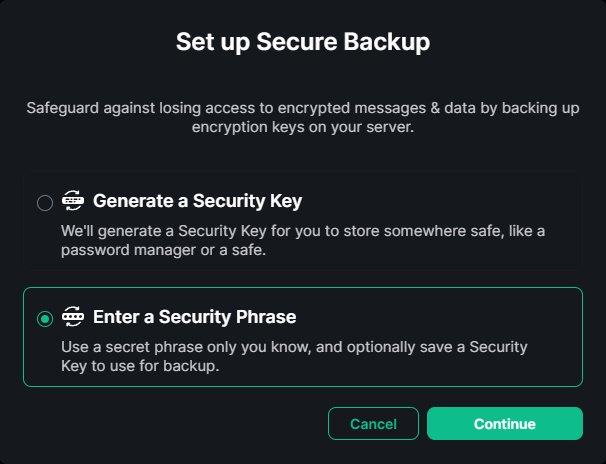
Selecciona la opción Introducir una frase de seguridad para crear una frase de seguridad que se te pedirá cada vez que inicies sesión. Haz clic en Continuar para proseguir.
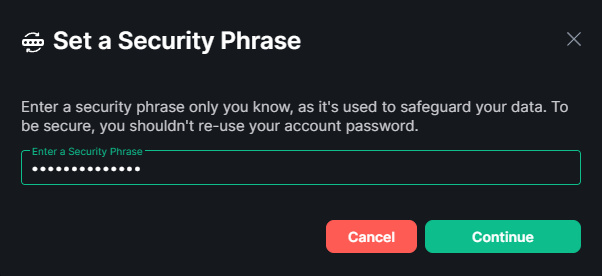
Introduce una frase de seguridad y haz clic en el botón Continuar para proseguir. Se te pedirá que la confirmes de nuevo en la siguiente pantalla.
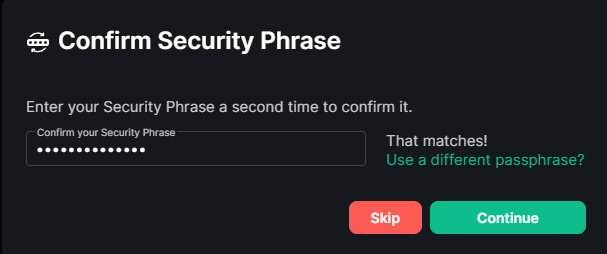
Introduce de nuevo la frase y haz clic en Continuar para proseguir.
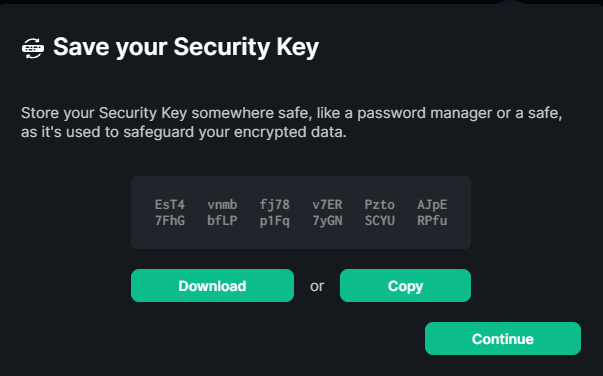
Se te proporcionará un conjunto de claves de seguridad que puedes utilizar si olvidas tu frase de seguridad. Haz clic en el botón Descargar para guardarlas.
Pulsa el botón Continuar para continuar.
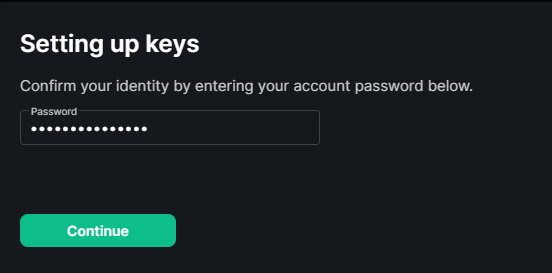
Se te pedirá la contraseña de tu cuenta. Introduce la contraseña y haz clic en el botón Continuar para terminar de configurar la copia de seguridad encriptada.
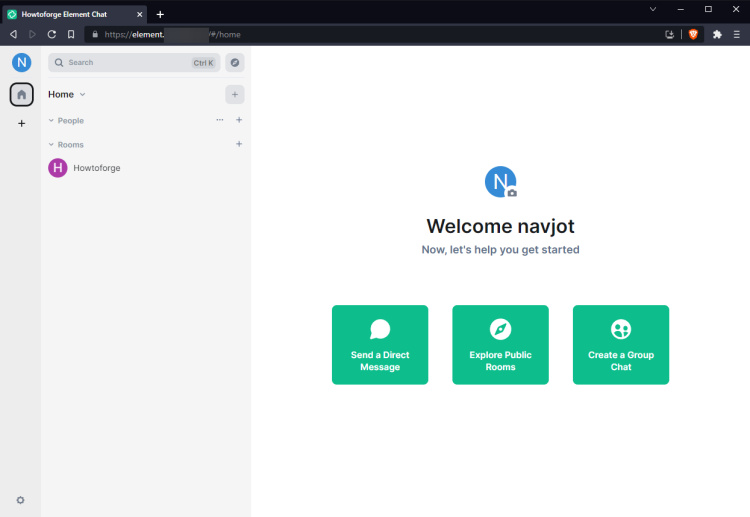
Creamos una sala de chat de grupo llamada HowtoForge utilizando el botón Crear un chat de grupo de la página principal. Aparecerá la siguiente ventana emergente cuando hagas clic en el botón.
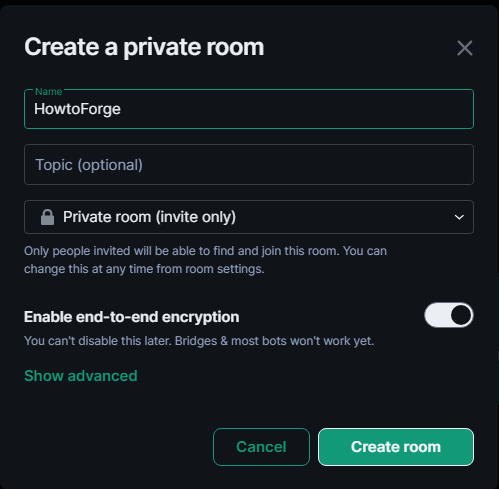
Puedes restringir los miembros al dominio expandiendo el menú avanzado y seleccionando la opción. Termina de crear la sala haciendo clic en el botón Crear sala.
Paso 12 – Instalar Element
Crea un directorio para Element.
$ sudo mkdir -p /var/www/html/element
Crea un nuevo archivo para coger la última versión de Element.
$ sudo nano /var/www/html/element/update.sh
Añádele las siguientes líneas.
#!/bin/sh
set -e

install_location="/var/www/html/element"
latest="$(curl -I https://github.com/element-hq/element-web/releases/latest | awk -F '/' '/^location/ {print  substr($NF, 1, length($NF)-1)}')"

cd "$install_location"

[ ! -d "archive" ] && mkdir -p "archive"
[ -d "archive/element-${latest}" ] && rm -r "archive/element-${latest}"
[ -f "archive/element-${latest}.tar.gz" ] && rm "archive/element-${latest}.tar.gz"

wget "https://github.com/element-hq/element-web/releases/download/${latest}/element-${latest}.tar.gz" -P "archive"
tar xf "archive/element-${latest}.tar.gz" -C "archive"

[ -L "${install_location}/current" ] && rm "${install_location}/current"
ln -sf "${install_location}/archive/element-${latest}" "${install_location}/current"
ln -sf "${install_location}/config.json" "${install_location}/current/config.json"
Guarda el archivo pulsando Ctrl + X e introduciendo Y cuando se te pida.
Haz que el archivo sea ejecutable.
$ sudo chmod +x /var/www/html/element/update.sh
Ejecuta el script para descargar Element.
$ sudo /var/www/html/element/update.sh
Paso 13 – Configurar Element
Copia el mismo archivo de configuración de Element.
$ sudo cp /var/www/html/element/current/config.sample.json /var/www/html/element/config.json
Abre el archivo de configuración para editarlo.
$ sudo nano /var/www/html/element/config.json
Busca las siguientes líneas.
"m.homeserver": {
    "base_url": "https://matrix-client.matrix.org",
    "server_name": "matrix.org"
},
Cambia la dirección por defecto del servidor doméstico de Matrix por la de tu servidor doméstico y elimina la variable server_name.
"m.homeserver": {
    "base_url": "https://matrix.example.com",
    "server_name": "example.com"
},
Si quieres utilizar tu nombre en lugar de Element en el título del sitio web, cambia el nombre de la marca.
"brand": "HowtoForge Example Chat",
Establece la variable disable_guests como verdadera para no permitir que los invitados utilicen Element.
"disable_guests": true,
Guarda el archivo pulsando Ctrl + X e introduciendo Y cuando se te solicite.
Genera un certificado SSL para el cliente Element.
$ sudo certbot certonly --nginx --agree-tos --no-eff-email --staple-ocsp --preferred-challenges http -m [email protected] -d element.example.com
Crea y abre el archivo /etc/nginx/conf.d/element.conf para editarlo.
$ sudo nano /etc/nginx/conf.d/element.conf
Pega en él las siguientes líneas.
server {
    listen 80;
    listen [::]:80;
    server_name element.example.com;
    return 301 https://$host$request_uri;
}

server {
    listen 443 ssl;
    listen [::]:443 ssl;
    http2 on;

    server_name element.example.com;

    root /var/www/html/element/current;
    index index.html;

    access_log  /var/log/nginx/element.access.log;
    error_log   /var/log/nginx/element.error.log;

    add_header Referrer-Policy "strict-origin" always;
    add_header X-Content-Type-Options "nosniff" always;
    add_header X-Frame-Options "SAMEORIGIN" always;

    # TLS configuration
    ssl_certificate /etc/letsencrypt/live/element.example.com/fullchain.pem;
    ssl_certificate_key /etc/letsencrypt/live/element.example.com/privkey.pem;
    ssl_trusted_certificate /etc/letsencrypt/live/element.example.com/chain.pem;
    ssl_session_timeout 1d;
    ssl_session_cache shared:MozSSL:10m;
    ssl_session_tickets off;
    ssl_prefer_server_ciphers on;
    ssl_stapling on;
    ssl_stapling_verify on;
    ssl_dhparam /etc/ssl/certs/dhparam.pem;
    resolver 1.1.1.1 1.0.0.1 [2606:4700:4700::1111] [2606:4700:4700::1001] 8.8.8.8 8.8.4.4 [2001:4860:4860::8888] [2001:4860:4860::8844] valid=60s;
    resolver_timeout 2s;

    ssl_protocols TLSv1.2 TLSv1.3;
    ssl_ciphers ECDHE-ECDSA-AES128-GCM-SHA256:ECDHE-RSA-AES128-GCM-SHA256:ECDHE-ECDSA-AES256-GCM-SHA384:ECDHE-RSA-AES256-GCM-SHA384:ECDHE-ECDSA-CHACHA20-POLY1305:ECDHE-RSA-CHACHA20-POLY1305:DHE-RSA-AES128-GCM-SHA256:DHE-RSA-AES256-GCM-SHA384;
}
Guarda el archivo pulsando Ctrl + X e introduciendo Y cuando se te solicite.
Comprueba la sintaxis del archivo de configuración de Nginx.
$ sudo nginx -t
nginx: the configuration file /etc/nginx/nginx.conf syntax is ok
nginx: configuration file /etc/nginx/nginx.conf test is successful
Reinicia el servicio Nginx.
$ sudo systemctl restart nginx
Necesitamos configurar los ajustes de SELinux antes de acceder a Element. Ejecuta los siguientes comandos para permitir la ejecución de Element.
$ sudo semanage fcontext -a -t httpd_sys_rw_content_t "/var/www/html/element(/.*)?"
$ sudo restorecon -Rv /var/www/html/element/
Puedes acceder al cliente Element a través de la URL https://element.example.com de tu navegador. Inicia sesión y accederás al panel de control de la aplicación. Primero se te pedirá que verifiques la aplicación con https://app.element.io, asegúrate de que has iniciado sesión en la aplicación Element original y se te pedirá que hagas coincidir los caracteres emoji. Una vez verificada, obtendrás el siguiente panel de control.
Conclusión
Con esto concluye nuestro tutorial sobre la instalación del servidor Matrix Synapse Chat junto con Coturn y el cliente web Element utilizando Nginx como servidor proxy en una máquina Debian 12. Si tienes alguna pregunta, publícala en los comentarios a continuación.