Cómo instalar WonderCMS con Apache y Let’s Encrypt SSL en CentOS 8
WonderCMS es un sistema de gestión de contenidos gratuito, de código abierto, sencillo y ligero para construir sitios web y blogs sencillos. Es un CMS de archivo plano y no requiere ninguna base de datos. El proceso de instalación es muy sencillo y no requiere ninguna configuración inicial. Ofrece un rico conjunto de características que incluyen, soporte WYSIWYG, marco CSS flexible, amigable con el SEO y muchas más.
En este tutorial, te mostraremos cómo instalar WonderCMS en CentOS 8 y asegurarlo con Let’s Encrypt SSL.
Requisitos previos
- Un servidor con CentOS 8.
- Una contraseña de root configurada en tu servidor.
Instalar Apache y PHP
Primero, instala el servidor web Apache, PHP y otras extensiones de PHP con el siguiente comando:
dnf install httpd php php-mysqlnd php-curl php-opcache php-xml php-xmlrpc php-gd php-mbstring php-zip php-json wget unzip git -y
Una vez finalizada la instalación, abre el archivo php.ini y cambia algunos valores:
nano /etc/php.ini
Cambia el valor según tus necesidades:
memory_limit = 128M
post_max_size = 32M
upload_max_filesize = 16M
max_execution_time = 300
date.timezone = Asia/Kolkata
Guarda y cierra el archivo cuando hayas terminado. A continuación, inicia el servicio Apache y reinícialo para que se inicie después de reiniciar el sistema con el siguiente comando:
systemctl start httpd
 systemctl enable httpd
Descargar WonderCMS
Primero, descarga la última versión del WonderCMS desde el repositorio Git:
cd /var/www/html
 git clone https://github.com/robiso/wondercms.git
Una vez completada la descarga, da los permisos adecuados al directorio descargado con el siguiente comando:
chown -R apache:apache /var/www/html/wondercms
 chmod -R 775 /var/www/html/wondercms
Configurar Apache para WonderCMS
Primero, crea un nuevo archivo de configuración de host virtual de Apache para WonderCMS con el siguiente comando:
nano /etc/httpd/conf.d/wondercms.conf
Añade las siguientes líneas:
<VirtualHost *:80>
  ServerName wonder.linuxbuz.com
  DirectoryIndex index.php
  DocumentRoot /var/www/html/wondercms
  Redirect /wondercms/loginURL /loginURL

  ErrorLog /var/log/httpd/linuxbuz.com-error.log
  CustomLog /var/log/httpd/linuxbuz.com-access.log combined

  <Directory /var/www/html/wondercms>
      Options FollowSymLinks
      AllowOverride All
      Require all granted
  </Directory>

</VirtualHost>
Guarda y cierra el archivo. A continuación, reinicia el servicio Apache con el siguiente comando
systemctl restart httpd
También puedes comprobar el estado del servicio Apache con el siguiente comando:
systemctl status httpd
Deberías ver la siguiente salida:
? httpd.service - The Apache HTTP Server
   Loaded: loaded (/usr/lib/systemd/system/httpd.service; disabled; vendor preset: disabled)
  Drop-In: /usr/lib/systemd/system/httpd.service.d
           ??php-fpm.conf
   Active: active (running) since Wed 2020-02-19 08:51:34 EST; 1min 25s ago
     Docs: man:httpd.service(8)
 Main PID: 4716 (httpd)
   Status: "Total requests: 6; Idle/Busy workers 100/0;Requests/sec: 0.0759; Bytes served/sec: 812 B/sec"
    Tasks: 278 (limit: 12558)
   Memory: 43.1M
   CGroup: /system.slice/httpd.service
           ??4716 /usr/sbin/httpd -DFOREGROUND
           ??4718 /usr/sbin/httpd -DFOREGROUND
           ??4719 /usr/sbin/httpd -DFOREGROUND
           ??4720 /usr/sbin/httpd -DFOREGROUND
           ??4721 /usr/sbin/httpd -DFOREGROUND
           ??4935 /usr/sbin/httpd -DFOREGROUND

Feb 19 08:51:34 centos8 systemd[1]: Starting The Apache HTTP Server...
Asegura WonderCMS con Let’s Encrypt SSL
A continuación, instala el cliente Certbot Let’s Encrypt con el siguiente comando:
wget https://dl.eff.org/certbot-auto
 mv certbot-auto /usr/local/bin/certbot-auto
 chown root /usr/local/bin/certbot-auto
 chmod 0755 /usr/local/bin/certbot-auto
Ahora, ejecuta el siguiente comando para obtener e instalar un certificado SSL para tu sitio web WonderCMS.
certbot-auto --apache -d wonder.linuxbuz.com
El comando anterior instalará primero todas las dependencias necesarias en tu servidor. Una vez instalado, se te pedirá que proporciones una dirección de correo electrónico y que aceptes las condiciones del servicio, como se muestra a continuación:
Nota: Si obtienes algún error relacionado con el certificado SSL, reinicia el servicio Apache y ejecuta de nuevo el comando anterior.
Saving debug log to /var/log/letsencrypt/letsencrypt.log
Plugins selected: Authenticator apache, Installer apache
Enter email address (used for urgent renewal and security notices) (Enter 'c' to
cancel): [email protected]

- - - - - - - - - - - - - - - - - - - - - - - - - - - - - - - - - - - - - - - -
Please read the Terms of Service at
https://letsencrypt.org/documents/LE-SA-v1.2-November-15-2017.pdf. You must
agree in order to register with the ACME server at
https://acme-v02.api.letsencrypt.org/directory
- - - - - - - - - - - - - - - - - - - - - - - - - - - - - - - - - - - - - - - -
(A)gree/(C)ancel: A

- - - - - - - - - - - - - - - - - - - - - - - - - - - - - - - - - - - - - - - -
Would you be willing to share your email address with the Electronic Frontier
Foundation, a founding partner of the Let's Encrypt project and the non-profit
organization that develops Certbot? We'd like to send you email about our work
encrypting the web, EFF news, campaigns, and ways to support digital freedom.
- - - - - - - - - - - - - - - - - - - - - - - - - - - - - - - - - - - - - - - -
(Y)es/(N)o: Y


Obtaining a new certificate
Performing the following challenges:
http-01 challenge for wonder.linuxbuz.com
Waiting for verification...
Cleaning up challenges
Deploying Certificate to VirtualHost /etc/nginx/conf.d/wondercms.conf
A continuación, deberás elegir si quieres redirigir el tráfico HTTP a HTTPS como se muestra a continuación:
Please choose whether or not to redirect HTTP traffic to HTTPS, removing HTTP access.
- - - - - - - - - - - - - - - - - - - - - - - - - - - - - - - - - - - - - - - -
1: No redirect - Make no further changes to the webserver configuration.
2: Redirect - Make all requests redirect to secure HTTPS access. Choose this for
new sites, or if you're confident your site works on HTTPS. You can undo this
change by editing your web server's configuration.
- - - - - - - - - - - - - - - - - - - - - - - - - - - - - - - - - - - - - - - -
Select the appropriate number [1-2] then [enter] (press 'c' to cancel): 2
Escribe 2 y pulsa Enter para continuar. Una vez terminada la instalación, deberías ver la siguiente salida:
Redirecting all traffic on port 80 to ssl in /etc/nginx/conf.d/wondercms.conf

- - - - - - - - - - - - - - - - - - - - - - - - - - - - - - - - - - - - - - - -
Congratulations! You have successfully enabled https://wonder.linuxbuz.com

You should test your configuration at:
https://www.ssllabs.com/ssltest/analyze.html?d=wonder.linuxbuz.com
- - - - - - - - - - - - - - - - - - - - - - - - - - - - - - - - - - - - - - - -

IMPORTANT NOTES:
 - Congratulations! Your certificate and chain have been saved at:
   /etc/letsencrypt/live/wonder.linuxbuz.com/fullchain.pem
   Your key file has been saved at:
   /etc/letsencrypt/live/wonder.linuxbuz.com/privkey.pem
   Your cert will expire on 2020-03-23. To obtain a new or tweaked
   version of this certificate in the future, simply run certbot-auto
   again with the "certonly" option. To non-interactively renew *all*
   of your certificates, run "certbot-auto renew"
 - If you like Certbot, please consider supporting our work by:

   Donating to ISRG / Let's Encrypt:   https://letsencrypt.org/donate
   Donating to EFF:                    https://eff.org/donate-le
Configurar el cortafuegos y SELinux
A continuación, tendrás que crear una regla de cortafuegos para permitir el servicio HTTP y HTTPS desde redes externas. Puedes permitirlo con el siguiente comando:
firewall-cmd --permanent --add-service=http
firewall-cmd --permanent --add-service=https
 firewall-cmd --reload
A continuación, tendrás que configurar SELinux para WonderCMS. Puedes configurar SELinux con el siguiente comando:
setsebool httpd_can_network_connect on -P
 chcon -R -u system_u -t httpd_sys_rw_content_t -r object_r /var/www/html/wondercms
Por último, reinicia el servicio Apache para aplicar los cambios:
systemctl restart httpd
Accede a WonderCMS
Ahora, abre tu navegador web y escribe la URL https://wonder.linuxbuz.com. Serás redirigido a la página de inicio de WonderCMS:
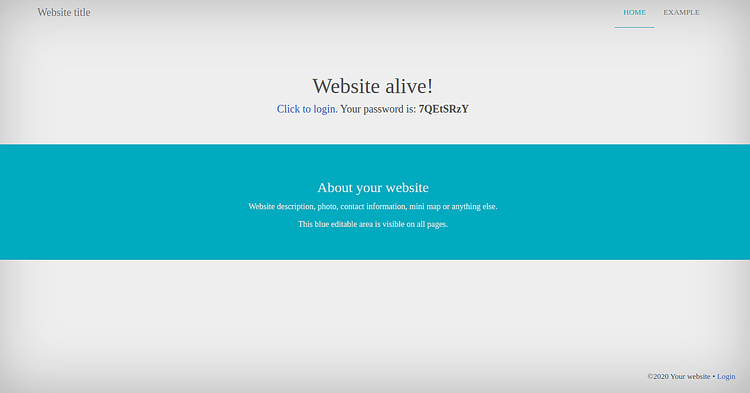
Ahora, copia la contraseña de la página anterior y haz clic en el botón«Click to login «. Deberías ver la siguiente página:
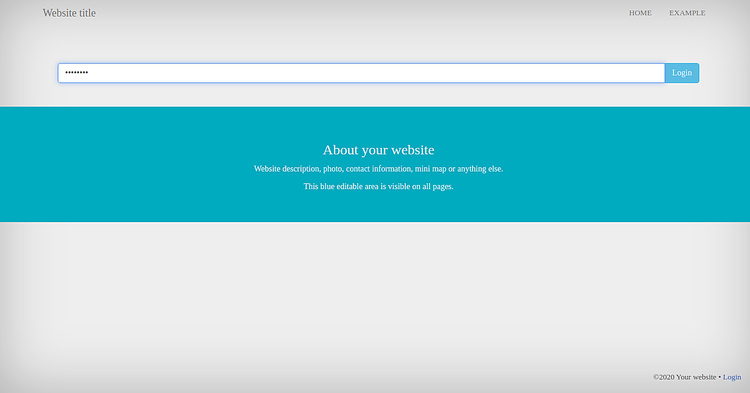
Pega la contraseña y haz clic en el botón Iniciar sesión. Deberías ver la siguiente página:
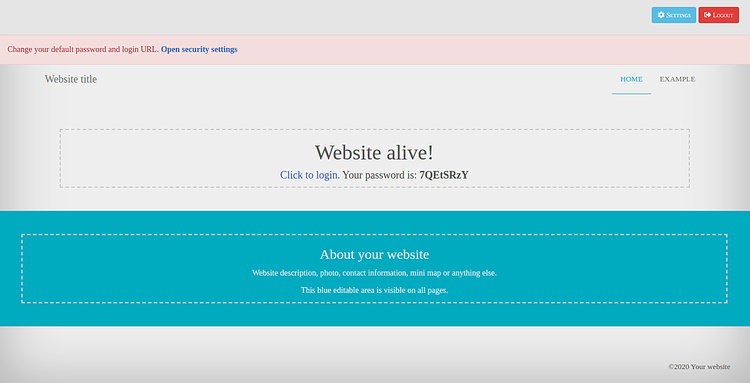
A continuación, haz clic en Configuración => Seguridad. Deberías ver la siguiente página:
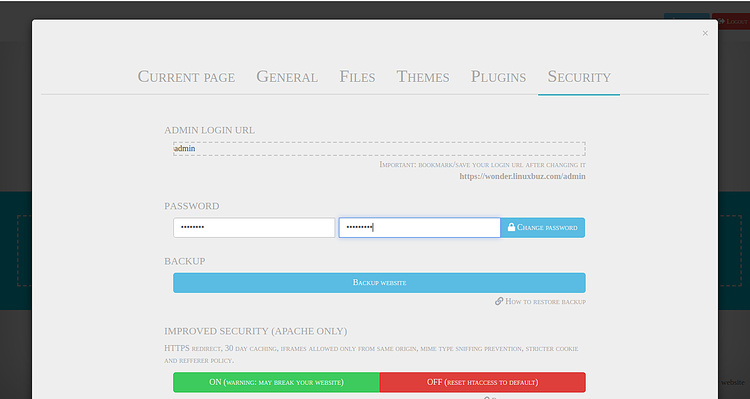
Cambia la URL de acceso, la contraseña y haz clic en el botón CAMBIAR CONTRASEÑA.
Conclusión
Enhorabuena! has instalado y asegurado con éxito WonderCMS en CentOS 8 con Let’s Encrypt SSL. Ahora puedes alojar tu propio blog y sitio web fácilmente usando WonderCMS.