Cómo instalar Webmin con Let’s Encrypt SSL gratuito en Rocky Linux 8
Webmin es una herramienta de administración y gestión de Linux gratuita, de código abierto y basada en la web, que te permite configurar el sistema Linux a través de un navegador web. Está escrito en Perl y proporciona una interfaz web fácil de usar con monitorización en tiempo real de la CPU y la RAM. Con Webmin, puedes realizar varias tareas administrativas, como la gestión de cuentas de usuario, la gestión de paquetes, la gestión del cortafuegos, la creación de trabajos cron, etc.
En este tutorial, te mostraré cómo instalar Webmin con Nginx y Let’s Encrypt SSL en Rocky Linux 8.
Requisitos previos
- Un servidor con Rocky Linux 8.
- Un nombre de dominio válido apuntado con la IP del servidor.
- Una contraseña de root configurada en el servidor.
Instalar Webmin
Webmin está escrito en lenguaje Perl, por lo que necesitarás instalar Perl en tu sistema. Ejecuta el siguiente comando para instalar Perl:
dnf install perl -y
A continuación, descarga la última versión del tarball de Webmin con el siguiente comando:
wget https://www.webmin.com/download/webmin-current.tar.gz
Una vez descargado el Webmin, extrae el archivo descargado con el siguiente comando:
tar xvf webmin-current.tar.gz
A continuación, crea un directorio de instalación de Webmin y ejecuta el siguiente script para instalar el Webmin:
mkdir -p /usr/local/webmin
./webmin-1.984/setup.sh /usr/local/webmin/
Se te pedirá que proporciones la ruta del directorio de configuración, el nombre de usuario y la contraseña del administrador, como se muestra a continuación:
***********************************************************************

        Welcome to the Webmin setup script, version 1.984
***********************************************************************
Webmin is a web-based interface that allows Unix-like operating
systems and common Unix services to be easily administered.

Installing Webmin from /root/webmin-1.984 to /usr/local/webmin/ ...

***********************************************************************
Webmin uses separate directories for configuration files and log files.
Unless you want to run multiple versions of Webmin at the same time
you can just accept the defaults.

Config file directory [/etc/webmin]:
Log file directory [/var/webmin]:

***********************************************************************
Webmin is written entirely in Perl. Please enter the full path to the
Perl 5 interpreter on your system.

Full path to perl (default /usr/bin/perl):

Testing Perl ...
Perl seems to be installed ok

***********************************************************************
Operating system name:    Rocky Linux
Operating system version: 8.5

***********************************************************************
Webmin uses its own password protected web server to provide access
to the administration programs. The setup script needs to know :
 - What port to run the web server on. There must not be another
   web server already using this port.
 - The login name required to access the web server.
 - The password required to access the web server.
 - If the webserver should use SSL (if your system supports it).
 - Whether to start webmin at boot time.

Web server port (default 10000):
Login name (default admin): admin
Login password:
Password again:
Use SSL (y/n): n
Start Webmin at boot time (y/n): y
***********************************************************************
***********************************************************************
Webmin has been installed and started successfully. Use your web
browser to go to

  http://rockylinux:10000/

and login with the name and password you entered previously.
Por defecto, Webmin escucha en el puerto 10000. Puedes comprobarlo con el siguiente comando:
ss -antpl | grep 10000
Obtendrás la siguiente salida:
LISTEN 0 128 0.0.0.0:10000 0.0.0.0:* users:(("miniserv.pl",pid=6601,fd=7))
Configurar Nginx como proxy inverso para Webmin
Es una buena idea utilizar Nginx como proxy inverso para Webmin. En primer lugar, instala el paquete Nginx con el siguiente comando:
dnf install nginx -y
A continuación, crea un archivo de configuración del host virtual Nginx con el siguiente comando:
nano /etc/nginx/conf.d/webmin.conf
Añade las siguientes líneas:
server {
       listen 80;
       server_name webmin.linuxbuz.com;

       access_log /var/log/nginx/webmin.access;
       error_log /var/log/nginx/webmin.error;

       location / {
              proxy_pass http://127.0.0.1:10000;
              #proxy_set_header Host $http_host;
              proxy_set_header X-Real-IP $remote_addr;
              proxy_set_header X-Forwarded-For $proxy_add_x_forwarded_for;
              proxy_set_header X-Forwarded-Proto $scheme;
        }
}
Guarda y cierra el archivo y luego verifica que Nginx no tenga ningún error de sintaxis:
nginx -t
Obtendrás la siguiente salida:
nginx: the configuration file /etc/nginx/nginx.conf syntax is ok
nginx: configuration file /etc/nginx/nginx.conf test is successful
A continuación, inicia el servicio Nginx y habilítalo para que se inicie al reiniciar el sistema:
systemctl start nginx
systemctl enable nginx
Puedes comprobar el estado del Webmin con el siguiente comando:
systemctl status nginx
Deberías ver la siguiente salida:
? nginx.service - The nginx HTTP and reverse proxy server
   Loaded: loaded (/usr/lib/systemd/system/nginx.service; disabled; vendor preset: disabled)
   Active: active (running) since Sat 2022-02-12 08:20:04 UTC; 17s ago
  Process: 7051 ExecStart=/usr/sbin/nginx (code=exited, status=0/SUCCESS)
  Process: 7050 ExecStartPre=/usr/sbin/nginx -t (code=exited, status=0/SUCCESS)
  Process: 7048 ExecStartPre=/usr/bin/rm -f /run/nginx.pid (code=exited, status=0/SUCCESS)
 Main PID: 7053 (nginx)
    Tasks: 2 (limit: 11412)
   Memory: 3.7M
   CGroup: /system.slice/nginx.service
           ??7053 nginx: master process /usr/sbin/nginx
           ??7054 nginx: worker process

Feb 12 08:20:03 rockylinux systemd[1]: Starting The nginx HTTP and reverse proxy server...
Feb 12 08:20:04 rockylinux nginx[7050]: nginx: the configuration file /etc/nginx/nginx.conf syntax is ok
Feb 12 08:20:04 rockylinux nginx[7050]: nginx: configuration file /etc/nginx/nginx.conf test is successful
Feb 12 08:20:04 rockylinux systemd[1]: nginx.service: Failed to parse PID from file /run/nginx.pid: Invalid argument
Feb 12 08:20:04 rockylinux systemd[1]: Started The nginx HTTP and reverse proxy server.
Habilitar SSL en Webmin
Se recomienda asegurar el Webmin con Let’s Encrypt SSL. En primer lugar, tendrás que instalar el cliente Certbot para gestionar el SSL de Let’s Encrypt. Puedes instalarlo con el siguiente comando:
dnf install epel-release -y
dnf install python3-certbot-nginx -y
A continuación, ejecuta el comando certbot para descargar e instalar Let’s Encrypt SSL en el dominio de Webmin.
certbot --nginx -d webmin.linuxbuz.com
Se te pedirá que proporciones tu dirección de correo electrónico válida y que aceptes las condiciones del servicio:
Saving debug log to /var/log/letsencrypt/letsencrypt.log
Enter email address (used for urgent renewal and security notices)
 (Enter 'c' to cancel): [email protected]

- - - - - - - - - - - - - - - - - - - - - - - - - - - - - - - - - - - - - - - -
Please read the Terms of Service at
https://letsencrypt.org/documents/LE-SA-v1.2-November-15-2017.pdf. You must
agree in order to register with the ACME server. Do you agree?
- - - - - - - - - - - - - - - - - - - - - - - - - - - - - - - - - - - - - - - -
(Y)es/(N)o: Y

- - - - - - - - - - - - - - - - - - - - - - - - - - - - - - - - - - - - - - - -
Would you be willing, once your first certificate is successfully issued, to
share your email address with the Electronic Frontier Foundation, a founding
partner of the Let's Encrypt project and the non-profit organization that
develops Certbot? We'd like to send you email about our work encrypting the web,
EFF news, campaigns, and ways to support digital freedom.
- - - - - - - - - - - - - - - - - - - - - - - - - - - - - - - - - - - - - - - -
(Y)es/(N)o: Y
Account registered.
Requesting a certificate for webmin.linuxbuz.com

Successfully received certificate.
Certificate is saved at: /etc/letsencrypt/live/webmin.linuxbuz.com/fullchain.pem
Key is saved at:         /etc/letsencrypt/live/webmin.linuxbuz.com/privkey.pem
This certificate expires on 2022-05-13.
These files will be updated when the certificate renews.
Certbot has set up a scheduled task to automatically renew this certificate in the background.

Deploying certificate
Successfully deployed certificate for webmin.linuxbuz.com to /etc/nginx/conf.d/webmin.conf
Congratulations! You have successfully enabled HTTPS on https://webmin.linuxbuz.com
We were unable to subscribe you the EFF mailing list because your e-mail address appears to be invalid. You can try again later by visiting https://act.eff.org.

- - - - - - - - - - - - - - - - - - - - - - - - - - - - - - - - - - - - - - - -
If you like Certbot, please consider supporting our work by:
 * Donating to ISRG / Let's Encrypt:   https://letsencrypt.org/donate
 * Donating to EFF:                    https://eff.org/donate-le
- - - - - - - - - - - - - - - - - - - - - - - - - - - - - - - - - - - - - - - -
Configurar Webmin
A continuación, deberás editar el archivo de configuración de Webmin y definir los referentes de confianza.
nano /etc/webmin/config
Añade la siguiente línea:
referers=webmin.linuxbuz.com
Guarda y cierra el archivo y luego edita el archivo miniserv.conf y desactiva el modo HTTPS en Webmin:
nano /etc/webmin/miniserv.conf
Añade las siguientes líneas:
ssl=0
allow=127.0.0.1
Guarda y cierra el archivo cuando hayas terminado.
A continuación, obtén el id del proceso de Webmin con el siguiente comando:
ps -ef | grep webmin
Obtendrás la siguiente salida:
root        6601       1  0 08:12 ?        00:00:00 /usr/bin/perl /usr/local/webmin//miniserv.pl /etc/webmin/miniserv.conf
root        7553    1117  0 08:24 pts/0    00:00:00 grep --color=auto webmin
A continuación, utiliza el comando kill para matar el proceso de Webmin.
kill -9 6601
A continuación, inicia el servicio Webmin con systemd y habilítalo para que se inicie al reiniciar el sistema:
systemctl start webmin
systemctl enable webmin
A continuación, comprueba el estado de Webmin con el siguiente comando:
systemctl status webmin
Obtendrás la siguiente salida:
? webmin.service - Webmin
   Loaded: loaded (/usr/lib/systemd/system/webmin.service; enabled; vendor preset: disabled)
   Active: active (running) since Sat 2022-02-12 08:25:05 UTC; 54s ago
  Process: 7560 ExecStart=/etc/webmin/start (code=exited, status=0/SUCCESS)
 Main PID: 7561 (miniserv.pl)
    Tasks: 1 (limit: 11412)
   Memory: 23.9M
   CGroup: /system.slice/webmin.service
           ??7561 /usr/bin/perl /usr/local/webmin//miniserv.pl /etc/webmin/miniserv.conf

Feb 12 08:25:05 rockylinux systemd[1]: Starting Webmin...
Feb 12 08:25:05 rockylinux start[7560]: Starting Webmin server in /usr/local/webmin/
Feb 12 08:25:05 rockylinux webmin[7560]: Webmin starting
Feb 12 08:25:05 rockylinux systemd[1]: webmin.service: Can't open PID file /var/webmin/miniserv.pid (yet?) after start: No such file or direc>
Feb 12 08:25:05 rockylinux systemd[1]: Started Webmin.
Configurar el cortafuegos
Si el cortafuegos firewalld está instalado en tu servidor. Entonces, tendrás que permitir los puertos 80 y 443 a través del cortafuegos. Puedes permitirlos con el siguiente comando:
firewall-cmd --add-port=80/tcp --permanent
firewall-cmd --add-port=443/tcp --permanent
Por último, recarga el servicio de cortafuegos para aplicar los cambios:
firewall-cmd --reload
Accede a la interfaz de Webmin
Ahora, abre tu navegador web y accede a la interfaz de Webmin utilizando la URL https://webmin.linuxbuz.com. Serás redirigido a la página de inicio de sesión de Webmin:
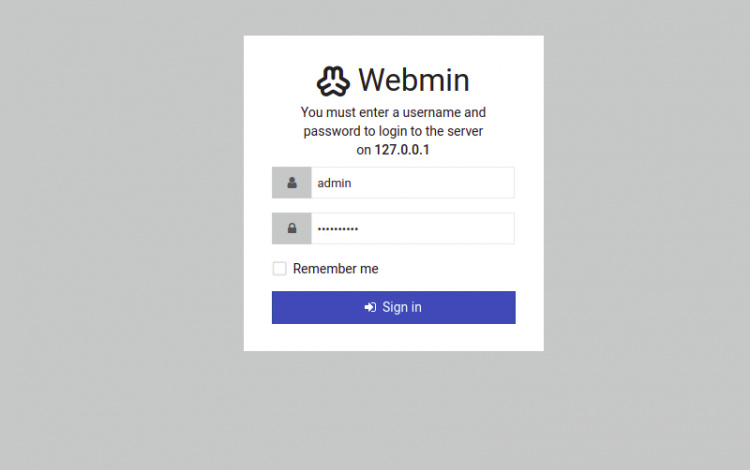
Proporciona tu nombre de usuario y contraseña de administrador, y haz clic en el botón de inicio de sesión. Deberías ver el panel de control de Webmin en la siguiente página:

Conclusión
Enhorabuena! has instalado con éxito Webmin con Nginx y Let’s Encrypt SSL en Rocky Linux 8. Ahora puedes gestionar tu sistema Linux fácilmente a través del navegador web. No dudes en preguntarme si tienes alguna duda.