Cómo instalar Lighttpd con PHP, MariaDB y Let’s Encrypt SSL en Debian 10
Lighttpd es un servidor web gratuito, de código abierto y de alta velocidad, especialmente diseñado para entornos de velocidad crítica. Requiere poca memoria en comparación con otros servidores web, como Apache y Nginx, y es especialmente rápido para ejecutar aplicaciones AJAX. Lighttpd también permite alojar aplicaciones web escritas en otro lenguaje de programación utilizando las interfaces FastCGI, SCGI y CGI. Lighttpd es la mejor opción para ti si tu servidor sufre problemas de carga.
En este tutorial, aprenderemos a instalar Lighttpd en Debian 10 con soporte para PHP-FPM y MariaDB y aseguraremos el servidor web con un certificado SSL de Let’s Encrypt.
Requisitos
- Un servidor con Debian 10.
- Una contraseña de root en tu servidor.
En este tutorial utilizaré el nombre de dominio ejemplo.com. Sustituye ejemplo.com en todos los nombres de archivo y ajustes de configuración por tu propio nombre de dominio.
Cómo empezar
Antes de empezar, tendrás que actualizar tu sistema con la última versión. Puedes hacerlo ejecutando el siguiente comando:
apt-get update -y
 apt-get upgrade -y
Una vez que tu servidor esté actualizado, reinicia tu servidor para aplicar los cambios.
Instalar Lighttpd
Por defecto, Lighttpd está disponible en el repositorio por defecto de Debian 10. Puedes instalarlo simplemente ejecutando el siguiente comando:
apt-get install lighttpd -y
Una vez terminada la instalación, inicia el servicio Lighttpd y habilítalo para que se inicie tras el reinicio del sistema con el siguiente comando:
systemctl start lighttpd
 systemctl enable lighttpd
También puedes comprobar el estado de Lighttpd con el siguiente comando:
systemctl status lighttpd
Deberías obtener la siguiente salida:
? lighttpd.service - Lighttpd Daemon
   Loaded: loaded (/lib/systemd/system/lighttpd.service; enabled; vendor preset: enabled)
   Active: active (running) since Fri 2019-09-06 02:09:35 EDT; 29s ago
 Main PID: 4445 (lighttpd)
    Tasks: 1 (limit: 1138)
   Memory: 1.4M
   CGroup: /system.slice/lighttpd.service
           ??4445 /usr/sbin/lighttpd -D -f /etc/lighttpd/lighttpd.conf

Sep 06 02:09:35 debian systemd[1]: Starting Lighttpd Daemon...
Sep 06 02:09:35 debian systemd[1]: Started Lighttpd Daemon.
Sep 06 02:09:36 debian systemd[1]: /lib/systemd/system/lighttpd.service:6: PIDFile= references path below legacy directory /var/run/, updating
lines 1-12/12 (END)
Una vez que hayas terminado, puedes pasar al siguiente paso.
Instalar el servidor MariaDB
Puedes instalar el servidor MariaDB ejecutando el siguiente comando:
apt-get install mariadb-server mariadb-client -y
Una vez instalado, tendrás que asegurar la instalación de MariaDB. Puedes asegurarla ejecutando el siguiente script:
mysql_secure_installation
Answer all the questions as shown below:
Change the root password? [Y/n] n
Remove anonymous users? [Y/n] Y
Disallow root login remotely? [Y/n] Y
Remove test database and access to it? [Y/n] Y
Reload privilege tables now? [Y/n] Y
Una vez que hayas terminado, puedes pasar al siguiente paso.
Instalar PHP y PHP-FPM
A continuación, tendrás que instalar PHP, PHP-FPM y FastCGI en tu sistema. Por defecto, Debian 10 viene con la versión 7.3 de PHP. Puedes instalarlo simplemente ejecutando el siguiente comando:
apt-get install php php-cgi php-fpm php-mysql -y
Una vez instalados todos los paquetes, tendrás que editar el archivo php.ini y establecer cgi.fix_pathinfo en 1. Puedes hacerlo con el siguiente comando:
nano /etc/php/7.3/fpm/php.ini
Cambia la siguiente línea:
cgi.fix_pathinfo=1
Guarda y cierra el archivo cuando hayas terminado.
Por defecto, PHP apunta al socket UNIX /var/run/php/php7.3-fpm.sock. Por lo tanto, tendrás que configurar el pool de PHP-FPM para establecer que PHP escuche el socket TCP.
Puedes hacerlo editando el archivo /etc/php/7.3/fpm/pool.d/www.conf:
nano /etc/php/7.3/fpm/pool.d/www.conf
Busca la siguiente línea:
listen = /run/php/php7.3-fpm.sock
Y sustitúyela por la siguiente línea:
listen = 127.0.0.1:9000
Guarda y cierra el archivo cuando hayas terminado. A continuación, reinicia el servicio PHP-FPM para aplicar los cambios de configuración:
systemctl restart php7.3-fpm
A continuación, tendrás que modificar el archivo 15-fastcgi-php.conf:
nano /etc/lighttpd/conf-available/15-fastcgi-php.conf
Busca las siguientes líneas:
"bin-path" => "/usr/bin/php-cgi",
"socket" => "/var/run/lighttpd/php.socket",
Y sustitúyelas por las siguientes:
"host" => "127.0.0.1",
"port" => "9000",
Guarda y cierra el archivo cuando hayas terminado. A continuación, activa el módulo FastCGI y FastCHI-PHP con los siguientes comandos:
lighty-enable-mod fastcgi
 lighty-enable-mod fastcgi-php
Por último, reinicia el servicio Lighttpd para aplicar los cambios:
systemctl restart lighttpd
Crear un host virtual Lighttpd
A continuación, tendrás que crear un nuevo archivo de host virtual para probar PHP con Lighttpd. Puedes crearlo con el siguiente comando:
nano /etc/lighttpd/conf-available/example.com.conf
Añade las siguientes líneas:
$HTTP["host"] == "www.example.com" {
    server.document-root = "/var/www/html/"
    server.errorlog      = "/var/log/lighttpd/example.com-error.log"
}
Guarda y cierra el archivo cuando hayas terminado. A continuación, habilita el host virtual con el siguiente comando:
ln -s /etc/lighttpd/conf-available/example.com.conf /etc/lighttpd/conf-enabled/
A continuación, crea un archivo index.php de muestra en el directorio raíz del documento Lighttpd con el siguiente comando
nano /var/www/html/index.php
Añade la siguiente línea:
<?php phpinfo(); ?>
Guarda y cierra el archivo. A continuación, cambia la propiedad del directorio raíz del documento Lighttpd a www-data con el siguiente comando
chown -R www-data:www-data /var/www/html/
Por último, reinicia el servicio Lighttpd para aplicar todos los cambios de configuración:
systemctl restart lighttpd
Asegura Lighttpd con Let’s Encrypt Free SSL
En primer lugar, tendrás que instalar la herramienta Certbot para asegurar tu servidor web con Let’s Encrypt. Por defecto, la última versión de Certbot no está disponible en el repositorio por defecto de Debian 10.
Puedes añadir el repositorio de Certbot con el siguiente comando:
apt-get install software-properties-common
 add-apt-repository ppa:certbot/certbot
A continuación, actualiza el repositorio e instala Certbot con el siguiente comando:
apt-get update -y
 apt-get install certbot -y
A continuación, crea un certificado Let’s Encrypt con el siguiente comando:
certbot certonly --webroot -w /var/www/html/ -d www.example.com
Se te pedirá que proporciones tu dirección de correo electrónico y que aceptes el plazo de la licencia, como se muestra a continuación:
Saving debug log to /var/log/letsencrypt/letsencrypt.log
Plugins selected: Authenticator webroot, Installer None
Enter email address (used for urgent renewal and security notices) (Enter 'c' to
cancel): [email protected]

- - - - - - - - - - - - - - - - - - - - - - - - - - - - - - - - - - - - - - - -
Please read the Terms of Service at
https://letsencrypt.org/documents/LE-SA-v1.2-November-15-2017.pdf. You must
agree in order to register with the ACME server at
https://acme-v02.api.letsencrypt.org/directory
- - - - - - - - - - - - - - - - - - - - - - - - - - - - - - - - - - - - - - - -
(A)gree/(C)ancel: A

- - - - - - - - - - - - - - - - - - - - - - - - - - - - - - - - - - - - - - - -
Would you be willing to share your email address with the Electronic Frontier
Foundation, a founding partner of the Let's Encrypt project and the non-profit
organization that develops Certbot? We'd like to send you email about our work
encrypting the web, EFF news, campaigns, and ways to support digital freedom.
- - - - - - - - - - - - - - - - - - - - - - - - - - - - - - - - - - - - - - - -
(Y)es/(N)o: Y
Una vez que los certificados se hayan descargado con éxito, deberías ver la siguiente salida:
IMPORTANT NOTES:
 - Congratulations! Your certificate and chain have been saved at:
   /etc/letsencrypt/live/example.com/fullchain.pem
   Your key file has been saved at:
   /etc/letsencrypt/live/example.com/privkey.pem
   Your cert will expire on 2019-12-06. To obtain a new or tweaked
   version of this certificate in the future, simply run certbot
   again. To non-interactively renew *all* of your certificates, run
   "certbot renew"
 - If you like Certbot, please consider supporting our work by:

   Donating to ISRG / Let's Encrypt:   https://letsencrypt.org/donate
   Donating to EFF:                    https://eff.org/donate-le
A continuación, tendrás que combinar el certificado y la clave privada en un solo archivo. Puedes hacerlo con el siguiente comando:
cat /etc/letsencrypt/live/example.com/cert.pem /etc/letsencrypt/live/example.com/privkey.pem > /etc/letsencrypt/live/example.com/web.pem
A continuación, tendrás que editar el archivo de host virtual de Lighttpd y definir la ruta del certificado SSL de Let’s Encrypt.
Puedes hacerlo con el siguiente comando:
nano /etc/lighttpd/conf-enabled/example.com.conf
Modifica el archivo como se muestra a continuación:
$HTTP["host"] == "www.example.com" {
    server.document-root = "/var/www/html/"
}

$SERVER["socket"] == ":443" {
ssl.engine = "enable"
ssl.pemfile = "/etc/letsencrypt/live/example.com/web.pem" # Combined Certificate
ssl.ca-file = "/etc/letsencrypt/live/example.com/chain.pem" # Root CA
server.name = "www.example.com" # Domain Name OR Virtual Host Name
server.document-root = "/var/www/html/" # Document Root
server.errorlog = "/var/log/lighttpd/example.com_error.log"
accesslog.filename = "/var/log/lighttpd/example.com_access.log"
}

$HTTP["scheme"] == "http" {
$HTTP["host"] == "www.example.com" { # HTTP URL
url.redirect = ("/.*" => "https://www.example.com$0") # Redirection HTTPS URL
}
}
Guarda y cierra el archivo. A continuación, reinicia el servicio Lighttpd para aplicar los cambios de configuración:
systemctl restart lighttpd
Acceder a la interfaz web de Lighttpd
Lighttpd está instalado y configurado con soporte para PHP y PHP-FPM. Ahora, es el momento de probarlo.
Abre tu navegador web y escribe la URL https://www.example.com. Serás redirigido a la siguiente página:
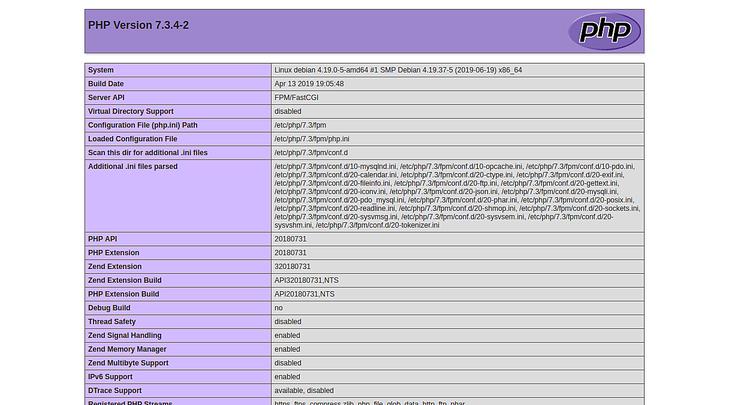
La página anterior indica que PHP funciona bien con FastCGI.
Conclusión
Enhorabuena! has instalado y configurado con éxito el servidor web Lighttpd con soporte PHP-FPM y FastCGI en Debian 10. Ahora puedes alojar tu propio servidor web con facilidad. Para más información, visita la página de documentación oficial de Lighttpd en Lighttpd Doc.