Cómo instalar Let’s Chat en Ubuntu 22.04
Let’s Chat es una aplicación de mensajería gratuita, de código abierto y persistente que se ejecuta en Node.js y MongoDB. Está diseñada para equipos pequeños e íntimos y ofrece un rico conjunto de funciones, como autenticación LDAP/Kerberos, una API tipo REST y compatibilidad con XMPP. Con Let’s Chat, puedes enviar todo tipo de mensajes y también encontrar chats de grupos de interés, pegatinas de voz y emojis geniales.
En este post, te mostraremos cómo instalar Let’s Chat con Nginx como proxy inverso en Ubuntu 22.04.
Requisitos previos
- Un servidor que ejecute Ubuntu 22.04.
- Una contraseña de root configurada en el servidor.
Instalar Node.JS
Antes de empezar, necesitarás instalar Node.js en tu servidor. Para instalar la última versión de Node.js, tendrás que añadir el repositorio Node Source a APT.
Primero, instala todas las dependencias necesarias con el siguiente comando:
apt install dirmngr gnupg apt-transport-https ca-certificates software-properties-common -y
Una vez instaladas todas las dependencias, añade el repositorio de Node.js a APT
curl -sL https://deb.nodesource.com/setup_18.x | bash -
Una vez añadido el repositorio, puedes instalar el Node.js con el siguiente comando:
apt-get install nodejs -y
Tras la instalación correcta, verifica la versión de Node.js con el siguiente comando:
node -v
Obtendrás la siguiente salida:
v18.7.0
Instalar base de datos MongoDB
También necesitarás instalar una base de datos MongoDB en tu servidor.
En primer lugar, descarga e instala el paquete libssl con el siguiente comando:
wget http://archive.ubuntu.com/ubuntu/pool/main/o/openssl/libssl1.1_1.1.1f-1ubuntu2_amd64.deb
dpkg -i libssl1.1_1.1.1f-1ubuntu2_amd64.deb
A continuación, añade la clave GPG de MongoDB y el repositorio con el siguiente comando:
wget -qO - https://www.mongodb.org/static/pgp/server-4.4.asc | apt-key add -
echo "deb [ arch=amd64,arm64 ] https://repo.mongodb.org/apt/ubuntu focal/mongodb-org/4.4 multiverse" | tee /etc/apt/sources.list.d/mongodb-org-4.4.list
A continuación, actualiza la caché del repositorio con el siguiente comando:
apt update
Una vez actualizado tu repositorio, instala el MongoDB utilizando el siguiente comando:
apt install -y mongodb-org
Una vez instalado el paquete MongoDB, inicia y habilita el servicio MongoDB con el siguiente comando:
systemctl start mongod
systemctl enable mongod
Puedes comprobar el estado del servicio MongoDB con el siguiente comando:
systemctl status mongod
Deberías ver la siguiente salida:
? mongod.service - MongoDB Database Server
     Loaded: loaded (/lib/systemd/system/mongod.service; disabled; vendor preset: enabled)
     Active: active (running) since Sun 2022-07-31 04:00:08 UTC; 6s ago
       Docs: https://docs.mongodb.org/manual
   Main PID: 42274 (mongod)
     Memory: 61.1M
        CPU: 1.014s
     CGroup: /system.slice/mongod.service
             ??42274 /usr/bin/mongod --config /etc/mongod.conf

Jul 31 04:00:08 ubuntu2204 systemd[1]: Started MongoDB Database Server.
Instalar Let’s Chat
En primer lugar, tendrás que descargar la última versión de Let’s Chat del repositorio Git Hub. Puedes descargarla con el siguiente comando:
git clone https://github.com/sdelements/lets-chat.git
Una vez completada la descarga, cambia el directorio al descargado e instala todas las dependencias necesarias con el siguiente comando:
cd lets-chat
npm install
A continuación, copia el archivo de configuración de ejemplo e inicia el servidor de Let’s Chat con el siguiente comando:
cp settings.yml.sample settings.yml
npm start
Deberías ver la siguiente salida:
> [email protected] start
> node app.js

(node:42373) DeprecationWarning: `open()` is deprecated in mongoose >= 4.11.0, use `openUri()` instead, or set the `useMongoClient` option if using `connect()` or `createConnection()`. See http://mongoosejs.com/docs/4.x/docs/connections.html#use-mongo-client
(Use `node --trace-deprecation ...` to show where the warning was created)

???     ?????????????????????????     ??????????  ??? ?????? ?????????
???     ?????????????????????????    ???????????  ????????????????????
???     ??????     ???   ????????    ???     ????????????????   ???
???     ??????     ???   ????????    ???     ????????????????   ???
????????????????   ???   ????????    ???????????  ??????  ???   ???
????????????????   ???   ????????     ??????????  ??????  ???   ???

Release 0.4.8
Pulsa CTRL + C para detener el servicio Let’s Chat.
Crear un archivo de servicio Systemd para Let’s Chat
A continuación, tendrás que crear un archivo de servicio systemd para Let’s Chat. Puedes crearlo con el siguiente comando:
nano /etc/systemd/system/letschat.service
Añade las siguientes líneas:
[Unit]
Description=Let's Chat Server
Wants=mongodb.service
After=network.target mongod.service

[Service]
Type=simple
WorkingDirectory=/root/lets-chat
ExecStart=/usr/bin/npm start
User=root
Group=root
Restart=always
RestartSec=9

[Install]
WantedBy=multi-user.target
Guarda y cierra el archivo, luego recarga el demonio systemd con el siguiente comando:
systemctl daemon-reload
A continuación, inicia y activa el servicio Let’s Chat con el siguiente comando:
systemctl start letschat
systemctl enable letschat
A continuación, comprueba el estado de Let’s Chat con el siguiente comando:
systemctl status letschat
Deberías ver la siguiente salida:
? letschat.service - Let's Chat Server
     Loaded: loaded (/etc/systemd/system/letschat.service; disabled; vendor preset: enabled)
     Active: active (running) since Sun 2022-07-31 04:02:34 UTC; 4s ago
   Main PID: 42429 (npm start)
      Tasks: 23 (limit: 2242)
     Memory: 157.9M
        CPU: 4.457s
     CGroup: /system.slice/letschat.service
             ??42429 "npm start" "" "" "" "" "" "" "" "" "" "" "" "" "" ""
             ??42440 sh /tmp/start-b5e830e4.sh
             ??42441 letschat "" "" ""

Jul 31 04:02:34 ubuntu2204 npm[42429]: > node app.js
Jul 31 04:02:38 ubuntu2204 npm[42441]: (node:42441) DeprecationWarning: `open()` is deprecated in mongoose >= 4.11.0, use `openUri()` instead>
Jul 31 04:02:38 ubuntu2204 npm[42441]: (Use `node --trace-deprecation ...` to show where the warning was created)
Jul 31 04:02:38 ubuntu2204 npm[42441]: ???     ?????????????????????????     ??????????  ??? ?????? ?????????
Jul 31 04:02:38 ubuntu2204 npm[42441]: ???     ?????????????????????????    ???????????  ????????????????????
Jul 31 04:02:38 ubuntu2204 npm[42441]: ???     ??????     ???   ????????    ???     ????????????????   ???
Jul 31 04:02:38 ubuntu2204 npm[42441]: ???     ??????     ???   ????????    ???     ????????????????   ???
Jul 31 04:02:38 ubuntu2204 npm[42441]: ????????????????   ???   ????????    ???????????  ??????  ???   ???
Jul 31 04:02:38 ubuntu2204 npm[42441]: ????????????????   ???   ????????     ??????????  ??????  ???   ???
Jul 31 04:02:38 ubuntu2204 npm[42441]: Release 0.4.8
En este punto, el servicio Let’s Chat está iniciado y escucha en el puerto 5000. Puedes comprobarlo con el siguiente comando:
ss -antpl | grep 5000
Deberías ver la siguiente salida:
LISTEN 0 511 127.0.0.1:5000 0.0.0.0:* users:(("letschat",pid=42441,fd=20))
Configurar Nginx para Let’s Chat
A continuación, tendrás que instalar y configurar Nginx como proxy inverso para Let’s Chat. Así podrás acceder al Chat de Let’s a través del puerto 80.
En primer lugar, instala el paquete de servidor Nginx con el siguiente comando:
apt install nginx -y
A continuación, crea un archivo de configuración de host virtual Nginx:
nano /etc/nginx/conf.d/letschat.conf
Añade las siguientes configuraciones:
server {
server_name letschat.example.com;
listen 80;

access_log /var/log/nginx/lets_chat-access.log;
error_log /var/log/nginx/lets_chat-error.log;

location / {
proxy_set_header   X-Real-IP $remote_addr;
proxy_set_header   Host      $host;
proxy_http_version 1.1;
proxy_set_header   Upgrade $http_upgrade;
proxy_set_header   Connection 'upgrade';
proxy_cache_bypass $http_upgrade;
proxy_pass         http://127.0.0.1:5000;
}

}
Guarda y cierra el archivo, luego verifica que Nginx no tenga ningún error de sintaxis:
nginx -t
Deberías ver la siguiente salida:
nginx: the configuration file /etc/nginx/nginx.conf syntax is ok
nginx: configuration file /etc/nginx/nginx.conf test is successful
Por último, reinicia el servicio Nginx para aplicar los cambios de configuración:
systemctl restart nginx
También puedes comprobar el estado del Nginx utilizando el siguiente comando:
systemctl status nginx
Deberías ver el estado de Nginx en la siguiente salida:
? nginx.service - A high performance web server and a reverse proxy server
     Loaded: loaded (/lib/systemd/system/nginx.service; enabled; vendor preset: enabled)
     Active: active (running) since Sun 2022-07-31 04:04:23 UTC; 5s ago
       Docs: man:nginx(8)
    Process: 43193 ExecStartPre=/usr/sbin/nginx -t -q -g daemon on; master_process on; (code=exited, status=0/SUCCESS)
    Process: 43194 ExecStart=/usr/sbin/nginx -g daemon on; master_process on; (code=exited, status=0/SUCCESS)
   Main PID: 43195 (nginx)
      Tasks: 2 (limit: 2242)
     Memory: 2.5M
        CPU: 35ms
     CGroup: /system.slice/nginx.service
             ??43195 "nginx: master process /usr/sbin/nginx -g daemon on; master_process on;"
             ??43196 "nginx: worker process" "" "" "" "" "" "" "" "" "" "" "" "" "" "" "" "" "" "" "" "" "" "" "" "" "" "" ""

Jul 31 04:04:23 ubuntu2204 systemd[1]: Starting A high performance web server and a reverse proxy server...
Jul 31 04:04:23 ubuntu2204 systemd[1]: Started A high performance web server and a reverse proxy server.
Acceder a la interfaz web de Let’s Chat
Ahora, abre tu navegador web y accede a la interfaz web de Let’s Chat utilizando la URL http://letschat.example.com.
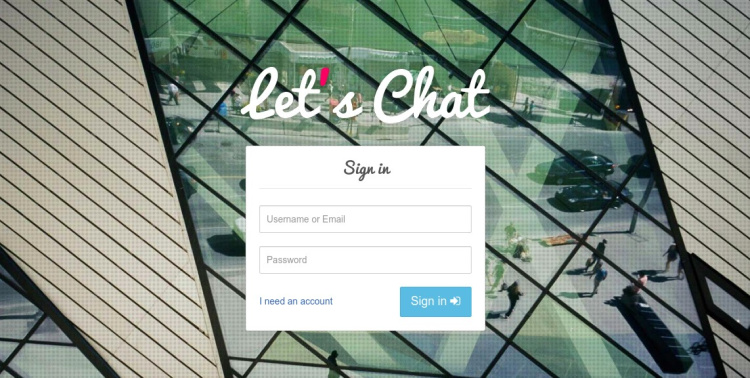
Deberás hacer clic en el botón «Necesito una cuenta» para crear una cuenta. Deberías ver la siguiente página:
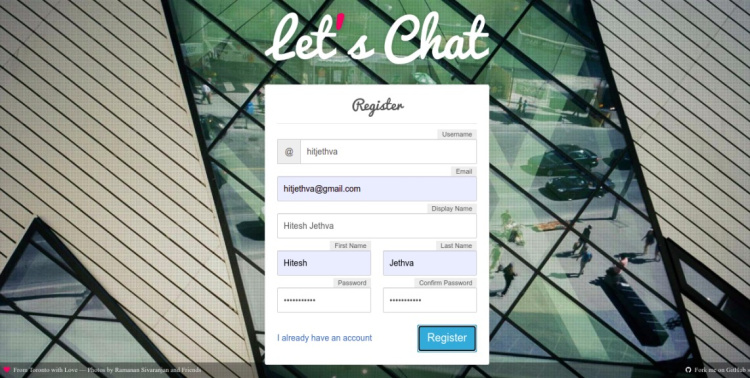
Proporciona tu nombre de usuario, contraseña, dirección de correo electrónico y haz clic en el botón Registrar. Una vez que te hayas registrado correctamente, deberías ver la siguiente pantalla:
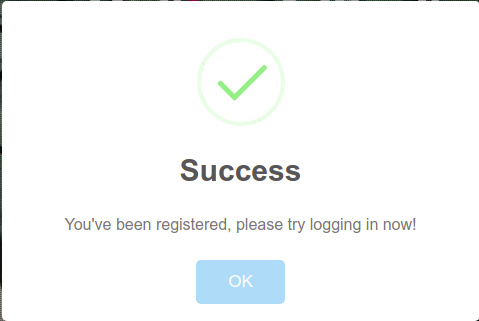
Haz clic en el botón Aceptar. Se te redirigirá a la pantalla de inicio de sesión de Let’s Chat:
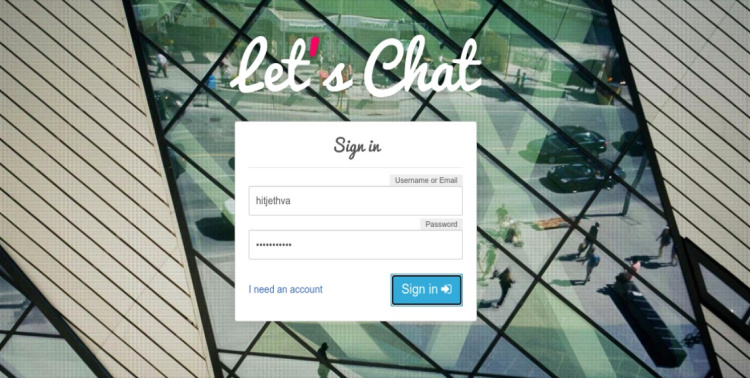
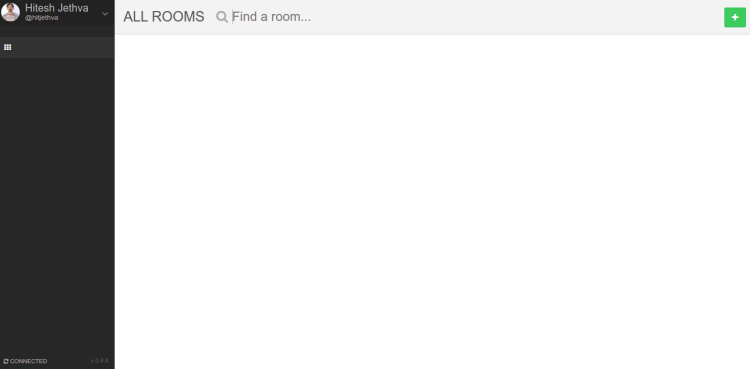
Proporciona tu nombre de usuario y contraseña de Let’s Chat, y haz clic en el botón Iniciar sesión. Deberías ver el panel de Let’s Chat en la siguiente pantalla:
Conclusión
Enhorabuena! has instalado correctamente el servidor de Let’s Chat con Nginx como proxy inverso en Ubuntu 22.04. Ahora puedes desplegar Let’s Chat en tu entorno de trabajo y empezar a comunicarte con otros miembros del equipo. No dudes en preguntarme si tienes alguna duda.