Cómo instalar Ionic Framework en Debian 10
Ionic es un framework gratuito y de código abierto para construir aplicaciones nativas y web de alta calidad y multiplataforma. Viene con una potente interfaz de línea de comandos que te ayuda a crear un proyecto a partir de un simple comando. Ionic es compatible con Android, IOS y la Plataforma Universal de Windows para desarrollar aplicaciones. Ionic utiliza plugins de Cardova para acceder a la cámara, el GPS y la linterna.
En este post, te mostraremos cómo instalar Ionic Mobile App Framework en un servidor Debian 10.
Requisitos previos
- Un servidor que ejecute Debian 10.
- Una contraseña de root configurada en el servidor.
Cómo empezar
En primer lugar, actualiza los paquetes del sistema a la versión actualizada ejecutando el siguiente comando:
apt-get update -y
Una vez actualizados todos los paquetes, puedes instalar otros paquetes necesarios con el siguiente comando.
apt-get install curl gnupg2 wget -y
Instalar Node.js
A continuación, tendrás que instalar Node.js en tu sistema. Por defecto, la última versión de Node.js no está incluida en el repositorio de Debian. Así que tendrás que añadir el repositorio de fuentes de Node a tu sistema.
Puedes añadir el repositorio de fuentes de Node con el siguiente comando:
curl -sL https://deb.nodesource.com/setup_14.x | bash -
Una vez añadido el repositorio, instala Node.js con el siguiente comando:
apt-get install nodejs -y
Después de instalar Node.js, verifica la versión de Node.js con el siguiente comando:
node --version
Deberías ver la siguiente salida:
v14.17.1
A continuación, también tienes que instalar Cordova en tu sistema. Puedes instalarlo con el siguiente comando:
npm install -g cordova
Una vez instalado, puedes pasar al siguiente paso.
Instalar Ionic Framework
En primer lugar, tendrás que instalar la utilidad CLI de Ionic en tu servidor. Puedes instalarla con el siguiente comando:
npm i -g @ionic/cli
Después de instalar ionic, verifica la versión de ionic con el siguiente comando:
ionic -v
Deberías obtener la siguiente salida:
6.16.3
Crear un proyecto con Ionic
Ahora, puedes crear tu primer proyecto con el siguiente comando:
ionic start
Se te pedirá que selecciones el framework entre React o Angular, que especifiques el nombre de tu proyecto y que selecciones una plantilla como se muestra a continuación:
Pick a framework! ????

Please select the JavaScript framework to use for your new app. To bypass this prompt next time, supply a value for the
--type option.

? Framework: Angular

Every great app needs a name! ????

Please enter the full name of your app. You can change this at any time. To bypass this prompt next time, supply name,
the first argument to ionic start.

? Project name: myapp

Let's pick the perfect starter template! ????

Starter templates are ready-to-go Ionic apps that come packed with everything you need to build your app. To bypass this
prompt next time, supply template, the second argument to ionic start.

? Starter template: tabs
? Preparing directory ./myapp in 3.69ms
? Downloading and extracting tabs starter in 591.18ms
? Integrate your new app with Capacitor to target native iOS and Android? No

Your Ionic app is ready! Follow these next steps:

- Go to your new project: cd ./myapp
- Run ionic serve within the app directory to see your app in the browser
- Run ionic capacitor add to add a native iOS or Android project using Capacitor
- Generate your app icon and splash screens using cordova-res --skip-config --copy
- Explore the Ionic docs for components, tutorials, and more: https://ion.link/docs
- Building an enterprise app? Ionic has Enterprise Support and Features: https://ion.link/enterprise-edition
Iniciar la aplicación
Ahora, cambia el directorio a tu proyecto e inicia la aplicación con el siguiente comando:
cd myapp
ionic serve --host 0.0.0.0 --port 8100,/p>
Deberías obtener el siguiente resultado:
> ng run app:serve --host=0.0.0.0 --port=8100
[INFO] Development server running!

       Local: http://localhost:8100
       External: http://216.98.11.73:8100

       Use Ctrl+C to quit this process

[INFO] Browser window opened to http://localhost:8100!
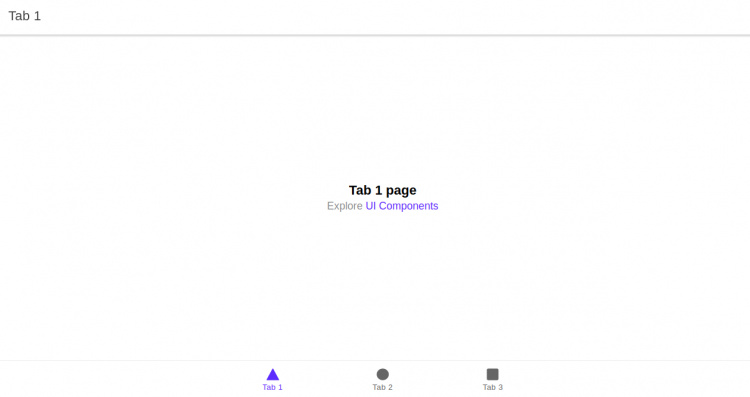
Ahora, abre tu navegador web y accede a tu aplicación utilizando la URL http://your-server-ip:8100. Deberías ver tu aplicación ionic en la siguiente pantalla:
Conclusión
Enhorabuena! has instalado con éxito el framework Ionic en el servidor Debian 10. Ahora puedes empezar a crear tu aplicación móvil utilizando el framework Ionic.