Cómo instalar ERPNext en Ubuntu 20.04
ERPNext es un software ERP gratuito y de código abierto construido con Python, JavaScript y Frappe Framework. Es un sistema empresarial moderno, fácil de usar y gratuito, utilizado por fabricantes, distribuidores y servicios. Está diseñado para pequeñas y medianas empresas que ayudan a las empresas a gestionar todos los aspectos de sus operaciones empresariales. Es uno de los mejores software de gestión ERP de código abierto utilizado por miles de empresas de todo el mundo para gestionar sus procesos ERP.
En este tutorial, te explicaré cómo instalar ERPNext en un servidor Ubuntu 20.04.
Requisitos previos
- Un servidor que ejecute Ubuntu 20.04.
- Un dominio válido está apuntado con tu servidor.
- Una contraseña de root está configurada en tu servidor.
Cómo empezar
Antes de empezar, tendrás que instalar las dependencias de Python necesarias en tu sistema. Puedes instalarlas todas con el siguiente comando:
apt-get install python3-dev libffi-dev git python3-pip python3-testresources libssl-dev wkhtmltopdf gcc g++ make -y
Después de instalar las dependencias de Python, ERPNext también utiliza Node.js para su frontend. Así que añade el repositorio de Node.js con el siguiente comando:
curl -sL https://deb.nodesource.com/setup_12.x | bash -
A continuación, instala Node.js y el servidor Redis con el siguiente comando:
apt-get install nodejs redis-server -y
Una vez instalados ambos paquetes, instala el paquete Yarn ejecutando el siguiente comando:
npm install -g yarn
Cuando hayas terminado, puedes pasar al siguiente paso.
Instalar y configurar la base de datos MariaDB
Por defecto, MariaDB está disponible en el repositorio por defecto de Ubuntu 20.04. Puedes instalarlo con el siguiente comando:
apt-get install mariadb-server -y
Una vez instalado, asegura MariaDB y establece la contraseña raíz de MariaDB con el siguiente comando:
mysql_secure_installation
Responde a todas las preguntas como se muestra a continuación para establecer la contraseña raíz de MariaDB y asegurar la instalación:
Enter current password for root (enter for none):
Set root password? [Y/n] Y
New password:
Re-enter new password:
Remove anonymous users? [Y/n] Y
Disallow root login remotely? [Y/n] Y
Remove test database and access to it? [Y/n] Y
Reload privilege tables now? [Y/n] Y
Una vez asegurada la MariaDB, inicia sesión en la consola MariaDB con el siguiente comando:
mysql -u root -p
A continuación, cambia el plugin de autenticación de MariaDB con el siguiente comando:
MariaDB [(none)]>USE mysql;
MariaDB [(none)]>UPDATE user SET plugin='mysql_native_password' WHERE User='root';
A continuación, vacía los privilegios y sal del intérprete de comandos de MariaDB con el siguiente comando:
MariaDB [(none)]> FLUSH PRIVILEGES;
MariaDB [(none)]> EXIT;
A continuación, tendrás que cambiar el formato de archivo de MariaDB Innodb a Barracuda. Puedes hacerlo editando el archivo /etc/mysql/mariadb.conf.d/50-server.cnf:
nano /etc/mysql/mariadb.conf.d/50-server.cnf
Añade / Modifica las siguientes líneas:
[mysqld]
innodb-file-format=barracuda
innodb-file-per-table=1
innodb-large-prefix=1
character-set-client-handshake = FALSE
character-set-server = utf8mb4
collation-server = utf8mb4_unicode_ci

[mysql]
default-character-set = utf8mb4
Guarda y cierra el archivo y, a continuación, reinicia el servicio MariaDB para aplicar los cambios:
systemctl restart mariadb
Instalar ERPNext
En esta sección, te mostraremos cómo crear el usuario ERPNext, instalar la herramienta bench e instalar ERPNext en tu sistema.
Crear usuario ERPNext
En primer lugar, crea un nuevo usuario para ejecutar ERPNext mediante el siguiente comando:
useradd -m -s /bin/bash erpnext
A continuación, establece la contraseña para ERPNext con el siguiente comando:
passwd erpnext
A continuación, añade el usuario ERPNext al grupo sudo con el siguiente comando:
usermod -aG sudo erpnext
A continuación, inicia sesión con el usuario ERPNext y configura la variable de entorno con el siguiente comando:
su - erpnext
nano ~/.bashrc
Añade la siguiente línea:
PATH=$PATH:~/.local/bin/
Guarda el archivo y, a continuación, activa la variable de entorno con el siguiente comando:
source ~/.bashrc
Instalar la herramienta Bench
Primero, cambia el directorio al usuario ERPNext y crea un directorio para ERPNext con el siguiente comando:
su - erpnext
sudo mkdir /opt/bench
A continuación, establece la propiedad al usuario erpnext:
sudo chown -R erpnext:erpnext /opt/bench
A continuación, cambia el directorio a /opt/bench y clona el repositorio de bench desde Git Hub:
cd /opt/bench
git clone https://github.com/frappe/bench bench-repo
A continuación, instala el repositorio bench utilizando el comando pip3:
pip3 install -e bench-repo
Una vez instalado, inicializa el directorio bench con frappe framework utilizando el siguiente comando:
bench init erpnext
Deberías obtener la siguiente salida:
? Built js/checkout.min.js
? Built js/dialog.min.js
? Built js/social.min.js
? Built js/web_form.min.js
? Built js/list.min.js
? Built js/chat.js
Browserslist: caniuse-lite is outdated. Please run next command `yarn upgrade caniuse-lite browserslist`
? Built css/frappe-rtl.css
? Built css/printview.css
? Built js/bootstrap-4-web.min.js
? Built js/barcode_scanner.min.js
? Built css/list.min.css
? Built css/report.min.css
? Built frappe/css/email.css
? Built js/frappe-recorder.min.js
? Built js/desk.min.js
? Built css/frappe-chat-web.css
? Built js/frappe-web.min.js
? Built css/form.min.css
? Built css/web_form.css
? Built css/desk.min.css
? Built css/frappe-web-b4.css
? Built js/control.min.js
? Built js/form.min.js
? Built js/data_import_tools.min.js
? Built js/report.min.js
?  Done in 111.35s
Done in 113.33s.
SUCCESS: Bench erpnext initialized
Crear sitio ERPNext
A continuación, cambia el directorio a erpnext y crea un nuevo sitio ERPNext con el siguiente comando:
cd /opt/bench/erpnext
bench new-site erp.linuxbuz.com
Se te pedirá que proporciones tu contraseña raíz de MariaDB y la contraseña de administrador, como se muestra a continuación:
MySQL root password:

Installing frappe...
Updating DocTypes for frappe        : [========================================] 100%
Updating country info               : [========================================] 100%
Set Administrator password:
Re-enter Administrator password:
*** Scheduler is disabled ***
Current Site set to erp.linuxbuz.com
En este punto, ERPNext está instalado en tu sistema.
Configurar ERPNext para el entorno de producción
A continuación, tendrás que instalar Supervisor para gestionar el proceso de ERPNext y Nginx como proxy inverso.
En primer lugar, cambia el usuario a ERPNext e instala Supervisor y Nginx con el siguiente comando:
su - erpnext
sudo apt-get install supervisor nginx -y
A continuación, instala el frappe-bench con el siguiente comando:
sudo pip3 install frappe-bench
A continuación, cambia el directorio a /opt/bench/erpnext y configura ERPNext para el entorno de producción con el siguiente comando:
cd /opt/bench/erpnext
sudo /home/erpnext/.local/bin/bench setup production erpnext
Una vez configurado ERPNext, deberías ver la siguiente salida:
PLAY RECAP ************************************************************************************************************************************
localhost                  : ok=8    changed=4    unreachable=0    failed=0    skipped=1    rescued=0    ignored=0

$ sudo systemctl restart supervisor
Port configuration list:

Site erp.linuxbuz.com assigned port: 80
$ /usr/bin/supervisorctl reread
No config updates to processes
$ /usr/bin/supervisorctl update
$ sudo /usr/sbin/nginx -t
nginx: the configuration file /etc/nginx/nginx.conf syntax is ok
nginx: configuration file /etc/nginx/nginx.conf test is successful
$ sudo systemctl reload nginx
En este punto, ERPNext está configurado con Nginx para el entorno de producción.
Accede a la interfaz web de ERPNext
Ahora, abre tu navegador web y escribe la URL http://erp.linuxbuz.com. Se te redirigirá a la página de inicio de sesión de ERPNext:

Proporciona el nombre de usuario como Administrador y una contraseña que hayas establecido anteriormente y haz clic en el botón Iniciar sesión. Deberías ver la siguiente página:
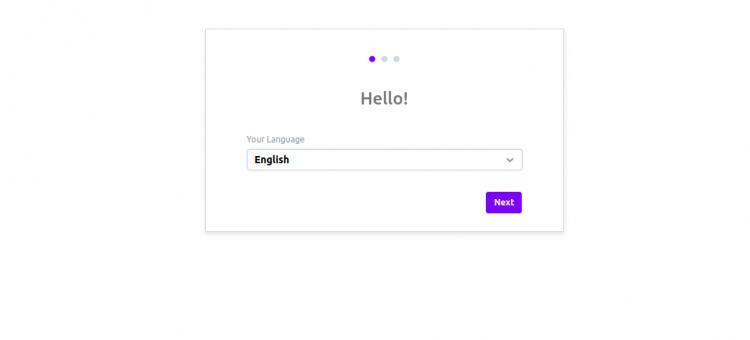
Selecciona el idioma deseado y pulsa el botón Siguiente. Deberías ver la siguiente página:
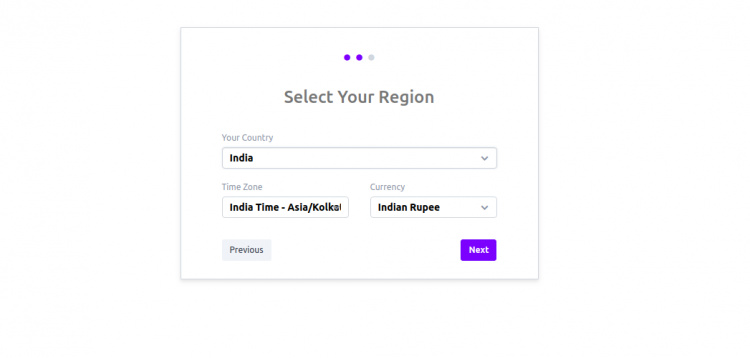
Selecciona tu País, Zona Horaria, Moneda y pulsa el botón Siguiente. Deberías ver la siguiente página:
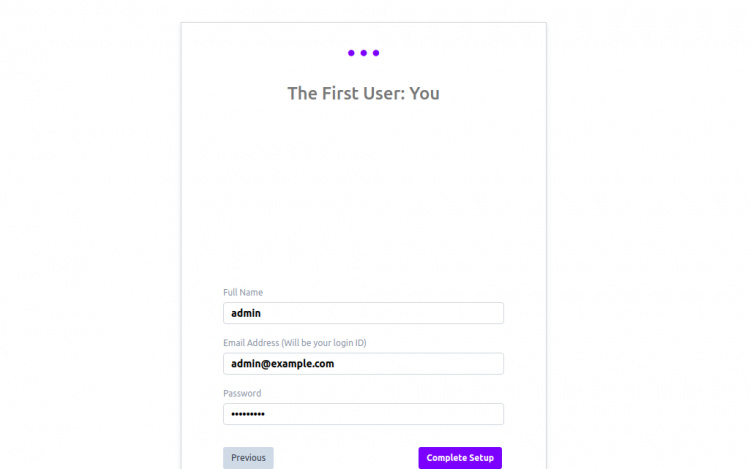
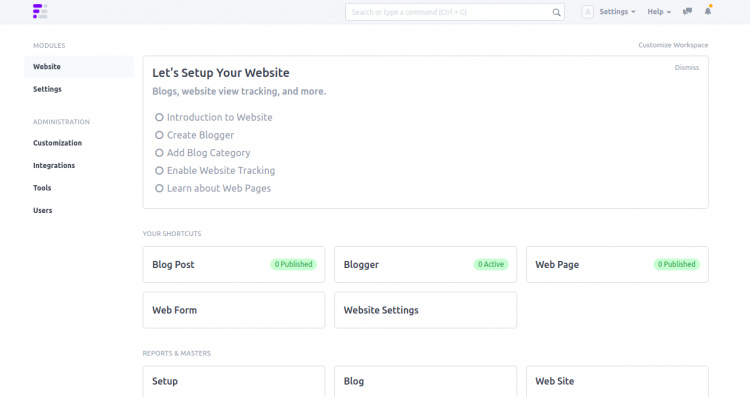
Proporciona tu nombre, correo electrónico, contraseña y haz clic en el botón Completar configuración. Deberías ver el panel de control de ERPNext en la siguiente página:
Proteger ERPNext con Let’s Encrypt SSL
En primer lugar, tendrás que instalar el cliente Certbot para instalar y gestionar Let’s Encrypt SSL. Puedes instalarlo con el siguiente comando:
sudo apt-get install certbot python3-certbot-nginx -y
Una vez instalado, ejecuta el siguiente comando para instalar y configurar Let’s Encrypt SSL para tu dominio:
sudo certbot --nginx -d erp.linuxbuz.com
Se te pedirá que proporciones tu correo electrónico y aceptes las condiciones del servicio, como se muestra a continuación:
Saving debug log to /var/log/letsencrypt/letsencrypt.log
Plugins selected: Authenticator nginx, Installer nginx
Enter email address (used for urgent renewal and security notices) (Enter 'c' to
cancel): [email protected]

- - - - - - - - - - - - - - - - - - - - - - - - - - - - - - - - - - - - - - - -
Please read the Terms of Service at
https://letsencrypt.org/documents/LE-SA-v1.2-November-15-2017.pdf. You must
agree in order to register with the ACME server at
https://acme-v02.api.letsencrypt.org/directory
- - - - - - - - - - - - - - - - - - - - - - - - - - - - - - - - - - - - - - - -
(A)gree/(C)ancel: A

- - - - - - - - - - - - - - - - - - - - - - - - - - - - - - - - - - - - - - - -
Would you be willing to share your email address with the Electronic Frontier
Foundation, a founding partner of the Let's Encrypt project and the non-profit
organization that develops Certbot? We'd like to send you email about our work
encrypting the web, EFF news, campaigns, and ways to support digital freedom.
- - - - - - - - - - - - - - - - - - - - - - - - - - - - - - - - - - - - - - - -
(Y)es/(N)o: Y
Obtaining a new certificate
Performing the following challenges:
http-01 challenge for erp.linuxbuz.com
Waiting for verification...
Cleaning up challenges
Deploying Certificate to VirtualHost /etc/nginx/conf.d/erpnext.conf
A continuación, selecciona si deseas o no redirigir el tráfico HTTP a HTTPS como se muestra a continuación:
- - - - - - - - - - - - - - - - - - - - - - - - - - - - - - - - - - - - - - - -
1: No redirect - Make no further changes to the webserver configuration.
2: Redirect - Make all requests redirect to secure HTTPS access. Choose this for
new sites, or if you're confident your site works on HTTPS. You can undo this
change by editing your web server's configuration.
- - - - - - - - - - - - - - - - - - - - - - - - - - - - - - - - - - - - - - - -
Select the appropriate number [1-2] then [enter] (press 'c' to cancel): 2
Escribe 2 y pulsa Intro para completar el proceso. Deberías ver el siguiente resultado:
Redirecting all traffic on port 80 to ssl in /etc/nginx/conf.d/erpnext.conf

- - - - - - - - - - - - - - - - - - - - - - - - - - - - - - - - - - - - - - - -
Congratulations! You have successfully enabled https://erp.linuxbuz.com

You should test your configuration at:
https://www.ssllabs.com/ssltest/analyze.html?d=erp.linuxbuz.com
- - - - - - - - - - - - - - - - - - - - - - - - - - - - - - - - - - - - - - - -

IMPORTANT NOTES:
 - Congratulations! Your certificate and chain have been saved at:
   /etc/letsencrypt/live/erp.linuxbuz.com/fullchain.pem
   Your key file has been saved at:
   /etc/letsencrypt/live/erp.linuxbuz.com/privkey.pem
   Your cert will expire on 2020-08-29. To obtain a new or tweaked
   version of this certificate in the future, simply run certbot again
   with the "certonly" option. To non-interactively renew *all* of
   your certificates, run "certbot renew"
 - Your account credentials have been saved in your Certbot
   configuration directory at /etc/letsencrypt. You should make a
   secure backup of this folder now. This configuration directory will
   also contain certificates and private keys obtained by Certbot so
   making regular backups of this folder is ideal.
 - If you like Certbot, please consider supporting our work by:

   Donating to ISRG / Let's Encrypt:   https://letsencrypt.org/donate
   Donating to EFF:                    https://eff.org/donate-le

 - We were unable to subscribe you the EFF mailing list because your
   e-mail address appears to be invalid. You can try again later by
   visiting https://act.eff.org.
En este punto, tu sitio web ERPNext está protegido con Let’s Encrypt SSL. Ahora puedes acceder a tu sitio web de forma segura con el protocolo HTTPS.
Conclusión
En esta guía, hemos aprendido a instalar ERPNext con Nginx en Ubuntu 20.04. También hemos aprendido a proteger ERPNext con Let’s Encrypt SSL. Puedes visitar la página de documentación de ERPNext para obtener más información.