Cómo instalar el software del boletín de noticias Mailtrain en Ubuntu 18.04
Mailtrain es una aplicación de boletines informativos gratuita, de código abierto y autoalojada, construida a partir de Node.js, que admite backends de bases de datos MySQL/MariaDB. Mailtrain te permite añadir suscriptores manualmente, a través de la API, o importarlos desde un archivo CSV. Mailtrain viene con un rico conjunto de características que incluyen, editores de plantillas, automatización, campos personalizados, campaña RSS, editor de código HTML y mucho más. Si tienes una larga lista de suscriptores y quieres gestionarla fácilmente, Mailtrain es la mejor opción para ti.
En este tutorial, te mostraremos cómo instalar la aplicación de boletines de Mailtrain con Docker en el servidor Ubuntu 18.04.
Requisitos
- Un servidor con Ubuntu 18.04.
- Un nombre de dominio válido apuntado con la IP de tu servidor.
- Una contraseña de root configurada en tu servidor.
Cómo empezar
Antes de empezar, tendrás que actualizar tu sistema con la última versión. Puedes hacerlo ejecutando el siguiente comando:
apt-get update -y
apt-get upgrade -y
A continuación, reinicia tu sistema para aplicar los cambios.
Instalar Docker y Docker Compose
Por defecto, la última versión de Docker no está disponible en el repositorio por defecto de Ubuntu 18.04. Por tanto, tendrás que añadir el repositorio de Docker a tu sistema.
Primero, instala los paquetes necesarios con el siguiente comando:
apt-get install curl git apt-transport-https ca-certificates -y
A continuación, descarga y añade la clave PGP de Docker con el siguiente comando:
curl -fsSL https://download.docker.com/linux/ubuntu/gpg | apt-key add -
A continuación, añade el repositorio Docker CE editando el archivo /etc/apt/sources.list:
nano /etc/apt/sources.list
Añade la siguiente línea al final del archivo:
deb [arch=amd64] https://download.docker.com/linux/ubuntu bionic stable
Guarda y cierra el archivo cuando hayas terminado. A continuación, actualiza el repositorio e instala Docker CE con los siguientes comandos:
apt-get update -y
apt-get install docker-ce -y
Una vez que la instalación se haya completado con éxito, puedes comprobar el estado del servicio Docker con el siguiente comando:
systemctl status docker
Deberías ver la siguiente salida:
Docker Application Container Engine
   Loaded: loaded (/lib/systemd/system/docker.service; enabled; vendor preset: enabled)
   Active: active (running) since Thu 2019-10-24 16:15:25 UTC; 21min ago
     Docs: https://docs.docker.com
 Main PID: 1402 (dockerd)
    Tasks: 45
   CGroup: /system.slice/docker.service
           ?? 1402 /usr/bin/dockerd -H fd:// --containerd=/run/containerd/containerd.sock
           ??10312 /usr/bin/docker-proxy -proto tcp -host-ip 0.0.0.0 -host-port 3000 -container-ip 172.18.0.4 -container-port 3000

Oct 24 16:23:04 ubuntu1804 dockerd[1402]: time="2019-10-24T16:23:04.817021656Z" level=info msg="Layer sha256:b875b006eb8ffb0434ce3a26cb04c9017c
Oct 24 16:24:09 ubuntu1804 dockerd[1402]: time="2019-10-24T16:24:09.879265134Z" level=info msg="ignoring event" module=libcontainerd namespace=
Oct 24 16:24:10 ubuntu1804 dockerd[1402]: time="2019-10-24T16:24:10.065610315Z" level=warning msg="20676b10252b4a484e32a7d7534b3b386cc2a1e5efd1
Oct 24 16:25:52 ubuntu1804 dockerd[1402]: time="2019-10-24T16:25:52.649551513Z" level=info msg="Layer sha256:903ab9000f0a93e49537d5d00c5c8a8cab
Oct 24 16:26:47 ubuntu1804 dockerd[1402]: time="2019-10-24T16:26:47.428865652Z" level=info msg="Layer sha256:903ab9000f0a93e49537d5d00c5c8a8cab
Oct 24 16:27:41 ubuntu1804 dockerd[1402]: time="2019-10-24T16:27:41.603287585Z" level=info msg="Layer sha256:903ab9000f0a93e49537d5d00c5c8a8cab
A continuación, instala la última versión de docker compose con el comando pip como se muestra a continuación:
apt-get install python-pip
apt-get install docker-compose
Una vez completada la instalación, puedes pasar al siguiente paso.
Instalar Mailtrain con Docker
Primero, descarga la última versión de Mailtrain desde el repositorio Git con el siguiente comando:
git clone git://github.com/Mailtrain-org/mailtrain.git
A continuación, cambia el directorio a mailtrain y renombra el archivo docker-compose por defecto:
cd mailtrain
mv docker-compose.override.yml.tmpl docker-compose.override.yml
A continuación, inicia los contenedores docker de Mailtrain con el siguiente comando:
docker-compose up -d
Este comando descargará e iniciará los contenedores mailtrain, mysql y redis como se muestra a continuación:
Creating network "mailtrain_default" with the default driver
Creating volume "mailtrain_mailtrain-node-config" with default driver
Creating volume "mailtrain_mailtrain-node-data" with default driver
Creating volume "mailtrain_mailtrain-redis-data" with default driver
Creating volume "mailtrain_mailtrain-node-reports" with default driver
Creating volume "mailtrain_mailtrain-mysq-data" with default driver
Pulling redis (redis:3.0)...
3.0: Pulling from library/redis
f5cc0ee7a6f6: Pull complete
5fc25ed18e87: Pull complete
e025bc8872f6: Pull complete
77c68b51b836: Pull complete
7c403ece3755: Pull complete
0a653bd338f4: Pull complete
31531fd948c6: Pull complete
Digest: sha256:730b765df9fe96af414da64a2b67f3a5f70b8fd13a31e5096fee4807ed802e20
Status: Downloaded newer image for redis:3.0
Pulling mysql (mysql:5.7)...
5.7: Pulling from library/mysql
80369df48736: Pull complete
e8f52315cb10: Pull complete
cf2189b391fc: Pull complete
cc98f645c682: Pull complete
27a27ac83f74: Pull complete
fa1f04453414: Pull complete
d45bf7d22d33: Pull complete
c7d49ffebc56: Pull complete
511a8052b204: Pull complete
5d5df4c12444: Pull complete
d482603a2922: Pull complete
Digest: sha256:44b33224e3c406bf50b5a2ee4286ed0d7f2c5aec1f7fdb70291f7f7c570284dd
Status: Downloaded newer image for mysql:5.7
Building mailtrain
:
:
Removing intermediate container 20676b10252b
 ---> 0abdb4121f54
Step 6/9 : COPY . /app
 ---> c8af7560e844
Step 7/9 : EXPOSE 3000
 ---> Running in 3ff55179a229
Removing intermediate container 3ff55179a229
 ---> d83b49d4b24b
Step 8/9 : ENTRYPOINT ["bash", "/app/docker-entrypoint.sh"]
 ---> Running in e5baf6a1ea2e
Removing intermediate container e5baf6a1ea2e
 ---> c4f899a0f8f9
Step 9/9 : CMD ["node", "index.js"]
 ---> Running in fe94519d2bd3
Removing intermediate container fe94519d2bd3
 ---> 2808c2972f20
Successfully built 2808c2972f20
Successfully tagged mailtrain:latest
WARNING: Image for service mailtrain was built because it did not already exist. To rebuild this image you must use `docker-compose build` or `docker-compose up --build`.
Creating mailtrain_redis_1 ... done
Creating mailtrain_mysql_1 ... done
Creating mailtrain_mailtrain_1 ... done
Ahora puedes comprobar todos los contenedores en ejecución con el siguiente comando:
docker ps
Deberías ver la siguiente salida:
CONTAINER ID        IMAGE               COMMAND                  CREATED              STATUS              PORTS                    NAMES
0e837c586c39        mailtrain:latest    "bash /app/docker-en…"   About a minute ago   Up 55 seconds       0.0.0.0:3000->3000/tcp   mailtrain_mailtrain_1
49a4e69a09c6        mysql:5.7           "docker-entrypoint.s…"   About a minute ago   Up About a minute   3306/tcp, 33060/tcp      mailtrain_mysql_1
a1449b64a196        redis:3.0           "docker-entrypoint.s…"   About a minute ago   Up About a minute   6379/tcp                 mailtrain_redis_1
Accede a la interfaz web de Mailtrain
El contenedor Mailtrain está ahora iniciado y escuchando en el puerto 3000. A continuación, abre tu navegador web y escribe la URL http://your-server-ip:3000. Deberías ver el panel de control por defecto de Mailtrain en la siguiente página:

Ahora, haz clic en el botón Iniciar sesión. Deberías ver la siguiente página:
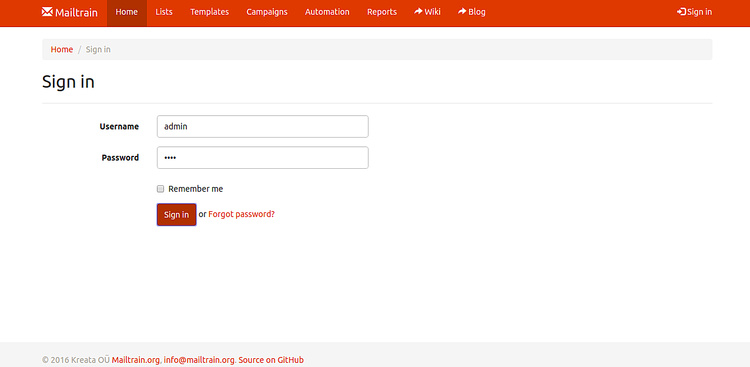
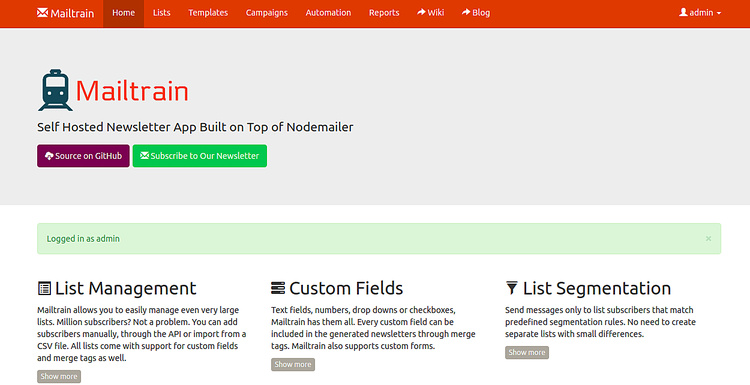
Introduce el nombre de usuario y la contraseña por defecto como admin/admin y haz clic en el botón Iniciarsesión. Deberías ver el panel de control por defecto de Mailtrain en la siguiente página:
Configurar Nginx como Proxy Inverso para Mailtrain
A continuación, tendrás que crear un Nginx como proxy inverso para Mailtrain en el puerto 3000. Para ello, instala primero el servidor web Nginx ejecutando el siguiente comando:
apt-get install nginx -y
A continuación, crea un archivo de configuración del host virtual Nginx con el siguiente comando:
nano /etc/nginx/sites-available/mailtrain.conf
Añade las siguientes líneas:
upstream mailtrain {
  server 127.0.0.1:3000 weight=100 max_fails=5 fail_timeout=5;
}

server {
  listen          80;
  server_name     example.com;

  location / {
        proxy_set_header X-Forwarded-Host $host;
        proxy_set_header X-Forwarded-Server $host;
        proxy_set_header X-Forwarded-For $proxy_add_x_forwarded_for;
        proxy_pass http://mailtrain/;
  }
}
Guarda y cierra el archivo cuando hayas terminado. A continuación, comprueba si Nginx tiene algún error de sintaxis con el siguiente comando
nginx -t
Deberías ver la siguiente salida:
nginx: the configuration file /etc/nginx/nginx.conf syntax is ok
nginx: configuration file /etc/nginx/nginx.conf test is successful
A continuación, habilita el archivo de host virtual de Nginx con el siguiente comando:
ln -s /etc/nginx/sites-available/mailtrain.conf /etc/nginx/sites-enabled/
Por último, reinicia el servidor web Nginx para aplicar la configuración:
systemctl restart nginx
Asegura Mailtrain con Let’s Encrypt
A continuación, tendrás que instalar el cliente Certbot para asegurar Mailtrain con Let’s Encrypt free SSL. Por defecto, la última versión de Certbot no está disponible en el repositorio por defecto de Ubuntu 18.04. Así que añade el repositorio de Certbot ejecutando el siguiente comando:
add-apt-repository ppa:certbot/certbot
A continuación, actualiza el repositorio e instala Certbot con el siguiente comando:
apt-get update -y
apt-get install certbot python-certbot-nginx -y
Una vez instalado, ejecuta el siguiente comando para descargar el SSL gratuito de Let’s Encrypt para tu dominio example.com y configura Nginx para que utilice este certificado.
certbot --nginx -d example.com
Proporciona tu dirección de correo electrónico y acepta las condiciones del servicio. Una vez que el certificado se haya instalado correctamente, deberías ver la siguiente salida:
- - - - - - - - - - - - - - - - - - - - - - - - - - - - - - - - - - - - - - - -
Congratulations! You have successfully enabled https://example.com

You should test your configuration at:
https://www.ssllabs.com/ssltest/analyze.html?d=example.com
- - - - - - - - - - - - - - - - - - - - - - - - - - - - - - - - - - - - - - - -

IMPORTANT NOTES:
 - Congratulations! Your certificate and chain have been saved at:
   /etc/letsencrypt/live/example.com/fullchain.pem
   Your key file has been saved at:
   /etc/letsencrypt/live/example.com/privkey.pem
   Your cert will expire on 2020-01-22. To obtain a new or tweaked
   version of this certificate in the future, simply run certbot again
   with the "certonly" option. To non-interactively renew *all* of
   your certificates, run "certbot renew"
 - Your account credentials have been saved in your Certbot
   configuration directory at /etc/letsencrypt. You should make a
   secure backup of this folder now. This configuration directory will
   also contain certificates and private keys obtained by Certbot so
   making regular backups of this folder is ideal.
 - If you like Certbot, please consider supporting our work by:

   Donating to ISRG / Let's Encrypt:   https://letsencrypt.org/donate
   Donating to EFF:                    https://eff.org/donate-le
Ahora puedes acceder a tu aplicación Mailtrain de forma segura utilizando la URL https://example.com.
Conclusión
En el tutorial anterior, hemos aprendido a instalar Mailtrain con docker en el servidor Ubuntu 18.04. También hemos aprendido a configurar Nginx como proxy inverso para Mailtrain y a asegurar Mailtrain con el SSL gratuito de Let’s Encrypt. No dudes en preguntarme si tienes alguna duda.