Cómo instalar el servidor de chat Matrix Synapse en Ubuntu 22.04
Matrix es una solución gratuita, de código abierto y basada en web que se utiliza para servicios de mensajería y VoIP. Es un protocolo VOIP de estándar abierto que te permite comunicarte con otros usuarios de un proveedor de servicios diferente mediante voz sobre IP y chat. Proporciona API RESTful HTTP JSON para construir servidores de chat distribuidos y federados sin un único punto de control y fallo, y proporciona todas las referencias para las API. Está escrito en Python y te permite crear tu servidor de origen y almacenar toda la información personal de los usuarios y el historial de chat.
En este post, te mostraremos cómo instalar Matrix Synapse en Ubuntu 22.04.
Requisitos previos
- Un servidor con Ubuntu 22.04.
- Un nombre de dominio válido apuntado con la IP de tu servidor.
- Una contraseña de root configurada en el servidor.
Cómo empezar
En primer lugar, tendrás que actualizar los paquetes de tu sistema a la versión actualizada. Puedes hacerlo con el siguiente comando:
apt update -y
Una vez actualizados todos los índices de los paquetes, instala las demás dependencias necesarias con el siguiente comando:
apt install curl wget gnupg2 apt-transport-https -y
Una vez instaladas todas las dependencias, puedes pasar al siguiente paso.
Instalar Matrix Synapse en Ubuntu 22.04
Por defecto, el paquete Matrix Synapse no está incluido en el repositorio por defecto de Ubuntu 22.04. Así que tendrás que añadir el repositorio oficial de Matrix Synapse a APT.
Primero, descarga y añade la clave GPG de Matrix Synapse con el siguiente comando:
wget -qO /usr/share/keyrings/matrix-org-archive-keyring.gpg https://packages.matrix.org/debian/matrix-org-archive-keyring.gpg
A continuación, añade el repositorio de Matrix Synapse a APT con el siguiente comando:
echo "deb [signed-by=/usr/share/keyrings/matrix-org-archive-keyring.gpg] https://packages.matrix.org/debian/ $(lsb_release -cs) main" | tee /etc/apt/sources.list.d/matrix-org.list
A continuación, actualiza el repositorio e instala el paquete Matrix Synapse utilizando el siguiente comando:
apt-get update -y
apt-get install matrix-synapse-py3 -y
Durante la instalación, se te pedirá que definas tu nombre de dominio como se muestra a continuación:
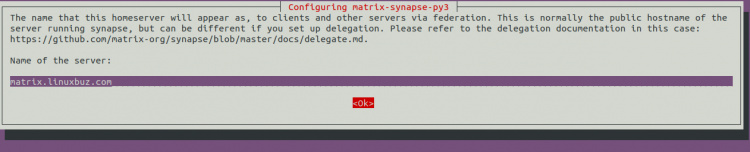
Indica tu nombre de dominio y pulsa la tecla Intro. Se te pedirá que informes de las estadísticas anónimas:

Selecciona Sí y pulsa la tecla Intro para continuar.
Una vez finalizada la instalación, inicia el servicio Matrix y habilítalo para que se inicie al reiniciar el sistema mediante el comando que se indica a continuación:
systemctl start matrix-synapse
systemctl enable matrix-synapse
También puedes comprobar el estado de Matrix Synapse con el siguiente comando:
systemctl status matrix-synapse
Obtendrás la siguiente salida:
? matrix-synapse.service - Synapse Matrix homeserver
     Loaded: loaded (/lib/systemd/system/matrix-synapse.service; enabled; vendor preset: enabled)
     Active: active (running) since Sat 2022-06-04 08:01:22 UTC; 3s ago
    Process: 1916 ExecStartPre=/opt/venvs/matrix-synapse/bin/python -m synapse.app.homeserver --config-path=/etc/matrix-synapse/homeserver.ya>
   Main PID: 1923 (python)
      Tasks: 8 (limit: 9460)
     Memory: 78.6M
        CPU: 4.911s
     CGroup: /system.slice/matrix-synapse.service
             ??1923 /opt/venvs/matrix-synapse/bin/python -m synapse.app.homeserver --config-path=/etc/matrix-synapse/homeserver.yaml --config>

Jun 04 08:01:17 ubuntu2204 systemd[1]: Starting Synapse Matrix homeserver...
Jun 04 08:01:22 ubuntu2204 matrix-synapse[1923]: This server is configured to use 'matrix.org' as its trusted key server via the
Jun 04 08:01:22 ubuntu2204 matrix-synapse[1923]: 'trusted_key_servers' config option. 'matrix.org' is a good choice for a key
Jun 04 08:01:22 ubuntu2204 matrix-synapse[1923]: server since it is long-lived, stable and trusted. However, some admins may
Jun 04 08:01:22 ubuntu2204 matrix-synapse[1923]: wish to use another server for this purpose.
Jun 04 08:01:22 ubuntu2204 matrix-synapse[1923]: To suppress this warning and continue using 'matrix.org', admins should set
Jun 04 08:01:22 ubuntu2204 matrix-synapse[1923]: 'suppress_key_server_warning' to 'true' in homeserver.yaml.
Jun 04 08:01:22 ubuntu2204 matrix-synapse[1923]: --------------------------------------------------------------------------------
Jun 04 08:01:22 ubuntu2204 matrix-synapse[1923]: Config is missing macaroon_secret_key
En este momento, el servicio Matrix Synapse está iniciado y escucha en el puerto 8008. Puedes comprobarlo con el siguiente comando:
ss -antpl | grep python
Obtendrás la siguiente salida:
LISTEN 0      50         127.0.0.1:8008      0.0.0.0:*    users:(("python",pid=1950,fd=12))
LISTEN 0      50             [::1]:8008         [::]:*    users:(("python",pid=1950,fd=11))
Configurar Matrix Synapse
Después de instalar Matrix Synapse, tendrás que configurarlo. En primer lugar, crea un secrete con el siguiente comando:
cat /dev/urandom | tr -dc 'a-zA-Z0-9' | fold -w 32 | head -n 1
Obtendrás la siguiente salida:
R3jvgiDYyhh5XgduDPsgtwxPDiar8q2s
A continuación, edita el archivo de configuración por defecto de Matrix Synapse:
nano /etc/matrix-synapse/homeserver.yaml
Define tu dirección bind, desactiva el registro y define tus secretes como se muestra a continuación:
    bind_addresses: ['127.0.0.1']
    enable_registration: false
    registration_shared_secret: "R3jvgiDYyhh5XgduDPsgtwxPDiar8q2s"
Guarda y cierra el archivo y reinicia el servicio Matrix Synapse para aplicar los cambios:
systemctl restart matrix-synapse
Configurar Nginx como proxy inverso para Matrix Synapse
Es una buena idea configurar Nginx como proxy inverso para Matix Synapse. En primer lugar, instala el paquete del servidor web Nginx con el siguiente comando:
apt-get install nginx -y
Una vez instalado Nginx, crea un archivo de configuración de host virtual Nginx:
nano /etc/nginx/conf.d/matrix.conf
Añade la siguiente configuración:
server {
listen 80;
server_name matrix.linuxbuz.com;
location / {
proxy_pass http://localhost:8008;
proxy_set_header X-Forwarded-For $remote_addr;
}
}
Guarda y cierra el archivo verifica la configuración de Nginx con el siguiente comando:
nginx -t
Obtendrás la siguiente salida:
nginx: the configuration file /etc/nginx/nginx.conf syntax is ok
nginx: configuration file /etc/nginx/nginx.conf test is successful
A continuación, reinicia el servicio Nginx para aplicar los cambios:
systemctl restart nginx
También puedes comprobar el estado del servicio Nginx utilizando el siguiente comando:
systemctl status nginx
Deberías ver la siguiente salida:
? nginx.service - A high performance web server and a reverse proxy server
     Loaded: loaded (/lib/systemd/system/nginx.service; enabled; vendor preset: enabled)
     Active: active (running) since Sat 2022-06-04 08:06:22 UTC; 26s ago
       Docs: man:nginx(8)
    Process: 2433 ExecStartPre=/usr/sbin/nginx -t -q -g daemon on; master_process on; (code=exited, status=0/SUCCESS)
    Process: 2434 ExecStart=/usr/sbin/nginx -g daemon on; master_process on; (code=exited, status=0/SUCCESS)
   Main PID: 2436 (nginx)
      Tasks: 5 (limit: 9460)
     Memory: 4.8M
        CPU: 58ms
     CGroup: /system.slice/nginx.service
             ??2436 "nginx: master process /usr/sbin/nginx -g daemon on; master_process on;"
             ??2437 "nginx: worker process" "" "" "" "" "" "" "" "" "" "" "" "" "" "" "" "" "" "" "" "" "" "" "" "" "" "" ""
             ??2438 "nginx: worker process" "" "" "" "" "" "" "" "" "" "" "" "" "" "" "" "" "" "" "" "" "" "" "" "" "" "" ""
             ??2439 "nginx: worker process" "" "" "" "" "" "" "" "" "" "" "" "" "" "" "" "" "" "" "" "" "" "" "" "" "" "" ""
             ??2440 "nginx: worker process" "" "" "" "" "" "" "" "" "" "" "" "" "" "" "" "" "" "" "" "" "" "" "" "" "" "" ""

Jun 04 08:06:22 ubuntu2204 systemd[1]: Starting A high performance web server and a reverse proxy server...
Jun 04 08:06:22 ubuntu2204 systemd[1]: Started A high performance web server and a reverse proxy server.
Crear una cuenta de superusuario
A continuación, tendrás que crear una cuenta de usuario admin y establecer una contraseña para acceder a Matrix Synapse.
register_new_matrix_user -c /etc/matrix-synapse/homeserver.yaml http://localhost:8008
Proporciona tu cuenta de usuario admin y establece una contraseña como se muestra a continuación:
New user localpart [root]: matrixadmin
Password:
Confirm password:
Make admin [no]: yes
Sending registration request...
Success!
Protege Matrix Synapse con Let’s Encrypt
También se recomienda proteger Matrix Synapse con Let’s Encrypt SSL. En primer lugar, instala el paquete cliente Certbot con el siguiente comando:
apt-get install certbot python3-certbot-nginx -y
Una vez instalado el paquete Certbot, ejecuta el siguiente comando para instalar Let’s Encrypt SSL:
certbot
Se te pedirá que proporciones tu dirección de correo electrónico y que aceptes las condiciones del servicio:
Saving debug log to /var/log/letsencrypt/letsencrypt.log
Enter email address (used for urgent renewal and security notices)
 (Enter 'c' to cancel): [email protected]

- - - - - - - - - - - - - - - - - - - - - - - - - - - - - - - - - - - - - - - -
Please read the Terms of Service at
https://letsencrypt.org/documents/LE-SA-v1.2-November-15-2017.pdf. You must
agree in order to register with the ACME server. Do you agree?
- - - - - - - - - - - - - - - - - - - - - - - - - - - - - - - - - - - - - - - -
(Y)es/(N)o: Y

- - - - - - - - - - - - - - - - - - - - - - - - - - - - - - - - - - - - - - - -
Would you be willing, once your first certificate is successfully issued, to
share your email address with the Electronic Frontier Foundation, a founding
partner of the Let's Encrypt project and the non-profit organization that
develops Certbot? We'd like to send you email about our work encrypting the web,
EFF news, campaigns, and ways to support digital freedom.
- - - - - - - - - - - - - - - - - - - - - - - - - - - - - - - - - - - - - - - -
(Y)es/(N)o: Y
Account registered.
Se te pedirá que selecciones el sitio web en el que deseas instalar el SSL:
Which names would you like to activate HTTPS for?
- - - - - - - - - - - - - - - - - - - - - - - - - - - - - - - - - - - - - - - -
1: matrix.linuxbuz.com
- - - - - - - - - - - - - - - - - - - - - - - - - - - - - - - - - - - - - - - -
Select the appropriate numbers separated by commas and/or spaces, or leave input
blank to select all options shown (Enter 'c' to cancel): 1
Escribe 1 y pulsa la tecla Intro para instalar el SSL de Let’s Encrypt en tu sitio web.
Requesting a certificate for matrix.linuxbuz.com

Successfully received certificate.
Certificate is saved at: /etc/letsencrypt/live/matrix.linuxbuz.com/fullchain.pem
Key is saved at:         /etc/letsencrypt/live/matrix.linuxbuz.com/privkey.pem
This certificate expires on 2022-09-02.
These files will be updated when the certificate renews.
Certbot has set up a scheduled task to automatically renew this certificate in the background.

Deploying certificate
Successfully deployed certificate for matrix.linuxbuz.com to /etc/nginx/conf.d/matrix.conf
Congratulations! You have successfully enabled HTTPS on https://matrix.linuxbuz.com
We were unable to subscribe you the EFF mailing list because your e-mail address appears to be invalid. You can try again later by visiting https://act.eff.org.

- - - - - - - - - - - - - - - - - - - - - - - - - - - - - - - - - - - - - - - -
If you like Certbot, please consider supporting our work by:
 * Donating to ISRG / Let's Encrypt:   https://letsencrypt.org/donate
 * Donating to EFF:                    https://eff.org/donate-le
- - - - - - - - - - - - - - - - - - - - - - - - - - - - - - - - - - - - - - - -
Acceder a Matrix Synapse
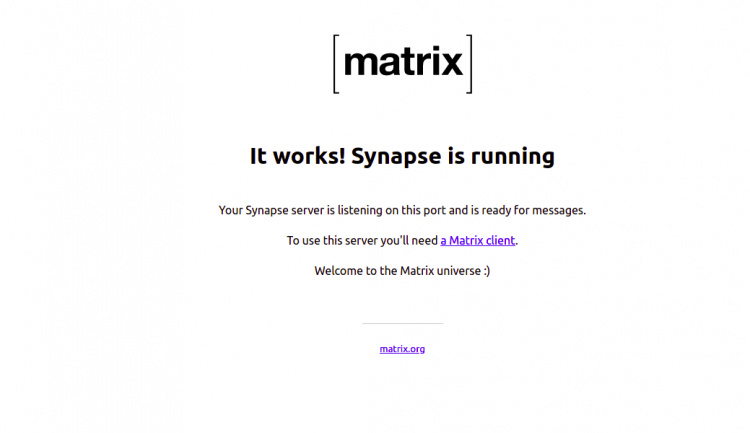
Ahora puedes verificar la instalación de Matrix Synapse utilizando la URL https://matrix.linuxbuz.com de tu navegador web. Deberías ver la siguiente pantalla:
También puedes verificar tu Matrix Synapse utilizando el cliente Riot basado en web https://riot.im/app/#/login. Deberías ver la siguiente pantalla:

Haz clic en el botón Editar. Aparecerá la siguiente pantalla:
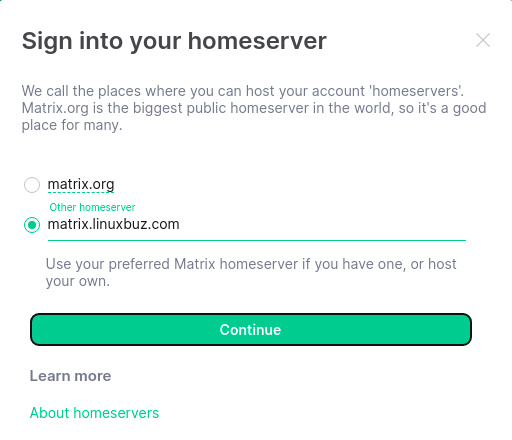
Proporciona la URL de tu servidor Matrix y pulsa el botón Continuar. Deberías ver la página de inicio de sesión de Matrix:
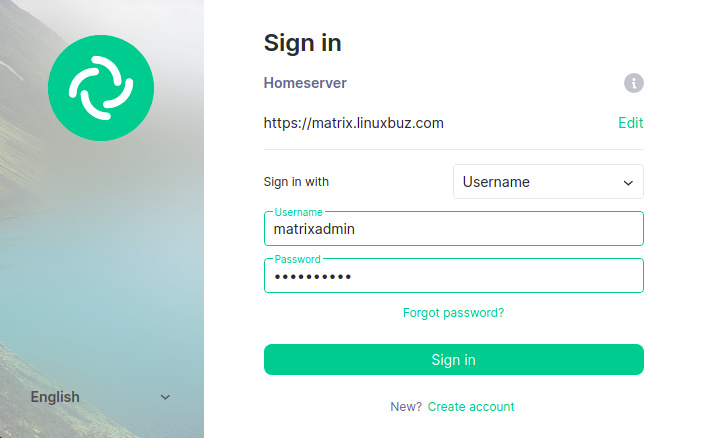
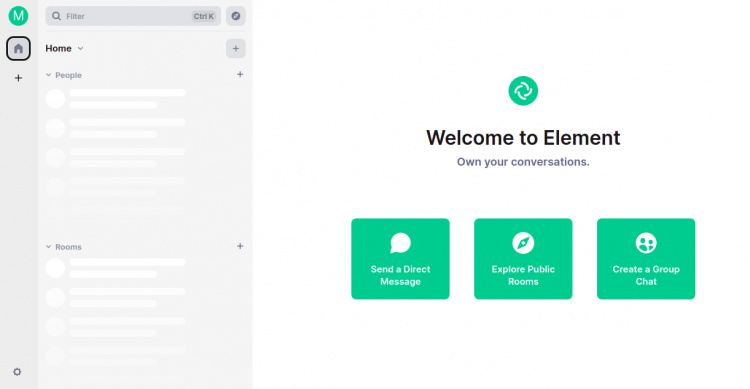
Proporciona tu nombre de usuario y contraseña de administrador y haz clic en el botón Iniciar sesión. Una vez conectado al servidor Matrix Synapse. Deberías ver la siguiente pantalla:
Conclusión
En este post, has aprendido a instalar Matrix Synapse con Nginx como proxy inverso en el servidor Ubuntu 22.04. También has verificado Matrix Synapse utilizando el cliente Riot basado en web. Ahora puedes construir tu propio servidor VOIP utilizando Matrix Synapse.