Cómo configurar el DNS de ISPConfig sólo en CentOS 7
ISPConfig es un potente panel de control gratuito y de código abierto para servidores Linux que te permite gestionar, supervisar y controlar todas las tareas a través de un navegador web. Es muy seguro, rápido y estable, y lo utilizan muchos administradores de sistemas para gestionar sus servidores. Puedes añadir dominios, direcciones de correo electrónico, sitios web, bases de datos y mucho más con ISPConfig.
Características de ISPConfig
- Soporta tres niveles de acceso: Administrador, Revendedores y Clientes.
- Gestiona múltiples servidores desde un único panel de control.
- Soporta IPv4 e IPv6.
- Compatible con Ubuntu, CentOS, Fedora, Debian y OpenSuSE.
Este tutorial explicará cómo configurar el panel de control ISPConfig en un servidor CentOS 7.
Requisitos
- Un servidor con CentOS 7 instalado.
- Una contraseña de root configurada en tu instancia.
Cómo empezar
Antes de empezar, se recomienda actualizar tu servidor con la última versión. Puedes actualizar el servidor con el siguiente comando:
yum update -y
A continuación, deberás establecer un nombre de host para el servidor. El nombre de host debe ser un nombre de dominio completo. Puedes establecer el nombre de host de tu servidor
hostnamectl set-hostname test.example.com
A continuación, también tendrás que desactivar SELinux en tu servidor. Puedes desactivarlo editando el siguiente archivo:
nano /etc/selinux/config
Cambia las siguientes líneas:
SELINUX=disabled
SELINUXTYPE=targeted
Guarda y cierra el archivo. A continuación, reinicia tu sistema para aplicar estos cambios.
Instalar Apache, MariaDB y PHP
Por defecto, la última versión de MariaDB no está disponible en el repositorio por defecto de CentOS. Por lo tanto, tendrás que añadir el repositorio de MariaDB a tu sistema.
Puedes añadirlo con el siguiente comando:
nano /etc/yum.repos.d/MariaDB.repo
Añade las siguientes líneas:
[mariadb]
name = MariaDB
baseurl = http://yum.mariadb.org/10.4/centos7-amd64
gpgkey=https://yum.mariadb.org/RPM-GPG-KEY-MariaDB
gpgcheck=1
Guarda y cierra el archivo. A continuación, instala el servidor MariaDB con el siguiente comando:
yum install mariadb-server mariadb-client
A continuación, también tendrás que añadir el repositorio Remi para instalar PHP. Puedes añadirlo con el siguiente comando:
yum install http://rpms.remirepo.net/enterprise/remi-release-7.rpm
yum install yum-utils
A continuación, desactiva PHP5.4 y activa PHP7.2 con el siguiente comando:
yum-config-manager --disable remi-php54
yum-config-manager --enable remi-php72
A continuación, instala PHP con todos los módulos necesarios ejecutando el siguiente comando:
yum install php php-devel php-mysql php-gd php-imap php-ldap php-pear php-xml php-xmlrpc php-pecl-apc php-mbstring php-mcrypt php-snmp php-soap php-tidy curl curl-devel perl-libwww-perl imageMagick libxml2 libxml2-devel mod_fcgid php-cli wget
Una vez finalizada la instalación, abre el archivo php.ini y cambia la configuración de la zona horaria:
nano /etc/php.ini
Cambia la siguiente línea:
date.timezone = Asia/Kolkata
Guarda y cierra el archivo.
A continuación, instala el servidor web Apache con el siguiente comando:
yum install ntp httpd httpd-devel mod_ssl perl-dateTime-format-HTTP perl-dateTime-format-builder
Por último, reinicia el servicio Apache y habilítalo para que se inicie al arrancar con el siguiente comando:
systemctl restart httpd
systemctl enable httpd
Instalar y configurar ISPConfig
Primero, descarga la última versión de ISPConfig con el siguiente comando:
wget -O ispconfig.tar.gz https://git.ispconfig.org/ispconfig/ispconfig3/repository/archive.tar.gz?ref=stable-3.1
A continuación, extrae el archivo descargado con el siguiente comando:
tar xfz ispconfig.tar.gz
A continuación, cambia el directorio a ispconfig e inicia la instalación con el siguiente comando:
cd ispconfig3*/install/
php -q install.php
Deberías ver la siguiente pantalla:
--------------------------------------------------------------------------------
 _____ ___________   _____              __ _         ____
|_   _/  ___| ___ \ /  __ \            / _(_)       /__  \
  | | \ `--.| |_/ / | /  \/ ___  _ __ | |_ _  __ _    _/ /
  | |  `--. \  __/  | |    / _ \| '_ \|  _| |/ _` |  |_ |
 _| |_/\__/ / |     | \__/\ (_) | | | | | | | (_| | ___\ \
 \___/\____/\_|      \____/\___/|_| |_|_| |_|\__, | \____/
                                              __/ |
                                             |___/
--------------------------------------------------------------------------------


>> Initial configuration

Operating System: CentOS 7.6

    Following will be a few questions for primary configuration so be careful.
    Default values are in [brackets] and can be accepted with .
    Tap in "quit" (without the quotes) to stop the installer.
Selecciona el modo experto de instalación y proporciona todas las instrucciones necesarias como se muestra a continuación:
Select language (en,de) [en]:

Installation mode (standard,expert) [standard]: expert

Full qualified hostname (FQDN) of the server, eg server1.domain.tld  [test.example.com]:

MySQL server hostname [localhost]:

MySQL server port [3306]:

MySQL root username [root]:

MySQL root password []: admin@123

MySQL database to create [dbispconfig]:

MySQL charset [utf8]:

The next two questions are about the internal ISPConfig database user and password.
It is recommended to accept the defaults which are 'ispconfig' as username and a random password.
If you use a different password, use only numbers and chars for the password.

ISPConfig mysql database username [ispconfig]:

Shall this server join an existing ISPConfig multiserver setup (y,n) [n]:

Adding ISPConfig server record to database.

Configure Mail (y,n) [y]:

[WARN] autodetect for Postgrey failed
Force configure Postgrey (y,n) [n]: n

Skipping Postgrey

Configuring Postfix
Generating a 4096 bit RSA private key
...................................................................++
......................................................................................................................................................................................................................................................++
writing new private key to 'smtpd.key'
-----
You are about to be asked to enter information that will be incorporated
into your certificate request.
What you are about to enter is what is called a Distinguished Name or a DN.
There are quite a few fields but you can leave some blank
For some fields there will be a default value,
If you enter '.', the field will be left blank.
-----
Country Name (2 letter code) [XX]:IN
State or Province Name (full name) []:GUJ
Locality Name (eg, city) [Default City]:JUN
Organization Name (eg, company) [Default Company Ltd]:IT
Organizational Unit Name (eg, section) []:IT
Common Name (eg, your name or your server's hostname) []:test.example.com
Email Address []:[email protected]
[WARN] autodetect for Mailman failed
Force configure Mailman (y,n) [n]:

Skipping Mailman

[WARN] autodetect for Dovecot failed
Force configure Dovecot (y,n) [n]: n

Skipping Dovecot

[WARN] autodetect for Courier failed
Force configure Courier (y,n) [n]: n

Skipping Courier

[WARN] autodetect for Spamassassin failed
Force configure Spamassassin (y,n) [n]:

Skipping Spamassassin

[WARN] autodetect for Amavisd failed
Force configure Amavisd (y,n) [n]:

Skipping Amavisd

[WARN] autodetect for Getmail failed
Force configure Getmail (y,n) [n]:

Skipping Getmail

[WARN] autodetect for Jailkit failed
Force configure Jailkit (y,n) [n]:

Skipping Jailkit

[WARN] autodetect for pureftpd failed
Force configure pureftpd (y,n) [n]:

Skipping pureftpd

Configure DNS Server (y,n) [y]:

Configuring BIND
The Web Server option has to be enabled when you want run a web server or when this node shall host the ISPConfig interface.
Configure Web Server (y,n) [y]:

Configuring Apache
Configuring vlogger
[WARN] autodetect for OpenVZ failed
Force configure OpenVZ (y,n) [n]:

Skipping OpenVZ

Configure Firewall Server (y,n) [y]:

Configuring Bastille Firewall
[WARN] autodetect for Metronome XMPP Server failed
Force configure Metronome XMPP Server (y,n) [n]:

Skipping Metronome XMPP Server

[WARN] autodetect for Fail2ban failed
Force configure Fail2ban (y,n) [n]:

Skipping Fail2ban

Configuring Apps vhost
Install ISPConfig Web Interface (y,n) [y]:

Installing ISPConfig
ISPConfig Port [8080]:

Admin password [46bb8280]: admin@123

Re-enter admin password []: admin@123

Do you want a secure (SSL) connection to the ISPConfig web interface (y,n) [y]:

Generating RSA private key, 4096 bit long modulus
..............................................................................................................................................................................................................................................................................................................................................................++
............................................................................................................................................................................................................................................................................................................................................................................................................................................++
e is 65537 (0x10001)
You are about to be asked to enter information that will be incorporated
into your certificate request.
What you are about to enter is what is called a Distinguished Name or a DN.
There are quite a few fields but you can leave some blank
For some fields there will be a default value,
If you enter '.', the field will be left blank.
-----
Country Name (2 letter code) [XX]:IN
State or Province Name (full name) []:GUJ
Locality Name (eg, city) [Default City]:JUN
Organization Name (eg, company) [Default Company Ltd]:IT
Organizational Unit Name (eg, section) []:IT
Common Name (eg, your name or your server's hostname) []:test.example.com
Email Address []:[email protected]

Please enter the following 'extra' attributes
to be sent with your certificate request
A challenge password []:admin@123
An optional company name []:IT
writing RSA key
Configuring DBServer
Installing ISPConfig crontab
Installing ISPConfig crontab
no crontab for root
Detect IP addresses
Restarting services ...
Installation completed.
Una vez hecho esto, puedes pasar al siguiente paso.
Acceder a la Interfaz Web de ISPConfig
ISPConfig ya está instalado y funciona en el puerto 8080. Abre tu navegador web y escribe la URL http://test.example.com:8080. Serás redirigido a la siguiente pantalla:

Ahora, proporciona tu nombre de usuario y contraseña de administrador que has establecido durante la instalación y pulsa el botón Iniciar sesión. Tras iniciar sesión con éxito, deberías ver el panel de control de ISPConfig en la siguiente página:
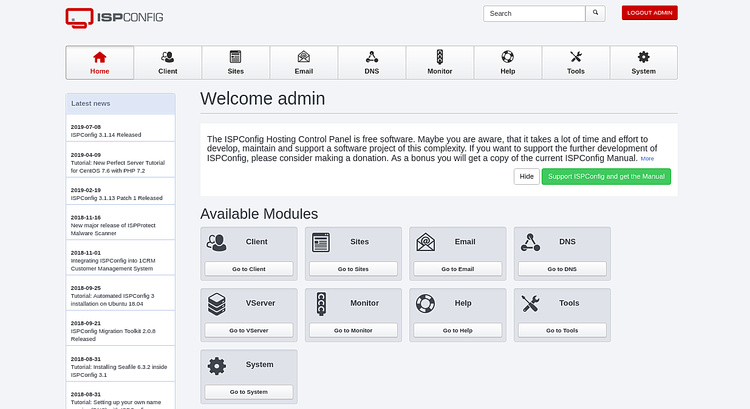
Enhorabuena! has instalado y configurado con éxito ISPConfig DNS solo en CentOS 7. Ahora puedes gestionar fácilmente tus registros DNS desde la interfaz web de ISPConfig. No dudes en preguntarme si tienes alguna duda.